How to Apply Blush Stick for a Radiant Glow
Applying blush is more than just adding color; it’s an opportunity to sculpt and define your features. The right placement can lift your cheekbones, soften angles, and create beautiful balance for your entire face. A creamy blush stick is the perfect tool for this kind of artistry, as its formula is incredibly blendable and forgiving, allowing you to place color with precision. Understanding your face shape is the first step to unlocking a truly flattering application. In this guide, we’ll walk you through identifying your face shape and provide tailored instructions on how to apply a blush stick to best complement your unique bone structure for a radiant, sculpted look.
Key Takeaways
- Find your most flattering look by identifying your undertone and face shape: Choosing a shade that matches your skin's undertone and applying it to complement your face shape are the two most important steps for a natural, radiant finish.
- Control your color by warming the product first: Instead of applying the stick directly to your face, swipe it on the back of your hand. This lets you control the amount of product you use and helps it melt into your skin for a seamless, buildable glow.
- Apply creams before powders for a flawless finish: For the best results, always apply your cream blush stick after liquid foundation but before any powders. You can lock in the color for all-day wear by lightly setting it with a translucent powder.
What Is a Blush Stick?
If you’ve ever wanted that natural, dewy flush that looks like you just came back from a brisk walk, a blush stick is your new best friend. Think of it as a cream blush in a convenient, travel-friendly tube. Blush sticks have become incredibly popular because they are so easy to use and melt into your skin, creating a radiant, healthy-looking glow that never looks powdery or fake.
The creamy formula is what makes it so special. Instead of sitting on top of your skin like some powders can, a cream blush stick blends seamlessly with your foundation or even bare skin. This gives you a believable, lit-from-within color that enhances your natural beauty. Whether you’re a makeup pro or just starting out, a good cream blush is one of the simplest ways to add life and dimension to your face. It’s the secret to a fresh, youthful look in just a few swipes.
Cream vs. Powder vs. Liquid Blush
Choosing the right blush formula often comes down to your skin type and the finish you want. Blush sticks have a creamy consistency, which makes them fantastic for anyone with dry, normal, or mature skin because they add a touch of moisture and a dewy glow. Powder blushes, on the other hand, are dry and can help absorb excess oil, making them a great choice for oily or combination skin types looking for a more matte finish.
The color payoff and final look also differ. Cream blushes typically provide a more vibrant, radiant finish that really pops. Powders tend to be more buildable and offer a softer, more diffused look. While liquid blushes can also give a dewy finish, they often require a bit more skill to blend out before they set. A blush stick gives you the best of both worlds: strong color and a glowy finish, with plenty of playtime to blend it perfectly.
Why Everyone Loves a Blush Stick
One of the biggest reasons blush sticks are so beloved is their simplicity. They are incredibly beginner-friendly because you don’t need any special tools to apply them; your fingertips are perfect for warming up the product and tapping it into your skin for a natural blend. The creamy formula is also very forgiving, as it doesn’t cling to dry patches or emphasize skin texture, which can sometimes be an issue with powders.
Beyond ease of use, many blush sticks are designed to be multi-use. You can swipe the same shade on your cheeks, lips, and even your eyelids for a quick, cohesive monochromatic look. This makes it a perfect item to toss in your purse for on-the-go touch-ups. It’s an effortless way to build your own makeup collection with versatile products that simplify your routine while delivering a fresh, polished look.
Find Your Perfect Blush Stick Shade
Choosing the right blush shade is the secret to achieving that "lit from within" glow. It’s less about matching your surface skin tone (like fair, medium, or deep) and more about understanding the subtle color that lies just beneath it. This is your undertone, and it’s the key to finding a blush that looks like a natural flush, not just makeup sitting on your skin. When you get the shade right, it harmonizes with your complexion beautifully. Once you know your undertone, picking the perfect shade from our collection of cream blush sticks becomes simple and intuitive.
Think of your undertone as the constant color in your complexion. It doesn’t change with the seasons or a tan. There are three main categories: cool, warm, and neutral. Figuring out which one you are is easier than you think, and it makes all the difference in your makeup routine. A blush that complements your undertone will melt into your skin, while one that clashes can look obvious or unnatural. Below, we’ll walk through a couple of quick tests you can do right now to identify your undertone and then find the most flattering blush shades to complement your natural beauty. This simple step ensures your blush will always look seamless and radiant.
Identify Your Skin’s Undertone
Your undertone is the permanent, subtle hue beneath your skin's surface that influences which makeup shades look best on you. Not sure what yours is? Here are two easy ways to find out.
First, try the vein test. In natural daylight, look at the veins on the inside of your wrist. If they appear mostly blue or purple, you likely have cool undertones. If they look greenish, you probably have warm undertones. See a mix of both? You’re likely in the neutral category.
Another simple trick is to hold a pure white T-shirt up to your face. If your skin takes on a slightly pink or rosy appearance against the white, you have cool undertones. If your face looks more yellow or golden, you have warm undertones.
The Best Shades for Your Skin Tone
Now that you know your undertone, you can find your most flattering blush shade. For a soft, natural look, choose a blush with an undertone that matches your skin’s. If you want a more vibrant pop of color, try a shade with the opposite undertone.
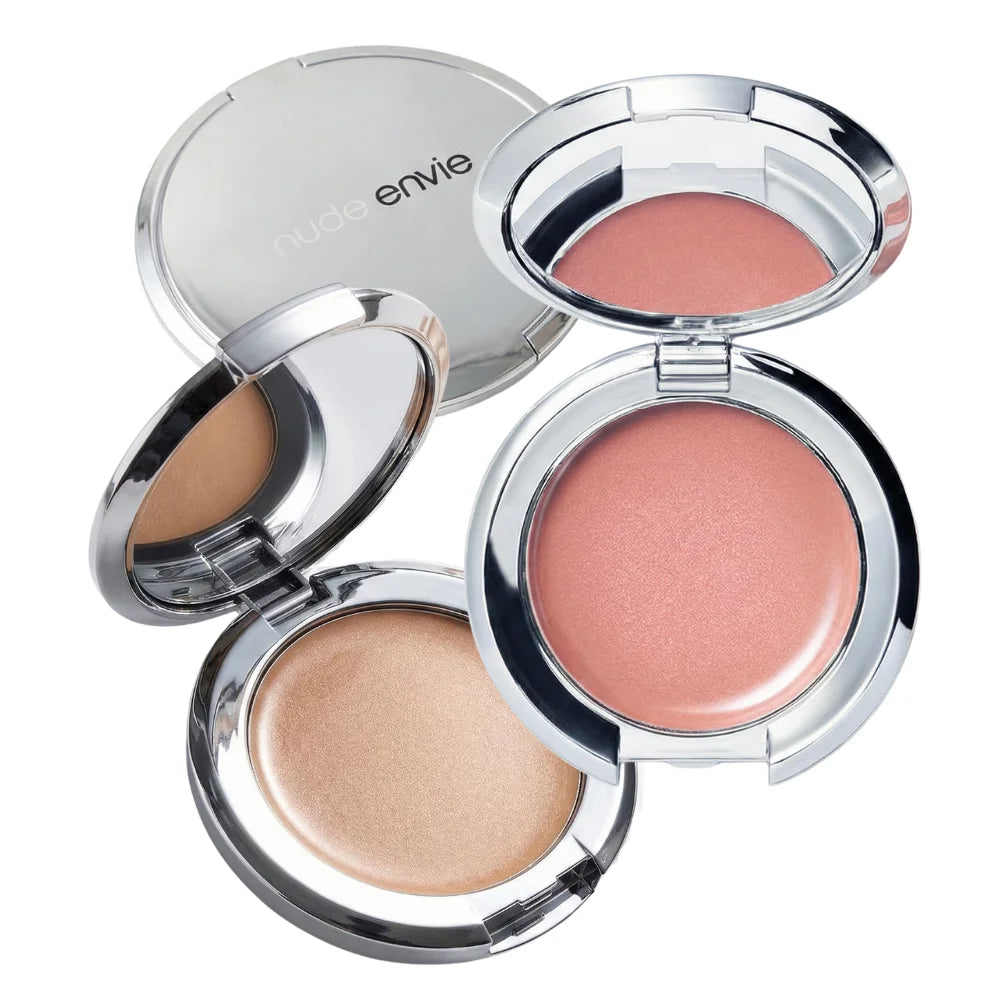
If you have cool undertones, look for blushes with pink or soft red hues, like our blush stick in Pink Adobe. For those with warm undertones, peachy, coral, and golden-pink shades will look stunning. A color like Peachy Keen adds the perfect warm radiance. If you have neutral undertones, you’re in luck; you can wear almost any shade! Soft pinks and peaches are especially beautiful. If you're still unsure, a virtual beauty consultation can provide personalized advice to help you find your perfect match.
How to Apply a Blush Stick
Applying a blush stick is one of the fastest ways to bring life and warmth to your face. The creamy formula is forgiving, easy to blend, and gives you that perfect, dewy glow. But to get that seamless, natural-looking flush, a little technique goes a long way. Let’s walk through the simple steps to master your
Prep Your Skin for a Smooth Canvas
Before you even think about blush, make sure your skin is ready. A great makeup look always starts with good skincare. Go through your usual routine and finish with a moisturizer to hydrate your skin. This simple step creates a smooth, plump canvas for the blush stick to glide over. When your skin is properly moisturized, the cream formula won't cling to dry patches or look cakey. Instead, it will melt right into your skin, giving you that coveted lit-from-within glow that looks completely natural.
Choose Your Tools: Fingers, Brushes, or Sponges?
One of the best things about a cream blush stick is its versatility. You don’t need a whole set of tools to get a beautiful application. Using your fingertips is often the easiest method; the warmth from your skin helps melt the product, allowing it to blend seamlessly for a second-skin finish. If you prefer more precision, a dense, synthetic brush works beautifully to stipple and buff the color exactly where you want it. For a sheerer, more airbrushed effect, try a damp makeup sponge to gently press the color into your skin. The choice is yours and depends entirely on the look you want to achieve.
Apply in 3 Simple Steps
Ready for that perfect pop of color? Follow this simple, foolproof method. First, instead of applying the stick directly to your face, swipe some color onto the back of your hand. This warms up the product and lets you control exactly how much you pick up. Next, use your finger, brush, or sponge to gently dab the blush onto the apples of your cheeks. For a lifted look, place the color slightly higher on your cheekbones and blend upwards toward your temples. Finally, remember that it’s always easier to add more color than to take it away. Start with a small amount and gradually layer it until you reach your desired intensity.
Blend for a Seamless, Natural Finish
Blending is the final and most important step for a flawless finish. The goal is to have no harsh lines or obvious edges, just a soft, diffused flush of color. Using soft, patting motions, blend the blush upwards and outwards towards your hairline. Avoid rubbing or dragging the product, as this can disturb the foundation underneath. Instead, use gentle tapping or stippling motions to press the color into your skin. Make sure to blend the edges thoroughly so the creamy blush looks like a natural part of your complexion. This technique ensures your blush looks radiant and perfectly integrated.
Where to Apply Blush for Your Face Shape
Where you place your blush can completely change your look. It’s not just about adding a pop of color; it’s about working with your unique features to create balance and definition. Think of it as a little bit of artistry that highlights your natural bone structure. The key is to identify your face shape and then apply your favorite cream blush stick in a way that complements it. Once you find the right placement, you’ll see how a simple swipe of color can make all the difference, giving you a radiant, lifted appearance that looks completely natural.
For Round and Square Faces
If you have a round face, the goal is to add definition and create the illusion of more sculpted cheekbones. Instead of applying blush to the apples of your cheeks, which can make your face appear fuller, glide the color along the tops of your cheekbones. Blend it upward and outward, toward your temples. This technique lifts the face and draws the eye upward, giving you a beautifully defined look.
For those with a square face shape, blush can be a fantastic tool for softening more angular features. You’ll want to do the opposite of a round face and apply the color directly to the apples of your cheeks. A gentle smile will help you find the perfect spot. Swirl the blush on this area, blending thoroughly to avoid any harsh lines. This adds a touch of roundness and warmth, balancing your features perfectly.
For Oval and Heart-Shaped Faces
Oval faces are quite balanced, which means you have some flexibility with blush placement. For a classic, youthful glow, apply your blush stick to the apples of your cheeks and blend outward. If you want a more sculpted, high-fashion look, apply the color just on top of your cheekbones, blending toward your hairline with a touch of highlighter. Both techniques work beautifully, so you can switch it up depending on your mood.
If you have a heart-shaped face, your goal is to soften your angles and create balance. The best way to do this is by applying blush in a 'C' shape. Start at the top of your cheekbones, near your temples, and sweep the color down and around onto the apples of your cheeks. This placement softens the cheekbones while drawing attention to the center of your face for a harmonious, radiant finish.
Common Blush Stick Mistakes (and How to Fix Them)
We’ve all been there: you apply your blush in dim lighting, only to catch your reflection later and see two bright, unblended circles on your cheeks. While blush sticks are incredibly user-friendly, a few common slip-ups can stand between you and a perfect, radiant flush. The good news is that these mistakes are simple to correct. With a few adjustments to your technique, you can get that seamless, lit-from-within glow every single time. Let’s walk through the most frequent errors and how to fix them for good.
Avoid Over-Application and Harsh Lines
The biggest mistake with any cream blush is applying too much product at once. It’s much easier to add more color than it is to take it away. To avoid this, start with a small amount and gradually layer the color to get the intensity you want. Instead of swiping the stick directly onto your cheeks, try dabbing it gently. For even more control, you can warm the product on the back of your hand first, then use your fingers or a brush to pick up the color. This approach helps our Enamoured Cream Blush Stick melt into your skin for a natural finish, preventing any harsh or obvious lines.
Fix Placement and Blending Errors
Proper blending is what separates a good blush application from a great one. If your blush looks like it’s just sitting on top of your skin, you haven’t blended enough. The key is to diffuse the edges so there are no harsh lines. Using your fingertips, a damp beauty sponge, or a stippling brush, blend the blush with soft, circular, patting motions. Always blend upwards and outwards toward your temples and ears. This technique lifts your features and creates a seamless transition. If you find you’ve placed the color incorrectly, don’t panic. You can get personalized advice on placement during a virtual beauty consultation. Otherwise, simply take your foundation brush with a tiny bit of leftover product and gently buff over the edges to soften the color.
How to Layer Blush Stick with Other Makeup
A blush stick is fantastic on its own, but it truly shines when layered correctly with your other makeup. Getting that seamless, lit-from-within glow is all about the order of operations. When you apply your makeup in the right sequence, your blush will blend beautifully into your skin instead of sitting on top of it, creating a polished look that feels both effortless and intentional.
The beauty of a cream blush stick is its versatility. It can be the star of a minimal makeup day or a key player in a more sculpted, full-face application. The key is understanding how its creamy texture interacts with your other products, like liquid foundation or powder bronzer. Applying a cream product over a powder, for example, can lead to a cakey result. By following a few simple guidelines, you can ensure all your products work together in harmony. Let’s walk through how to layer your blush stick for a beautifully sculpted and radiant look.
The Right Order: Foundation, Concealer, and Blush
For a truly flawless finish, always apply your cream or liquid base products before your blush stick. Start with your usual skincare routine, making sure your skin is well-moisturized to create a smooth canvas. Next, apply your foundation and concealer. This step is crucial because it evens out your skin tone and provides a perfect base for your cream blush to melt into. Applying blush stick over your foundation helps it blend seamlessly and prevents any patchiness. Think of it as adding color to a primed canvas rather than trying to blend it into bare skin, which can sometimes cause it to grab unevenly.
Pair with Highlighter and Bronzer for a Sculpted Look
To add dimension and a beautiful glow, pair your blush stick with a highlighter and bronzer. After applying your blush, use a highlighter on the high points of your face, like your cheekbones, brow bone, and the bridge of your nose. A touch of bronzer in the hollows of your cheeks will add warmth and definition. For extra staying power, you can lightly dust a powder blush in a similar shade over your cream blush. And here’s a pro tip for a chic, monochromatic look: dab a little of your blush stick onto your lips. The colors that flatter your cheeks often look just as lovely on your lips, tying your whole look together. You can find all the essentials to build your own collection for a perfectly coordinated face.
Make Your Blush Last All Day
You’ve perfectly applied your blush stick, creating a beautiful, healthy flush. But how do you keep that radiant look from fading before your day is over? It’s easier than you think. With a couple of simple setting techniques and some clever touch-up tricks, you can ensure your rosy glow stays put from your morning coffee to your evening plans. These steps will help you maintain that fresh, just-applied look for hours.
Set Your Cream Blush for Longer Wear
Cream formulas are amazing for that dewy, skin-like finish, but they sometimes need a little help to go the distance. To lock in your look, try lightly dusting a translucent setting powder over the blush. For even more staying power, layer a powder blush in a similar shade on top. This not only sets the cream base but also adds a beautiful dimension to the color. Think of it as creating a custom shade that’s uniquely yours and built to last all day without creasing or fading.
Touch-Up Tips for an All-Day Glow
If you need a quick refresh midday, there’s no need to start over. A great trick is to spritz a little setting spray onto a makeup sponge and gently press it over your cheeks. This re-energizes the color and melts the product back into your skin for a seamless finish. And if you ever get a little too enthusiastic with your application, don’t panic. Just take a clean finger or a sponge with a tiny bit of leftover concealer from our collection of best sellers and gently blend the edges to soften the color for that perfect, natural-looking glow.
Related Articles
- The 6 Best Dewy Cream Blushes for Aging Skin | Nude Envie
- How to Apply Cream Blush for a Flawless Finish – Nude Envie
- Where to Apply Blush: A Guide for Your Face Shape – Nude Envie
Frequently Asked Questions
Can I use a cream blush stick if I have oily skin? Absolutely. While powder blushes are often recommended for oily skin, a cream blush stick can still give you a beautiful, dewy finish. The trick is in the prep and setting. After your skincare routine, apply a mattifying primer to the areas where you tend to get shiny. Once you’ve applied your blush, set it with a light dusting of translucent powder. This will help control oil and lock the color in place for hours.
What's the best way to apply a blush stick: with my fingers, a brush, or a sponge? This really comes down to personal preference and the look you want. Using your fingertips is fantastic for a quick, natural application, as the warmth helps the product melt beautifully into your skin. A dense brush gives you more control and precision for a sculpted look. For a sheer, airbrushed finish, a damp makeup sponge is perfect for gently pressing the color into your cheeks. I suggest experimenting to see which method you love most.
Help! I applied way too much blush. How can I tone it down? Don't worry, this is an easy fix. The key is to blend, not wipe. Take your foundation brush or sponge (the one you just used is perfect, as it will have a little leftover product on it) and gently buff over the edges of the blush. Use soft, stippling or circular motions to diffuse the color until it looks soft and seamless. This technique softens the intensity without removing your makeup underneath.
Can I really use my blush stick on my lips or eyelids? Yes, and it’s one of the best ways to create a quick, cohesive makeup look. The creamy formula of a blush stick works beautifully as a lip tint. Just dab it onto your lips with your finger for a soft stain of color. For your eyes, you can swipe a small amount across your lids and blend it out for a simple wash of color that ties everything together. It’s the secret to looking polished in minutes.
Should I apply my blush stick before or after foundation? For the most seamless finish, always apply your blush stick after your liquid or cream base products, like foundation and concealer. Applying it on top allows the color to blend perfectly with your base without getting patchy. Just be sure to apply it before any powders (like setting powder or bronzer), as putting a cream product over a powder can sometimes create a cakey texture.