How to Apply Cream Blush in 4 Simple Steps
Switching from a familiar powder to a cream blush can feel a little intimidating. Maybe you’re worried it will be streaky, patchy, or just too intense. The truth is, a high-quality cream formula is one of the most forgiving and user-friendly products you can have in your makeup bag. It’s designed to be buildable and easy to blend, giving you complete control over your look. Forget everything you thought you knew about difficult cream formulas. We’re here to walk you through the simple, foolproof steps of how to apply cream blush, turning any hesitation into confidence and giving you that gorgeous, dewy glow.
Key Takeaways
- Tap, Don't Rub, for a Seamless Finish: Gently press cream blush into your skin with your fingertips, a sponge, or a brush. This tapping motion melts the product for a natural, streak-free look and prevents you from disturbing the foundation underneath.
- Always Apply Creams Before Powders: For the smoothest application, apply your cream blush after any liquid or cream base products but before any setting powder. This order prevents a patchy texture and helps lock in your dewy glow for all-day wear.
- Personalize Placement to Flatter Your Features: Where you apply blush can change your whole look. Start on the apples of your cheeks for a classic, youthful flush, or blend it upwards toward your temples to create a more lifted, defined effect that complements your face shape.
What Is Cream Blush, Anyway?
If you’re dreaming of a fresh, dewy glow, cream blush is about to become your best friend. Think of it as the secret to achieving that healthy, rosy look that seems to come from within. Its beautiful, creamy texture melts right into your skin, making it incredibly easy to blend and build up the color to your liking. Unlike powders that can sometimes sit on top of the skin, a cream formula works with your complexion to create a seamless, natural-looking flush.
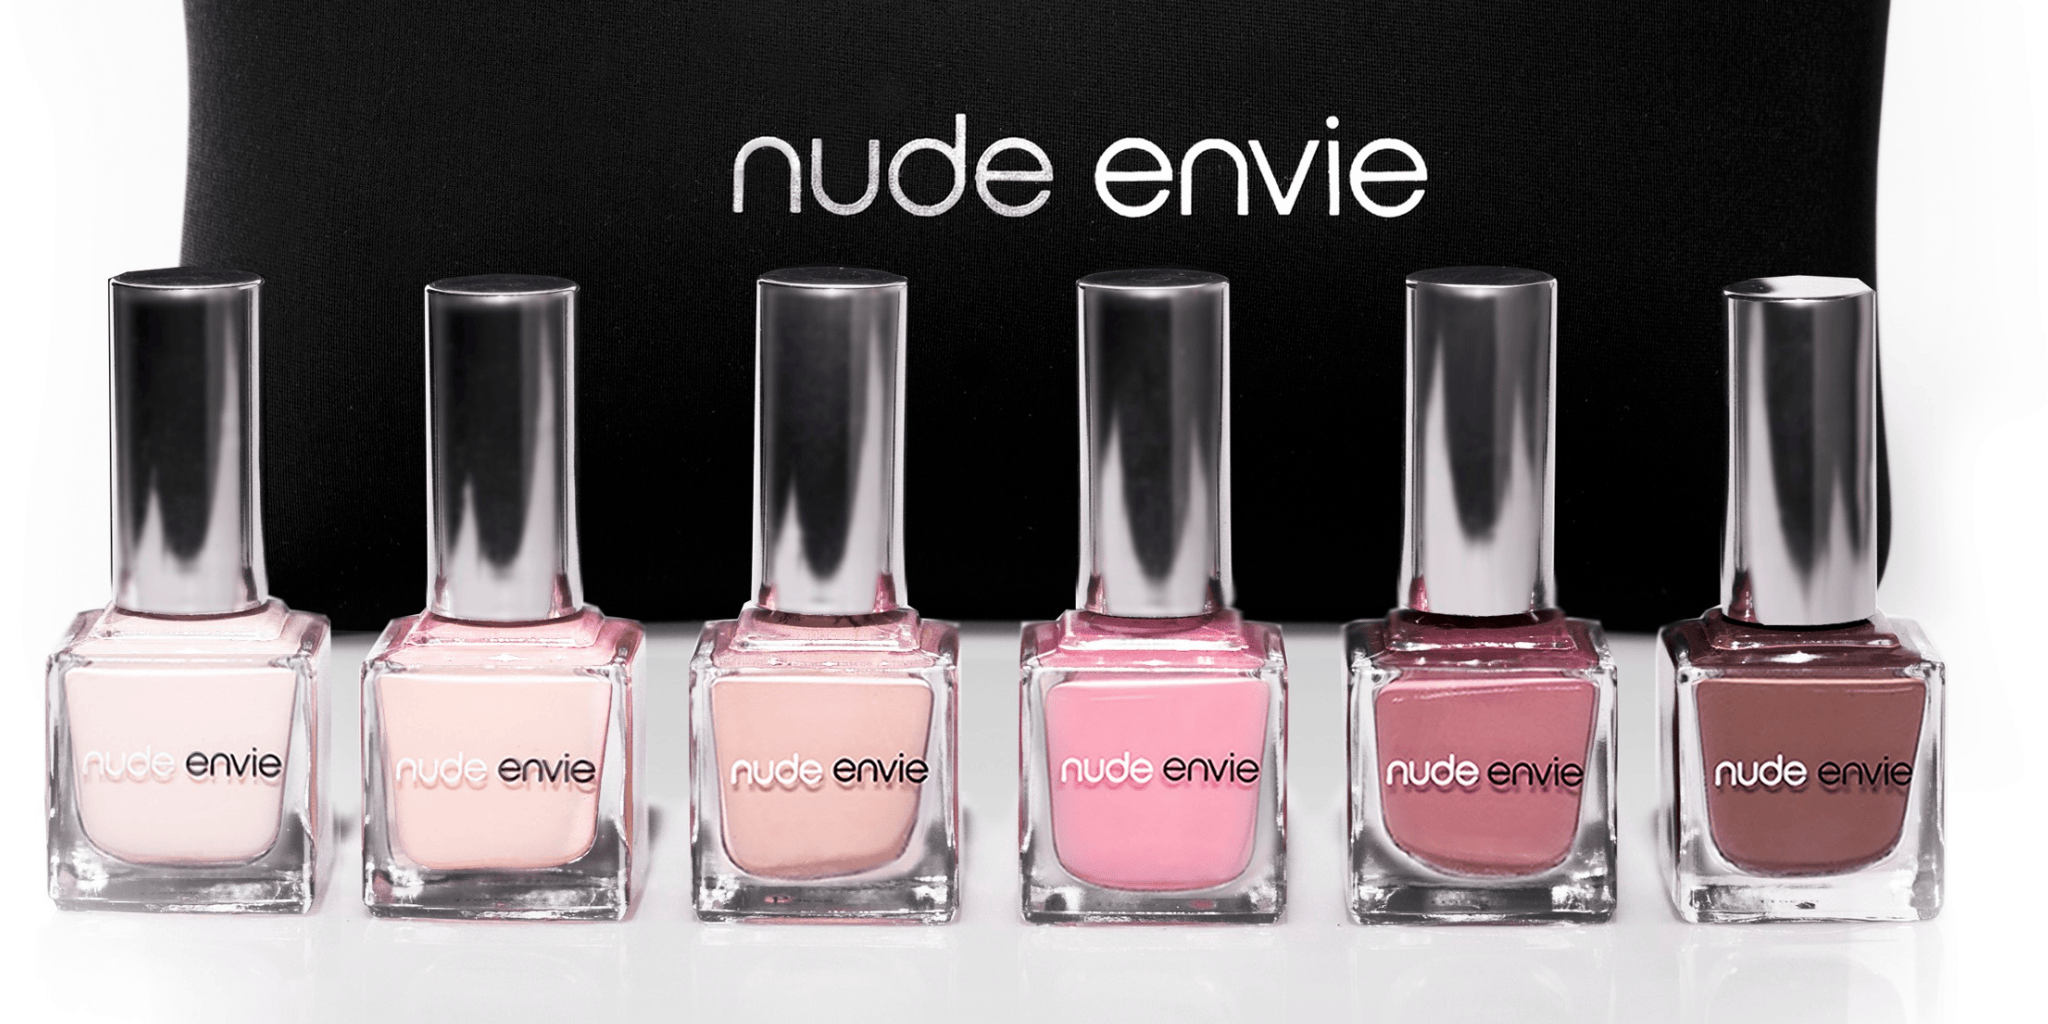
This versatility is why so many people have made the switch. Whether you want a subtle hint of color for a "no-makeup" makeup day or a more vibrant pop for a night out, a great cream blush can do it all. It’s the perfect way to add life and radiance to your face with just a few simple taps. Our Cream Blush is designed to give you that perfect, luminous finish every time.
Cream vs. Powder: What's the Difference?
When you’re standing in the makeup aisle, the biggest choice you’ll face is usually cream versus powder. The main difference comes down to texture and finish. Cream blush is rich in moisture, which is what gives it that signature dewy, skin-like finish. Powder blush, on the other hand, is finely milled and tends to have a more matte look as it sets on the face. As makeup artist Charlotte Tilbury puts it, "Neither is 'better,' they are just different." It really just depends on the look you’re going for. If you love a radiant glow, cream is your go-to. If you prefer a soft, velvety finish, powder might be your pick.
Cream vs. Liquid: Which Is for You?
The choice between cream and liquid blush often depends on the other products in your makeup routine. Cream formulas are fantastic because they play so well with other cream or liquid products, like your foundation or concealer. This allows for a truly seamless blend where you can’t tell where one product ends and the other begins. However, applying a cream blush over a powder foundation can sometimes be tricky, as it can cause the products to look patchy. As one makeup lover on Reddit explains, "Cream blushes work best over other liquid or cream makeup." So, take a look at your base products to help you decide.
Why You'll Love a Creamy Formula
There’s a reason so many people are devoted to cream blush, and it all comes down to its gorgeous texture and natural finish. The soft, emollient formula makes it easy to apply with just your fingertips, a sponge, or a brush. You can start with a sheer wash of color and slowly build it up for more intensity without ever looking overdone. As the team at e.l.f. Cosmetics notes, cream blush gives a natural look, "like you just saw your crush." It’s that effortless, lit-from-within glow that makes your skin look healthy, hydrated, and beautifully flushed.
Your Toolkit for a Perfect Cream Blush Application
Getting that perfect, healthy flush isn't just about the shade you choose; it's also about how you apply it. The tool you use can completely change the finish of your cream blush, taking you from a subtle, natural glow to a more defined, airbrushed look. There’s no single right way to do it, and the best tool often comes down to personal preference and the effect you’re going for. You likely already have everything you need right at your fingertips (literally). Let’s walk through the three best tools for applying cream blush so you can find the perfect method for you.
Your Fingers: For a Natural, Melted-In Look
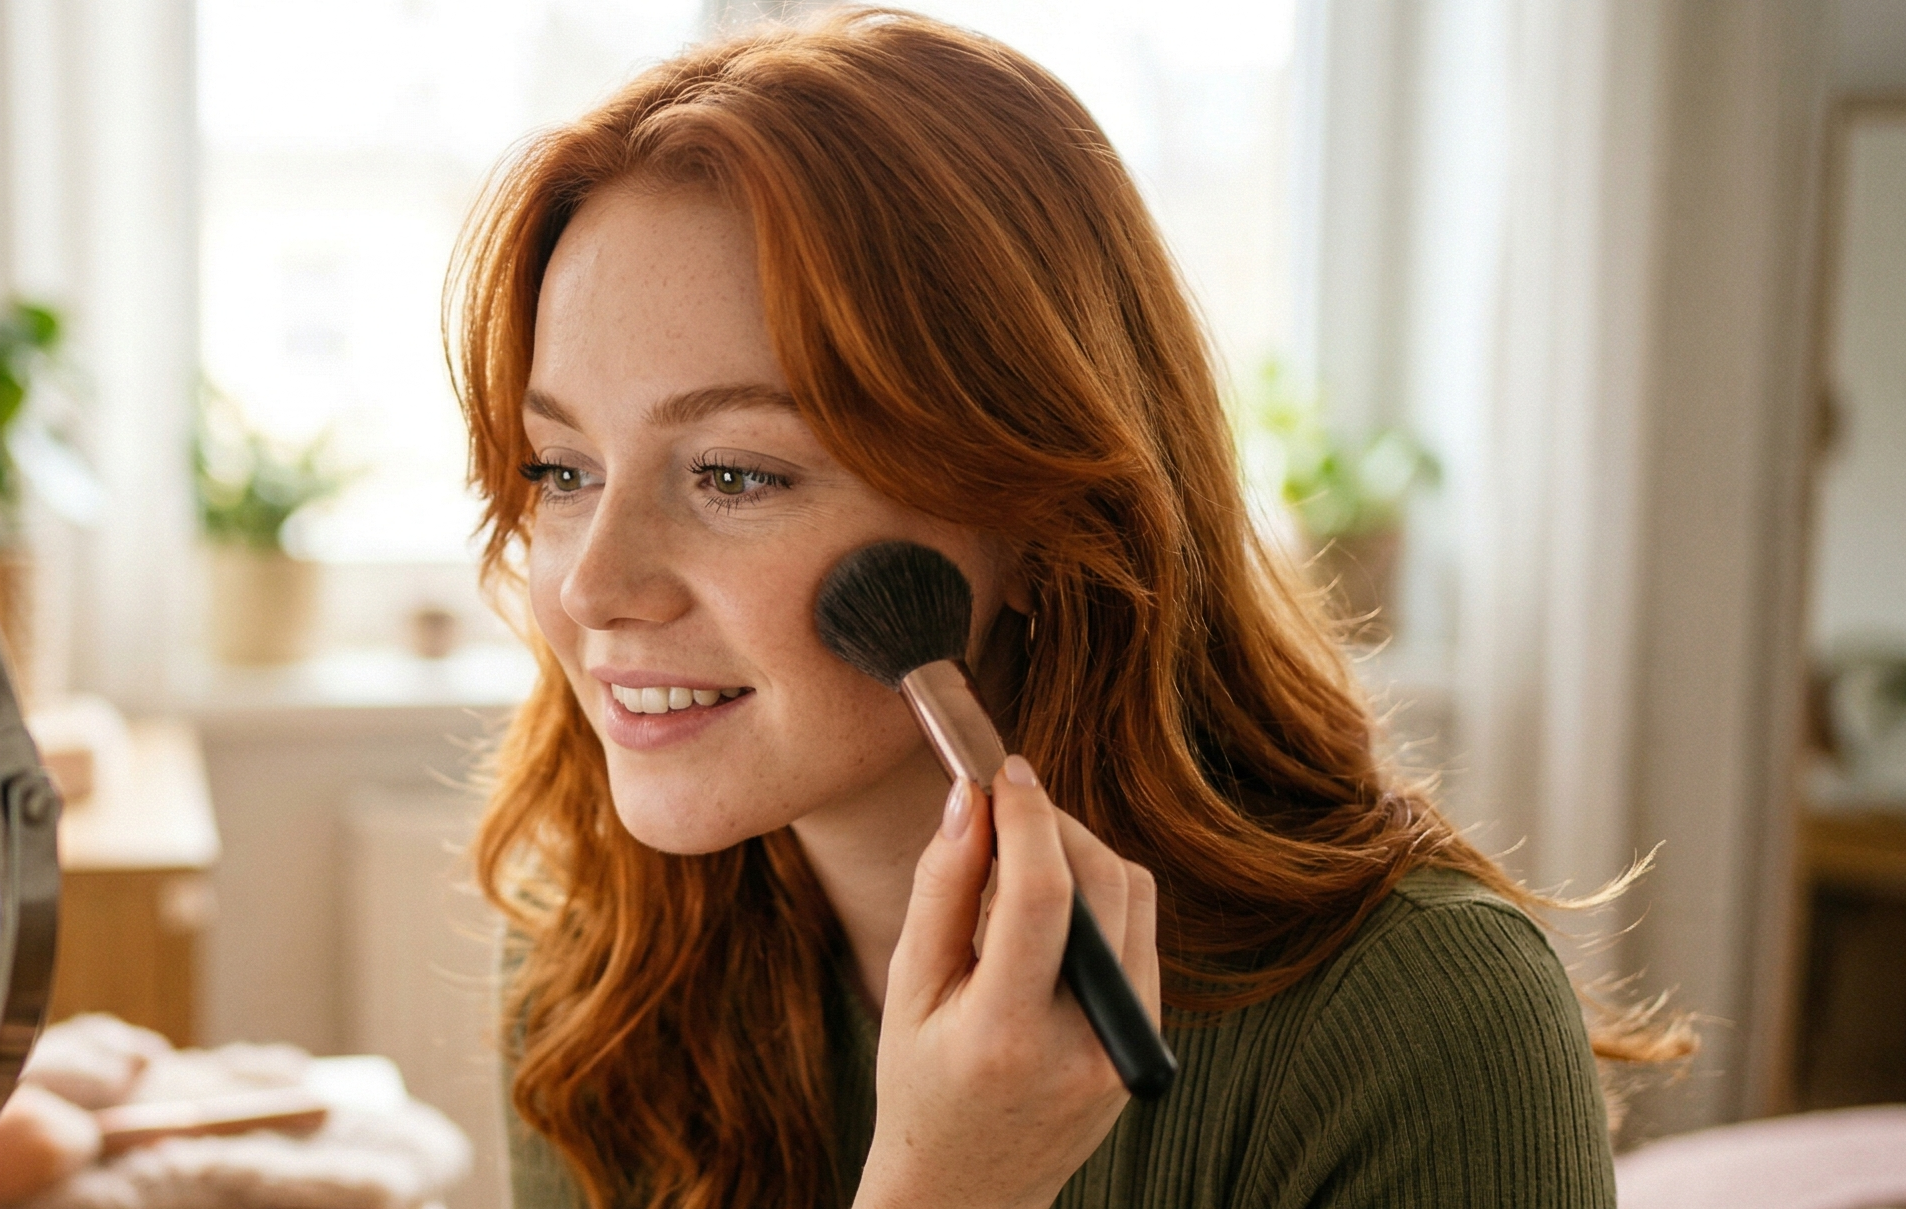
Sometimes, the best tools are the ones you were born with. Using your fingers is a fantastic way to apply cream blush for a beautifully natural finish. The warmth from your fingertips helps the product melt seamlessly into your skin, creating a soft, blended look that appears to come from within. This method is perfect for achieving that effortless, "no-makeup" makeup vibe. Simply tap the product onto the apples of your cheeks with your ring finger (it has the gentlest touch) and blend the edges for a flawless, second-skin finish.
A Damp Sponge: For an Airbrushed Finish
If you’re after a soft, airbrushed effect, a damp makeup sponge is your best friend. This tool is excellent for creating a diffused wash of color that looks incredibly smooth. Lightly bouncing the sponge on your cheeks allows for a sheer application that blends the blush perfectly into your foundation, creating a flawless finish. This technique is especially useful for building up color gradually without the risk of overdoing it. It gives you complete control, ensuring your blush looks intentional and beautifully integrated with the rest of your makeup.
A Stippling Brush: For Precise Color Placement
For those who prefer a more controlled and precise application, a dense stippling brush is the ideal tool. The tightly packed bristles pick up the perfect amount of product and allow you to tap it exactly where you want it. This method is great for defining your cheekbones while still maintaining a soft, well-blended finish. It gives you the structure of a powder blush application with the dewy, skin-like texture of a cream. It's the perfect way to build your own collection of tools for a customized routine.
How to Prep Your Skin for Cream Blush
A beautiful, natural flush starts before the blush even touches your cheeks. The secret to that seamless, second-skin finish lies in how you prepare your canvas. Getting your skin ready ensures the cream formula melts in perfectly, giving you a radiant glow that looks like it comes from within. Think of it as the essential first step to making your cream blush work its magic. It’s less about strict rules and more about understanding how different textures interact to create a flawless look.
When to Apply: Before or After Foundation?
This is one of the most common questions, and the answer is pretty straightforward. For the smoothest application, you’ll want to apply your cream blush after your liquid or cream foundation. Cream formulas are designed to blend beautifully with other liquids and creams. If you use a powder foundation, applying a cream blush on top can cause it to look patchy or cakey. So, stick to a liquid base, apply your foundation first, and then you’ll be ready for that pop of color from your favorite cream blush.
The Secret to a Seamless Blend
The key to a perfect blend is working with textures that are compatible. Cream blush loves to be applied onto skin that is still slightly dewy or "tacky" from your foundation. This allows the blush to melt right in, rather than sitting on top of the skin. Always begin with your regular skincare routine, making sure your face is well-moisturized. After applying your foundation, go straight in with your cream blush before setting anything with powder. This cream-on-cream technique helps the products merge together for a truly natural finish. If you need help finding the right routine, a virtual beauty consultation can offer personalized tips.
A Note on Setting Powder
Here’s a simple rule to live by: creams and liquids first, powders last. You should never apply cream blush over a layer of setting powder. Doing so can make the blush difficult to blend, leading to streaks and an uneven texture. Instead, think of powder as the final step in your routine. After you’ve applied your foundation, concealer, and cream blush, you can lightly dust a translucent powder over your face to set everything in place. This will lock in your look without disrupting the beautiful, seamless finish you just created.
How to Apply Cream Blush in 4 Simple Steps
Now for the fun part: the application. Getting that perfect, dewy glow is easier than you think. The beauty of a cream formula, like our Cream Blush Cheekies, is how forgiving it is. It melts into your skin for a finish that looks like it’s coming from within. Forget harsh lines or powdery patches; this is all about creating a soft, natural-looking flush that brightens your entire face.
The key is to follow a few simple techniques that work with the texture of the blush, not against it. Whether you’re a total beginner or just new to cream formulas, these four steps will guide you to a flawless application every single time. We’ll cover exactly where to place the color, the best way to blend it out, how to build the intensity without going overboard, and the secret to a lifted, sculpted look. Grab your favorite shade and let’s get started.
Step 1: Find the Apples of Your Cheeks
The best place to start your blush application for a classic, healthy glow is on the apples of your cheeks. If you’re not sure where those are, just smile at yourself in the mirror. The round, full part that pops up is your target. Applying color here mimics where you would naturally flush, giving your face a youthful and vibrant appearance. Dab a small amount of cream blush right in the center of the apple. This initial placement serves as the anchor point for your blending, ensuring the color is concentrated where it will look most natural.
Step 2: Tap and Blend (Don't Rub!)
Once you have the color placed, it’s time to blend. The most important rule for cream blush is to tap, not rub. Use your fingertips, a damp makeup sponge, or a stippling brush to gently press and tap the product into your skin. This gentle motion melts the blush seamlessly, preventing you from moving your foundation or creating streaks. Rubbing can cause patchiness and disturb the makeup underneath. Tapping, on the other hand, gives you a smooth, airbrushed effect that looks like a second skin. Continue tapping until the edges are soft and diffused.
Step 3: Build Your Color Slowly
A little cream blush goes a long way, so the secret to a natural finish is to build the color gradually. Start with a very small amount of product on your finger or brush. After your initial application, take a step back and assess the intensity. If you want a bit more color, add another sheer layer and repeat the tapping process. It’s always easier to add more blush than it is to take it away. This method gives you complete control over the final look, ensuring you achieve the perfect, believable flush without ever looking overdone.
Step 4: Blend Up and Out for a Lifted Look
For a final touch that enhances your bone structure, focus on the direction of your blending. From the apples of your cheeks, use soft, tapping motions to blend the blush upwards and outwards, moving toward your temples. This technique draws the eye upward, creating a subtle lifting effect that helps define your cheekbones. Avoid blending down, as this can drag the face down. The goal is a soft gradient of color that fades naturally toward your hairline, giving your face a beautifully sculpted yet soft dimension.
How Much Cream Blush Should You Use?
One of the biggest worries when applying blush is using too much. We’ve all had that moment of panic after a swipe of color comes on way stronger than intended. The great thing about cream blush is how forgiving and buildable it is, giving you complete control over the intensity. Unlike powders that can sometimes look patchy or streaky if you apply too much at once, a creamy formula melts right into your skin for a natural-looking glow.
The secret is all about starting with a light hand and layering the color gradually. This approach ensures you get that perfect, healthy-looking flush without ever feeling overdone. Whether you want a barely-there tint for a casual day or a more vibrant pop of color for a night out, a cream formula makes it easy to customize your look. It’s less about a strict rule for how much to use and more about a technique that lets you find the right amount for you.
Start Small—You Can Always Add More
The golden rule of cream blush is simple: it’s much easier to add more product than it is to take it away. Start with a very small amount, about the size of a pinhead, on your fingertip, brush, or sponge. Gently press the color onto the apples of your cheeks. Think of this first touch as placing the color, not blending it out just yet.
This initial, tiny application helps you map out where you want the flush to be. Once you see that sheer wash of color, you can decide if you want more. Our Cream Blush is richly pigmented, so you’ll be surprised how little you need to get a beautiful, radiant effect.
How to Build Intensity Without Overdoing It
Cream blushes are designed to be layered. You can easily go from a soft, subtle tint to a more noticeable, brighter color. After applying your first sheer layer and blending it in, take a step back and look at the results. If you want more impact, add another tiny dot of blush and blend it out completely. Repeat this process until you’re happy with the intensity.
The key is to work in thin layers. This gradual approach prevents you from accidentally applying too much and gives you the power to create a custom finish. It ensures the color looks like it’s coming from within your skin, not just sitting on top of it. This technique works beautifully with all our makeup collections, allowing your blush to harmonize with your lip and eye look.
Tips to Avoid an Unnatural Finish
How you apply your blush is just as important as how much you use. To get a seamless, skin-like finish, always use gentle tapping or stippling motions. Gently "buff" or "bounce" the product onto your skin with your fingers, a damp sponge, or a brush. This technique presses the pigment into your skin, helping it meld beautifully with your foundation.
Avoid dragging or smearing the cream blush across your cheeks. Rubbing can disturb the makeup underneath, leading to streaks or patchiness. A soft patting motion is the secret to a flawless blend, no matter which tool you prefer. If you ever want personalized tips on your technique, a Virtual Beauty Consultation can offer one-on-one guidance.
Where to Apply Cream Blush for Your Face Shape
You've got the right tools and the perfect shade, but where exactly does the blush go? While there are no hard-and-fast rules in makeup, knowing how to apply blush for your specific face shape can be a total game-changer. It’s all about using color to play up your best features and create balance. Think of it as gentle sculpting that adds dimension and a healthy glow. Let’s find the perfect placement for you.
The Go-To Spot for a Natural Flush
If you’re ever unsure where to start, the apples of your cheeks are a foolproof spot. To find them, just give yourself a big smile in the mirror. That round, fleshy part that pops up? That’s your target. Gently tap your cream blush right there, blending it softly. For an extra touch of that "I just came back from a lovely walk" radiance, you can sweep a tiny bit of what’s left on your fingers across the bridge of your nose. This technique creates a youthful, cohesive glow that looks incredibly natural and effortless. It’s a classic for a reason and works beautifully with any shade from our blush collection.
Application Tips for Round Faces
If you have a round face, you can use blush to create the illusion of more defined cheekbones. Instead of placing the color directly on the apples of your cheeks, try applying it slightly higher and further back, just above the apples. From there, blend the color upwards and outwards towards your temples. This diagonal placement helps to lift and elongate your features, adding a subtle, sculpted definition to your face. It draws the eye upward, creating a beautiful lifting effect that complements your natural bone structure. A soft pink or peach shade is perfect for creating this soft, defined look.
Application Tips for Square and Long Faces
For square face shapes, the goal is often to soften angles. Try applying your blush to the outer part of your cheeks, starting a bit further from your nose. Blend the color inward, toward the apples, in a slightly rounded motion. This helps to soften the edges of your face and brings a lovely roundness to your cheeks. If you have a longer face shape, you can create an illusion of width by applying blush horizontally. Start on the apples of your cheeks and blend straight back toward your ears. This horizontal line helps to balance your features, making your face appear a bit wider. Pair it with one of our hydrating lipsticks to complete the look.
Common Cream Blush Mistakes (and How to Fix Them)
We’ve all been there. You’re excited to try your new cream blush, but the application ends up looking a little… off. Don’t worry, it happens to the best of us, and the fixes are surprisingly simple. Most of the time, a less-than-perfect finish comes down to a few common application habits that are easy to change. Once you know what to look for, you’ll be able to get that seamless, dewy glow every single time.
Let’s walk through the three most frequent cream blush mistakes and exactly how to correct them. A few small tweaks to your technique can make a world of difference, turning a patchy application into a radiant, natural-looking flush. Soon, these tips will become second nature, and you’ll be applying your favorite creamy blush like a pro.
Applying Over Powder
One of the golden rules of makeup is to apply creams before powders. When you try to layer a cream blush over a setting powder, the cream formula can grab onto the powder in certain spots, creating a patchy, uneven finish. The textures just don’t play well together in that order. To fix this, always apply your cream blush directly onto your skin or over your liquid foundation before you’ve set your face with powder. This allows the cream to melt beautifully into your skin for a true lit-from-within glow.
Rubbing Instead of Tapping
If you find your cream blush is moving your foundation around, your application method might be the culprit. Rubbing or smearing the blush across your cheeks can disturb the makeup you’ve already applied, leading to a messy finish. The key is to use a gentle touch. Whether you’re using your fingers, a sponge, or a brush, gently tap or pat the blush onto your skin. This pressing motion blends the color seamlessly without disrupting the layers underneath, giving you a smooth and flawless look.
Ending Up with Streaks or Patches
Streaks are a tell-tale sign that the blush hasn’t been blended properly. This often happens from dragging the product across your skin instead of pressing it in. To avoid this, think about bouncing or buffing the color onto your cheeks. Using a damp sponge or a stippling brush, use light, bouncing motions to press the product into your skin. This technique helps the blush melt into your foundation for an airbrushed effect. It ensures the color is diffused evenly, leaving you with a soft, natural flush instead of harsh lines.
How to Find Your Perfect Cream Blush Shade
Choosing the right blush shade can feel like a guessing game, but it doesn’t have to be. The secret to finding a color that looks like a natural, healthy flush is understanding your skin’s undertone. Your undertone is the subtle hue beneath your skin's surface, and it generally falls into one of three categories: warm, cool, or neutral. A quick way to check is to look at the veins on your wrist. If they appear greenish, you likely have warm undertones. If they look blue or purple, you probably have cool undertones. A mix of both suggests a neutral undertone.
Once you know your undertone, you can find a shade that complements your natural coloring instead of clashing with it. This simple step ensures your blush blends seamlessly, giving you that perfect radiant glow every time. It’s the difference between a blush that sits on your skin and one that looks like it’s coming from within. If you’re still unsure, a virtual beauty consultation can offer personalized advice to help you find your match. Exploring a curated blush collection with this knowledge in hand makes the whole process much more fun and effective, turning a potentially tricky decision into an exciting part of your routine.
The Best Shades for Warm Undertones
If your skin has a golden, peachy, or yellow hue, you have warm undertones. The goal is to choose a blush that enhances that natural warmth. Think of shades that remind you of a beautiful sunset: peach, coral, and apricot are all fantastic choices. A warm pink can also look stunning, giving you a beautiful, sun-kissed glow.
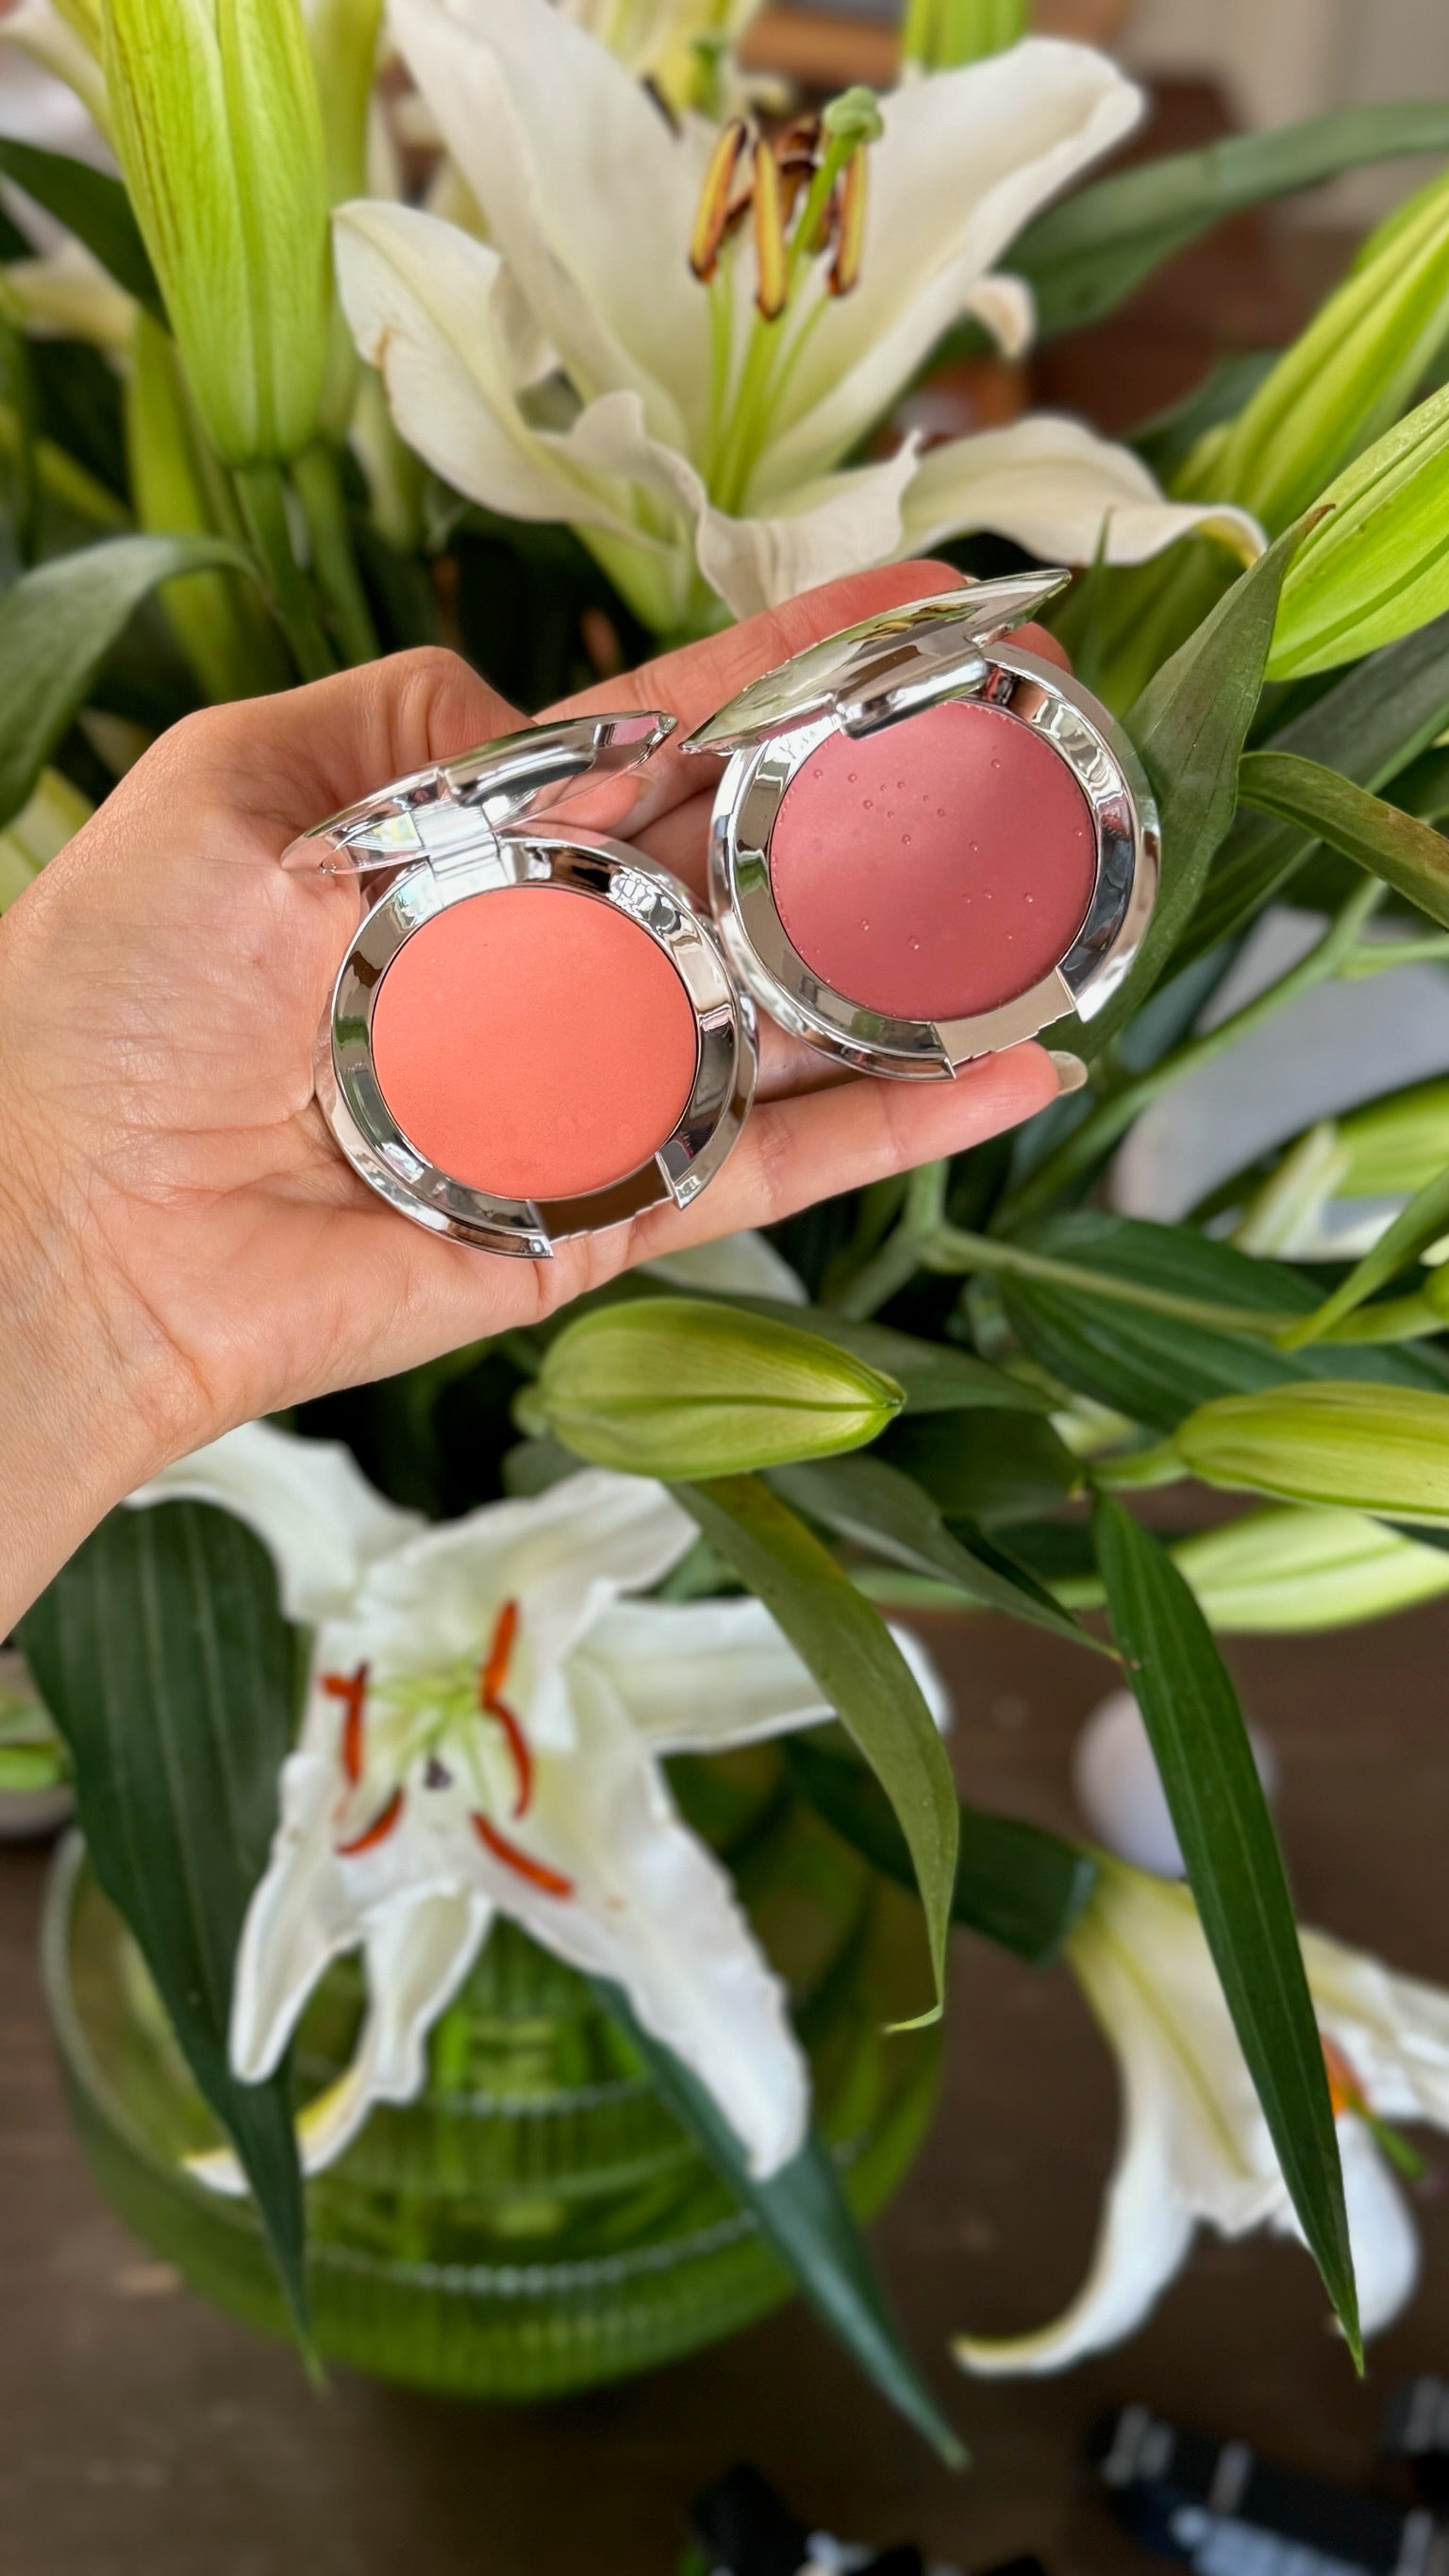
These colors work with your skin’s natural warmth rather than against it. Try to avoid shades that are too cool, like blue-based pinks or purples, as they can sometimes appear ashy or muted on warm skin. A shade like our Peachy or Glow cream blush will melt right into your skin for a seamless, radiant finish.
The Best Shades for Cool Undertones
For those with cool undertones, your skin has a subtle pink, red, or bluish tint. The most flattering blush shades will have a similar cool base. Look for soft pinks, delicate berry tones, and even lavender hues to complement your complexion. These colors will brighten your face and create a fresh, vibrant look that appears completely natural.
The right shade will give you a healthy flush, as if you’ve just come in from a brisk walk. Steer clear of very orange or golden-peach shades, which can sometimes look unnatural against cooler skin. A beautiful cool pink like our Imagine blush or a rosy tone like Flushed will give your cheeks the perfect pop of color.
The Best Shades for Neutral Undertones
Having neutral undertones means you have a balanced mix of warm and cool hues in your skin. This gives you incredible versatility when it comes to choosing makeup. You can pull off a wide range of blush shades, from warm peaches to cool pinks. However, the most foolproof options often sit right in the middle.
Soft mauves, classic rose tones, and peachy pinks are especially flattering because they enhance your complexion without leaning too far in one direction. These shades provide a beautifully balanced and natural look. You have the freedom to experiment, so why not build your own collection and play with a few different colors to see what you love most?
How to Make Your Cream Blush Last All Day
There’s nothing quite like the dewy, natural-looking flush you get from a cream blush. But how do you keep that gorgeous glow from fading by lunchtime? It’s actually easier than you think. With a few strategic application and setting techniques, you can ensure your blush looks just as fresh at the end of the day as it did when you first applied it. It all comes down to proper layering and setting, which will lock in your look without making it appear heavy or cakey.
The Right Way to Set with Powder
One of the golden rules of makeup is to apply creams before powders. This is especially true for blush. After blending your cream blush to perfection, you can set it with a very light dusting of translucent powder. This helps lock the color in place. The one thing you should never do is apply a cream blush over a powdered cheek. This can cause the product to cling to the powder, resulting in a patchy, uneven finish. Always apply your favorite cream blush to your foundation or bare skin first, then set it for a smooth, long-lasting look.
Try Layering for Extra Staying Power
If you have a long day ahead or just want a more vibrant pop of color, layering is your best friend. This technique involves applying a powder blush in a similar shade directly on top of your cream blush. This duo creates a powerful combination that seriously extends wear time. The cream acts as a base for the powder to adhere to, intensifying the pigment and adding another layer of staying power. Once you’ve layered the two formulas, you can finish with your setting powder and spray. This little extra step makes a huge difference for all-day wear.
Quick and Easy Touch-Up Tricks
The final step to seal the deal is a good setting spray. After you’ve applied your blush (and layered it, if you chose to), a light mist of setting spray will melt all your makeup together and keep it from moving. It also helps prevent your blush from fading throughout the day, keeping your skin looking fresh and smooth. For a quick midday refresh, you can gently tap a tiny bit more cream blush onto the apples of your cheeks to bring the color back to life. It’s an easy way to maintain that radiant look without redoing your entire face. Explore our best-selling makeup to find products that work beautifully together.
Is Cream Blush Right for Your Skin Type?
One of the best things about cream blush is how versatile it is. While you might think it only works for one specific skin type, the truth is that with the right application, almost anyone can get that perfect, dewy flush. It’s all about understanding your skin’s needs and adjusting your technique slightly. Whether your skin is dry, oily, or sensitive, there’s a way to make a creamy formula work beautifully for you. Let’s walk through how to adapt your routine for a flawless finish, no matter your skin type.
Why Dry and Mature Skin Love It
If you have dry or mature skin, cream blush will feel like it was made just for you. Powder formulas can sometimes settle into fine lines or cling to dry patches, but a cream blush does the opposite. Its emollient texture glides on smoothly, hydrating your skin and creating a natural, dewy glow that makes you look refreshed and radiant. Instead of sitting on top of your skin, it melts right in for a seamless finish. Our Cream Blush is packed with skin-loving ingredients that add a healthy-looking luminosity, giving you a youthful flush that looks like it’s coming from within.
Tips for Using Cream Blush on Oily Skin
It’s a common myth that if you have oily skin, you should stay away from cream products. You can absolutely wear cream blush and have it last all day. The secret is in the prep and setting. Start by applying a mattifying primer to create a smooth, oil-controlling base. After applying your foundation, tap on your cream blush. To give it serious staying power, lightly dust a translucent setting powder over it, or for even more color payoff, layer a similar shade of powder blush on top. This simple trick locks the cream in place and helps you create a beautiful, custom color that won’t slide around.
Is It Safe for Sensitive Skin?
Yes, cream blush is often a fantastic choice for sensitive skin. Because of their soft, blendable texture, cream formulas are gentle to apply and don’t require a lot of harsh rubbing or buffing with a brush, which can sometimes cause irritation. They are perfect for achieving a subtle hint of color or a more vibrant, rosy look without feeling heavy. When you choose a high-quality formula with clean ingredients, you can feel confident you’re giving your skin the best. Our products are designed to be luxurious and gentle, making them a go-to for anyone looking to enhance their natural beauty without compromise.
Related Articles
- How to Apply Blush for a Natural Flush: A Pro Guide | Nude Envie
- The Ultimate Guide to Cream Blush for Wrinkles | Nude Envie
- The 8 Best Blushes for Mature Skin Over 60 | Nude Envie
- How to Apply Cream Blush on Mature Skin for a Lift | Nude Envie
Frequently Asked Questions
Will cream blush work on my oily skin? Yes, it absolutely will. The key to making it last on oily skin is all about your prep and setting routine. Start with a primer that helps control oil, then apply your foundation and cream blush. To lock it in for the day, you can lightly dust a translucent setting powder over the blush or layer a powder blush in a similar shade right on top. This gives you a beautiful finish with serious staying power.
What's the best way to apply cream blush: with my fingers, a sponge, or a brush? There is no single "best" way; it really depends on the finish you want. Using your fingers warms up the product and helps it melt into the skin for a very natural, seamless look. A damp sponge gives you a sheer, airbrushed effect that’s easy to build up. A dense brush offers more precision for placing the color exactly where you want it. I recommend trying all three methods to see which one you enjoy most.
I applied too much blush! How can I fix it? Don't panic, this is an easy fix. The simplest way to tone down the color is to take your foundation brush or sponge (with a little leftover foundation on it) and gently tap over the blush. This will sheer out the pigment and help it blend more seamlessly with your base. You can also use a clean, damp sponge to lightly press over the area to lift some of the excess color.
Why does my cream blush look patchy or streaky? This usually comes down to one of two things: application order or technique. Always apply your cream blush before any powders. Putting a cream product on top of a set, powdered face can cause it to grab unevenly. Also, make sure you are tapping or stippling the blush into your skin instead of rubbing or dragging it. A gentle tapping motion presses the color in for a smooth, flawless finish.
Can I use cream blush on my lips or eyes too? Definitely. That's one of the best things about a great cream formula; it's incredibly versatile. Tapping a bit of your cream blush onto your lips can create a beautiful, soft stain that ties your whole look together. You can also apply a sheer wash of color to your eyelids for a quick and cohesive monochromatic look. It’s a perfect way to get more use out of a single product.