Where to Apply Blush for Your Specific Face Shape
You’ve probably heard the age-old advice to smile and dust blush onto the apples of your cheeks. It’s time to forget that tip. While it was once a go-to method, this technique can actually place the color too low on the face, creating a dated look that can drag your features down. Modern makeup artistry is all about creating a lifted, seamless effect that enhances your natural structure. Knowing where to apply blush for a fresh, youthful appearance is the key to unlocking its true potential. In this guide, we’ll move past the outdated rules and show you the pro-approved techniques for placing your blush to achieve a radiant, sculpted, and effortlessly modern finish.
Key Takeaways
- Focus on placement for a lifted look: Apply blush high on the cheekbones and blend upward toward your temples. This simple shift creates a modern, youthful appearance and avoids dragging down your features.
- Select the right formula for your skin: Cream blushes give a dewy, hydrated finish perfect for dry or mature skin, while powders offer more staying power for oily complexions. Layering a powder over a cream is a great trick for all-day wear.
- Perfect your technique from start to finish: A flawless application begins with moisturized skin and ends with seamless blending. Use the right tools to diffuse any harsh lines and pair your blush with bronzer for a complete, dimensional look.
Blush 101: Your Quick-Start Guide
Before we get into placement, let’s cover the basics. Choosing the right formula and using the proper tools are the first steps to achieving that perfect, natural-looking flush. Think of this as your foundation for a flawless blush application every single time. Getting these fundamentals right will make all the difference, no matter your face shape or skin type.
Cream vs. Powder: Find Your Perfect Formula
The first decision is picking your blush formula. For a fresh, dewy look that melts right into your skin, a cream blush is your best friend. It’s incredibly forgiving and gives you a youthful glow that looks like it’s coming from within. If you’re aiming for longevity, a powder blush offers fantastic staying power, just be sure to apply it with a light hand to build the color gradually. A great rule of thumb for picking a shade is to find a color that mimics your natural flush after a good workout. Our Enamor Blush is a perfect creamy option for that effortless, radiant finish.
Your Essential Blush Toolkit
You don’t need a dozen brushes, just the right ones. For cream and liquid formulas, a stipple brush or a dense, fluffy brush works beautifully to press and blend the product into your skin without disturbing your foundation. Try to avoid using those big, wide blush brushes, as they can deposit color over too large an area and give you less control. Here’s a pro tip: apply your blush with a relaxed, neutral expression, not while smiling. This ensures the color is placed correctly when your face is at rest. If you ever feel you’ve applied too much, simply take your foundation brush or sponge and gently pat over the area to soften the color.
Find the Best Blush Placement for Your Face Shape
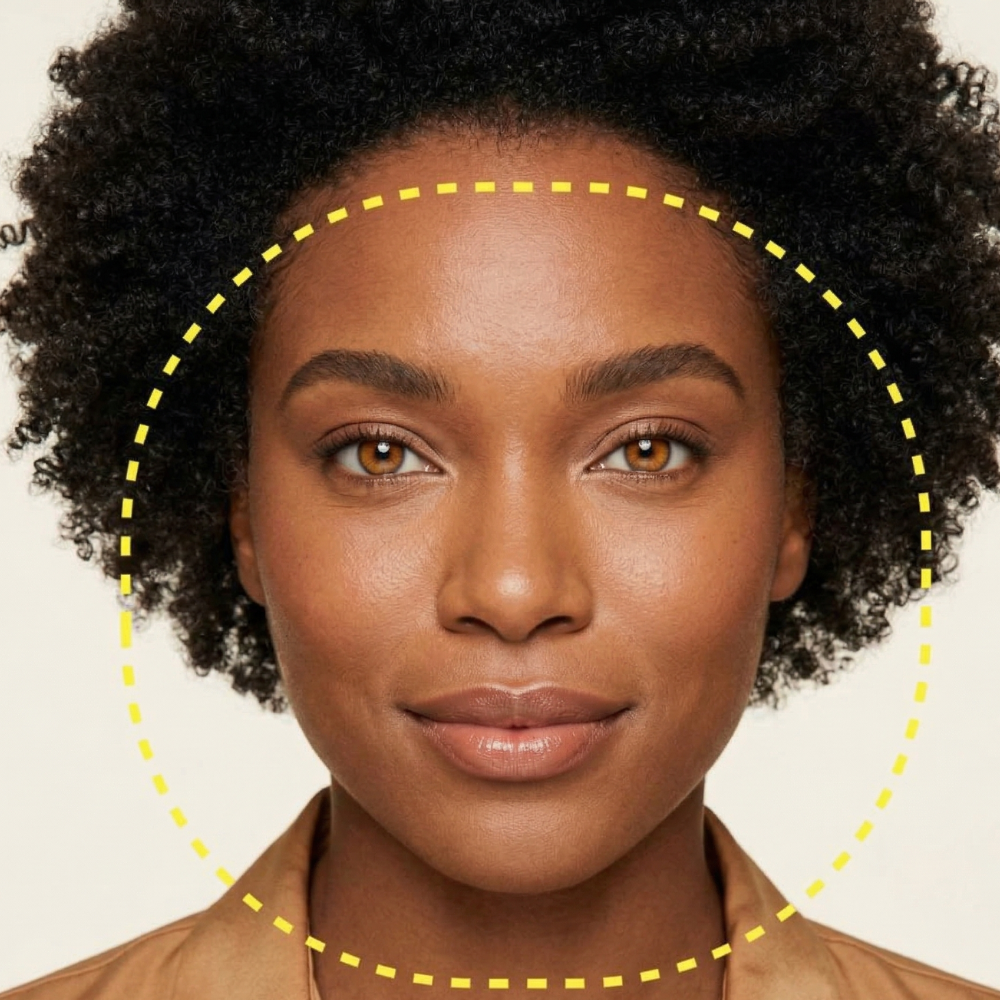
Where you apply your blush can completely change your look. It’s not about trying to alter your face shape, but rather working with your unique features to create balance and enhance your natural bone structure. A little bit of color in the right spot can add a healthy, radiant glow that looks like it’s coming from within. By understanding your face shape, you can place your favorite blush in a way that complements you perfectly. Not sure what your face shape is? A quick look in the mirror focusing on your forehead, cheekbones, and jawline will give you the clues you need.
For Round Faces
If your face is nearly as wide as it is long with softer, rounded edges, you likely have a round face shape. The goal here is to add a bit of definition and lift. Instead of applying blush directly to the apples of your cheeks, which can make your face appear rounder, focus the color higher up. Start near the outer corner of your eye and sweep the blush upwards along your cheekbone toward your temple. This technique draws the eye upward and outward, creating the illusion of more sculpted cheekbones and adding a beautiful, lifted effect to your entire face.
For Square Faces
Square faces are characterized by a strong, defined jawline and a forehead and jaw that are roughly the same width. To soften these beautiful angles, you’ll want to concentrate your blush on the fullest part of your cheeks. Smile to find the apples of your cheeks and apply your blush there using soft, circular motions. From the apple, gently blend the color outward toward your ears. This placement adds a touch of roundness and softness, beautifully balancing the more angular features of your face for a harmonious, glowing look.
For Oval Faces
Often considered the most versatile face shape, an oval face is longer than it is wide with a gently rounded jawline. You have a few great options for blush placement. For a classic look that adds a touch of width and a healthy flush, apply blush directly to the apples of your cheeks and blend outward. If you want to create a more sculpted and defined appearance, you can apply the blush just above your cheekbone, sweeping it up toward your temples. This versatility allows you to play with different makeup looks depending on your mood.
For Heart-Shaped Faces
A heart-shaped face typically features a wider forehead and cheekbones that taper down to a narrower chin. To create balance, you want to draw attention to the lower part of your cheeks. Apply blush starting on the apples of your cheeks, but place it slightly lower and more toward the outer edge of your face. Then, blend the color upward in a "U" or "C" shape toward your temples. This technique softens the cheekbones and helps balance the proportions between your forehead and chin, resulting in a soft and flattering finish.
For Diamond-Shaped Faces
If your cheekbones are the widest part of your face, with a narrower forehead and jawline, you have a diamond face shape. This shape is stunning on its own, and the right blush placement can really make your features pop. The key is to apply blush to the very top of your cheekbones. Avoid bringing the color too close to your nose. Instead, sweep it from the high points of your cheeks outward and upward toward your ears. This placement highlights your amazing bone structure and gives your face a gorgeous, lifted appearance.
Techniques for a Natural, Youthful Glow
Beyond finding the right shade, where you apply your blush can completely change your look. With a few simple adjustments to your technique, you can create a radiant, lifted effect that looks fresh and modern. Forget outdated rules and focus on these pro-approved methods for a healthy, natural-looking flush.
The Classic Cheekbone Sweep
This is a go-to technique for a reason. It’s universally flattering and incredibly easy to master. Instead of smiling to find the apples of your cheeks, start applying your blush just above that area. Blend the color upwards and outwards along the highest part of your cheekbone, moving toward your hairline. This method follows the natural contours of your face, giving your cheekbones beautiful definition and a subtle, youthful lift. It works beautifully with a buildable cream formula, like our Enamor Blush, which melts into the skin for a seamless, dewy finish that looks like it’s coming from within.
Create a Lifted Look
If you want to give your face an instant lift, this technique is for you. Apply your blush along the upper part of your cheekbones, blending it up toward your temples. The real magic happens when you gently diffuse the edges into the outer part of your under-eye area where you’ve applied concealer. This seamless blend draws the eye upward, creating a lifted, more awake appearance. This is one of the most effective blush placement guides for a vibrant look. It’s a modern approach that works with both powder and cream formulas to sculpt and brighten your entire face, not just your cheeks.
Rethinking the "Apples of Your Cheeks"
You’ve probably heard the advice to smile and apply blush to the apples of your cheeks. It’s time to set that tip aside. Applying color too low on the face can actually drag your features down, creating a dated look. Instead, place your blush higher up on the cheek, keeping the color above the apples. This simple shift makes a world of difference, promoting a fresher, more modern aesthetic that lifts the face. Try this technique with one of our best-selling blushes and see how it instantly brightens your complexion. It’s a small change that delivers a big impact.
How to Apply Blush for Your Skin Type
Your skin type plays a huge role in how makeup applies, wears, and looks. A technique that works for oily skin might not be the best for dry or mature skin. The key is to adapt your application method and product choice to work with your skin, not against it. By understanding your skin’s unique needs, you can make sure your blush looks seamless, fresh, and radiant all day long. Let’s get into the best application tips for your specific skin type, so you can achieve that perfect, healthy-looking flush every single time.
Tips for Mature Skin
As our skin matures, it often becomes drier and develops more texture. The goal with blush is to create a lifted, glowing appearance. Applying it correctly can instantly make your face look more vibrant. Start by choosing a formula that adds a touch of luminosity. A cream blush or a very finely milled powder blush works beautifully, as these textures look fresh and are less likely to settle into fine lines. When you apply it, focus on blending the color upwards along your cheekbones toward your temples. This technique creates a subtle lift that counteracts any natural sagging and gives your complexion a youthful radiance.
Making Blush Last on Oily Skin
If you have oily skin, you know the struggle of keeping your makeup in place. The secret to long-lasting blush is all about the right prep and product layering. Start with a mattifying primer to create a smooth base. When it comes to color, a great way to find your most natural shade is to gently pinch your cheek and match the color that appears. For extra staying power, try layering your products. Apply a cream blush first, then set it with a light dusting of a corresponding powder blush on top. This locks the color in and helps control shine for a fresh look that lasts for hours.
How to Blend Blush on Dry Skin
For those with dry skin, the focus is on hydration and seamless blending to avoid any patchiness. Always start by prepping your skin with a good moisturizer to create a smooth canvas. Cream blushes are your best friend here, as they add a dose of hydration and a dewy finish. When you’re ready to apply, use a dense brush. Instead of sweeping the color on, try dabbing the blush onto your skin first. This gives you more control over the placement. Then, gently blend the color upwards for a soft, diffused finish that melts right into your skin.
Choosing Products for Sensitive Skin
Sensitive skin requires gentle formulas that won't cause irritation. Look for products with clean ingredients that are free from common irritants. When it comes to blush, the texture is just as important as the formula. A cream blush or a very finely ground powder blush is ideal. These types of products have a smoother consistency that glides over the skin without emphasizing texture or clinging to dry spots. They deliver a fresh, healthy-looking color that feels as good as it looks. Our Nude Envie blush is formulated to be luxurious and gentle, making it a perfect choice for sensitive complexions.
Create Different Looks with Blush
Blush is so much more than just a pop of color. It’s a versatile tool that can completely reshape the look of your face, depending on where and how you apply it. By changing your technique, you can create a lifted, sculpted appearance one day and a soft, youthful fullness the next. It’s all about understanding how placement interacts with your features. Think of your blush as the finishing touch that pulls your entire look together, whether you’re aiming for subtle radiance or a more defined structure. Let’s explore three simple techniques to create distinct, beautiful effects.
For a Lifted Effect
If you want to create a more sculpted, lifted look, the key is to place your blush higher on the cheekbones. To get this right, start applying your blush above the apple of your cheek, blending it upward and outward toward your temple. A great way to visualize this is to imagine a line running from the corner of your mouth to the top of your ear. Your blush should always stay above this line. This technique draws the eye upward, enhancing your cheekbones and creating a subtle, elegant lift. Our powder blushes are perfect for this, as their silky texture blends seamlessly for a flawless finish.
To Add Youthful Fullness
For a fresh, youthful glow that adds a touch of fullness to your face, focus your application on the apples of your cheeks. This is the classic technique for a reason. Simply smile, and apply blush to the fleshy part of your cheeks that becomes most prominent. Blend in soft, circular motions, concentrating the color in that area. This method gives your face a rounded, healthy appearance that looks naturally vibrant. It’s a simple way to look bright-eyed and refreshed. Pair this look with a swipe of a sheer lip gloss to complete the effortlessly radiant vibe.
For a Soft, Diffused Glow
To achieve a soft, all-over glow that looks like you’re lit from within, think about diffusing the color beyond just your cheeks. Using a fluffy brush and a light hand, sweep a powder blush across the apples of your cheeks, then lightly dust the remaining product under your eyes, on your temples, and across the bridge of your nose. This technique mimics a natural, sun-kissed flush and ties your whole look together beautifully. The key is to use a very small amount of product and blend thoroughly. You can easily build your own collection with a blush and highlighter to perfect this radiant finish.
Are You Making These Common Blush Mistakes?
Even with the perfect product, a few common application slip-ups can stand between you and a radiant glow. The good news is that these are incredibly easy to fix. Let’s walk through some of the most frequent blush blunders and how to correct them for a flawless finish every time. Think of these as simple adjustments that make a world of difference.
Placing Your Blush Too Low
Applying blush too low on the cheeks is a mistake that can unintentionally drag your features down. Putting blush low on your face can make your eyes look saggy and highlight lines around your mouth. Instead of placing color on the full apple of your cheek, focus higher up on your cheekbones. By applying blush higher and blending upwards, you create an instant visual lift that brightens your entire face. This simple shift in placement helps to counteract any sagging and gives you a more youthful, awake appearance.
Using the Wrong Color or Intensity
The goal of blush is to create a believable, healthy flush. To achieve this, choose a blush color that looks like your natural flush after a light workout. Avoid colors that are too dark or muddy, as they can look harsh against your skin. On the other hand, shades that are too pale or chalky can make you look washed out. Our collection of Envy Blush offers a range of shades designed to enhance your natural tone. Start with a light hand and build the color gradually until you reach your desired intensity.
Forgetting to Blend Correctly
Harsh lines are the quickest way to an unnatural blush look. Proper blending is what separates a professional-looking application from an amateur one. The key is to diffuse the edges of the color so it melts seamlessly into your skin. Always blend the blush upwards towards your temples or the top of your ear. This technique not only prevents obvious stripes of color but also reinforces that lifting effect we’re aiming for. Using a quality blush brush will make this process much easier, giving you a soft, airbrushed finish.
Skipping Your Base Prep
For blush to look its best, the canvas underneath needs to be ready. Applying blush directly onto dry or unprepared skin can result in a patchy, uneven application that won’t last. Always put on moisturizer and a hydrating primer first. This helps your skin look fresh and dewy, creating a smooth surface for your makeup to glide over. This simple step ensures your blush blends beautifully and stays vibrant all day long. If you're ever unsure about your routine, a virtual beauty consultation can help you perfect your prep steps.
Fit Blush Seamlessly into Your Routine
Getting your blush to look like a natural flush instead of a splotch of color is all about what you do before and after you apply it. Integrating blush into your makeup routine correctly ensures it blends beautifully with your other products and, most importantly, lasts all day. Think of your foundation, concealer, and setting powder as the support system for your blush. When they all work together, you get that seamless, radiant finish that looks like it’s coming from within.
Layering with Foundation and Concealer
A flawless blush application starts with a well-prepped base. Before you even think about color, make sure your skin is happy and hydrated. Always start with moisturizer and a hydrating primer to give your skin a fresh, dewy canvas. This simple step prevents blush from clinging to dry patches and helps it melt into your skin. For an extra smooth base, try mixing a little concealer with your foundation on the back of your hand. This creates a custom coverage that evens out your skin tone without looking heavy, providing the perfect backdrop for a beautiful cream blush.
Pairing with Highlighter and Bronzer
Blush looks best when it has friends. Pairing it with highlighter and bronzer adds dimension and warmth to your face for a more sculpted appearance. To create a lifted effect, apply your bronzer just below your blush. Imagine a soft line from the corner of your mouth to the top of your ear; your bronzer goes right under where your blush sits, helping to anchor the color and gently lift your features. When applying your blush, you can control the intensity. One dot of a liquid or cream formula gives a natural look, while two or three dots build up to a bolder pop of color.
Set Your Blush for All-Day Wear
If you find your blush has vanished by lunchtime, a simple layering trick will change the game. For color that truly lasts, apply a cream blush first, then lightly set your entire face with a translucent powder. After that, go back in with a powder blush in a similar shade, applying it right on top of where you placed the cream. This layering technique locks in the color for hours. Using the right tools also makes a huge difference. A good stipple brush or a fluffy synthetic brush works wonders for blending cream and liquid blushes without disturbing your foundation. If you need help choosing the right formulas, a virtual beauty consultation can offer personalized advice.
Related Articles
- How to Apply Blush for a Natural Flush: A Pro Guide | Nude Envie
- The 8 Best Blushes for Mature Skin Over 60 | Nude Envie
Frequently Asked Questions
How do I choose the right blush shade for my skin tone? A great starting point is to find a color that matches your natural flush. Gently pinch your cheeks and look for a shade that mimics that color. For a more tailored approach, consider your skin's undertones. If you have cool undertones, pinks and berries will look beautiful. If you have warm undertones, peaches and corals will be very flattering. Neutral undertones can wear almost any shade.
I'm new to blush. Should I start with a cream or powder formula? I almost always recommend starting with a cream blush. Cream formulas are incredibly forgiving and easy to blend, often with just your fingertips. They melt into the skin for a very natural, dewy finish that looks like the color is coming from within. It's much harder to overdo it with a cream blush, which makes it perfect for building your confidence.
I accidentally applied way too much blush. How can I fix it without starting over? Don't worry, this is an easy fix. Take the brush or sponge you used to apply your foundation (it should still have a little product on it) and gently pat or buff over the blush. This will soften the color and blend it seamlessly into your base. If it still looks too bright, you can also dust a small amount of translucent setting powder over the area to diffuse the intensity.
Can I apply blush with my fingers instead of a brush? Absolutely, especially when you're using a cream formula. The warmth from your fingertips helps to melt the product into your skin, creating a very natural and seamless finish. Just be sure to use a light tapping motion to press the color onto your cheeks and blend the edges. This gives you great control and a beautiful, skin-like result.
Should my blush go on before or after my foundation and setting powder? Your blush should always be applied after your foundation and concealer. This ensures you have an even canvas to work on. If you're using a cream blush, apply it directly after your liquid or cream foundation. If you plan to set your face, do so after the cream blush. For powder blushes, apply them after you've set your foundation with powder to avoid any patchiness.