A Step-by-Step Natural Makeup Tutorial Over 50

If you feel like your current makeup routine isn't working for you anymore, you’re not alone. The truth is, a few simple swaps can completely transform your look. Trading a heavy foundation for a flexible skin tint, or a powder blush for a creamy formula, can make an incredible difference. These modern textures are designed to hydrate, blend seamlessly, and add a youthful glow back into the skin without settling into lines. This step-by-step natural makeup tutorial over 50 is designed to show you exactly how to make these impactful changes for a fresh, effortless finish that lasts all day and enhances your natural beauty.
Key Takeaways
- Flawless Makeup Starts with Your Skin: The most important step happens before you even touch your foundation. A well-hydrated and primed canvas ensures makeup glides on smoothly, looks natural, and won't settle into fine lines.
- Choose Hydrating Formulas for a Youthful Glow: Swap heavy powders for lightweight, creamy products. Formulas like serum foundations, cream blushes, and liquid highlighters melt into the skin to create a radiant, dewy finish that looks fresh, not flat.
- Technique is More Important Than Coverage: How and where you apply your makeup makes all the difference. Use a gentle pressing motion for foundation and place blush higher on the cheekbones to create a natural lift without needing heavy layers of product.
What Changes About Makeup After 50?
As your skin matures, the makeup techniques and products that once worked for you might not deliver the same results. It’s not about covering up; it’s about adapting your routine to enhance your features beautifully. The biggest shift is moving toward a "less is more" approach. Skin often becomes drier and develops more texture over time, so heavy, matte products can settle into fine lines and look cakey. Instead, the focus turns to creating a radiant, hydrated, and fresh-faced look that lets your natural skin shine through.
This means rethinking product formulas and application. Mature skin often benefits from lightweight, hydrating foundations that feel more like serums than heavy creams. The way you apply products also changes. You might find that you no longer need foundation all over your face, but rather just in specific areas to even out your skin tone. Similarly, a light hand with concealer is key, as too much can draw attention to the areas you’re trying to soften.
The most significant change is the renewed focus on skin preparation. Your makeup will only look as good as the skin underneath, making a solid skincare routine non-negotiable. Hydration is everything. Using primers, especially around the eyes, creates a smoother canvas for makeup and helps it last longer without creasing. Even the placement of your blush can make a difference; applying it slightly higher on the cheekbones can create a subtle, natural lift. It’s all about making small, strategic adjustments to celebrate your skin at every stage.
How to Prep Your Skin for a Flawless Makeup Application
The secret to makeup that looks fresh, radiant, and seamless isn’t about the foundation you use—it’s about what you do before you even pick up a brush. As our skin changes, creating a smooth, hydrated canvas becomes the most important step for a beautiful finish. When your skin is properly prepped, makeup glides on evenly instead of clinging to dry patches or settling into fine lines. It’s the difference between makeup that looks like it’s sitting on top of your skin and makeup that truly becomes one with it, creating that coveted natural look.
Think of it as priming a wall before you paint. You wouldn't apply a fresh coat of paint to a rough, uneven surface and expect a perfect result. The same goes for your face. A little bit of prep work makes the final result look polished and professional, helping your natural beauty shine through. These simple steps will ensure your skin is plump, smooth, and ready for makeup, giving you a glowing finish that lasts all day. It’s a non-negotiable part of the routine that makes a world of difference, and it doesn't have to be complicated. Just a few key steps can completely change your makeup application for the better, making you feel more confident in your skin.
Hydrate and Exfoliate for a Smooth Canvas
First things first: let's talk texture. As we get older, our skin's natural exfoliation process slows down, which can lead to a buildup of dead cells that cause dullness and prevent makeup from sitting smoothly. Gently exfoliating one to two times a week is a game-changer. It helps slough away that top layer to reveal brighter, softer skin underneath. Look for gentle chemical exfoliants with ingredients like lactic acid, which are effective yet kind to mature skin. After exfoliating, hydration is your best friend. Applying a rich, nourishing moisturizer plumps the skin, softens the appearance of fine lines, and creates a supple base. This step is crucial because well-hydrated skin holds onto makeup better and prevents foundation from looking cakey or dry as the day goes on.
Find the Perfect Primer for Your Skin
Once your moisturizer has fully absorbed, it’s time for primer. This is the true bridge between your skincare and your makeup. A good primer works wonders by creating an ultra-smooth surface, filling in pores and fine lines so your foundation can glide on flawlessly. For mature skin, I always recommend a hydrating or illuminating primer. These formulas add an extra layer of moisture and often contain light-reflecting particles that give you a subtle, lit-from-within glow. Using a primer not only improves how your makeup looks but also extends its wear time. It gives your foundation something to grip onto, keeping it in place for hours. You’ll find you need less foundation to achieve an even finish, allowing your skin to look like skin, only better.
The Best Makeup Products for a Natural Look Over 50
As your skin changes, your makeup products should, too. The goal isn’t to cover up your skin, but to work with it to create a fresh, radiant look. Heavy, matte products that once worked perfectly might now settle into fine lines or make your skin appear dry. The secret to a flawless natural finish is choosing modern formulas that are hydrating, lightweight, and designed to enhance your features beautifully. This is where you can really have fun exploring new textures and finishes that make your skin look its best.
Think of it as a simple swap: trade thick foundations for flexible skin tints, swap powder blushes for creamy formulas, and find a concealer that brightens without creasing. The right products will blend seamlessly, giving you a polished look that still feels completely like you. It’s all about finding textures that add a youthful glow and dimension back into the skin. When you have the right tools in your makeup bag, application becomes effortless and the results are always stunning. Our best-selling products are designed with these exact principles in mind, focusing on creamy textures and radiant finishes that flatter every age.
Opt for Lightweight Foundations and Tinted Moisturizers
If you find that traditional foundation settles into lines or feels heavy, it’s time to switch to a lightweight formula. Heavy coverage can often accentuate what you’re trying to minimize. Instead, look for tinted moisturizers or foundations with serum-like textures. These products offer light-to-medium, buildable coverage that evens out your skin tone without masking it. The best foundations for mature skin feel comfortable all day and create a luminous, lit-from-within glow. Your skin will look fresh, hydrated, and smooth—never cakey.
Find a Concealer That Won't Settle into Lines
A great concealer can be your best friend for looking bright-eyed and refreshed, but the wrong formula can do the opposite. The key is to find a creamy, hydrating concealer that won’t crease or look dry, especially around the delicate eye area. Before you even apply it, make sure your skin is well-moisturized, as this creates a smoother canvas. Look for concealers with a flexible, radiant finish that moves with your skin. A small amount, strategically placed, can brighten shadows and neutralize discoloration without adding texture or weight.
Why Creams Outperform Powders on Mature Skin
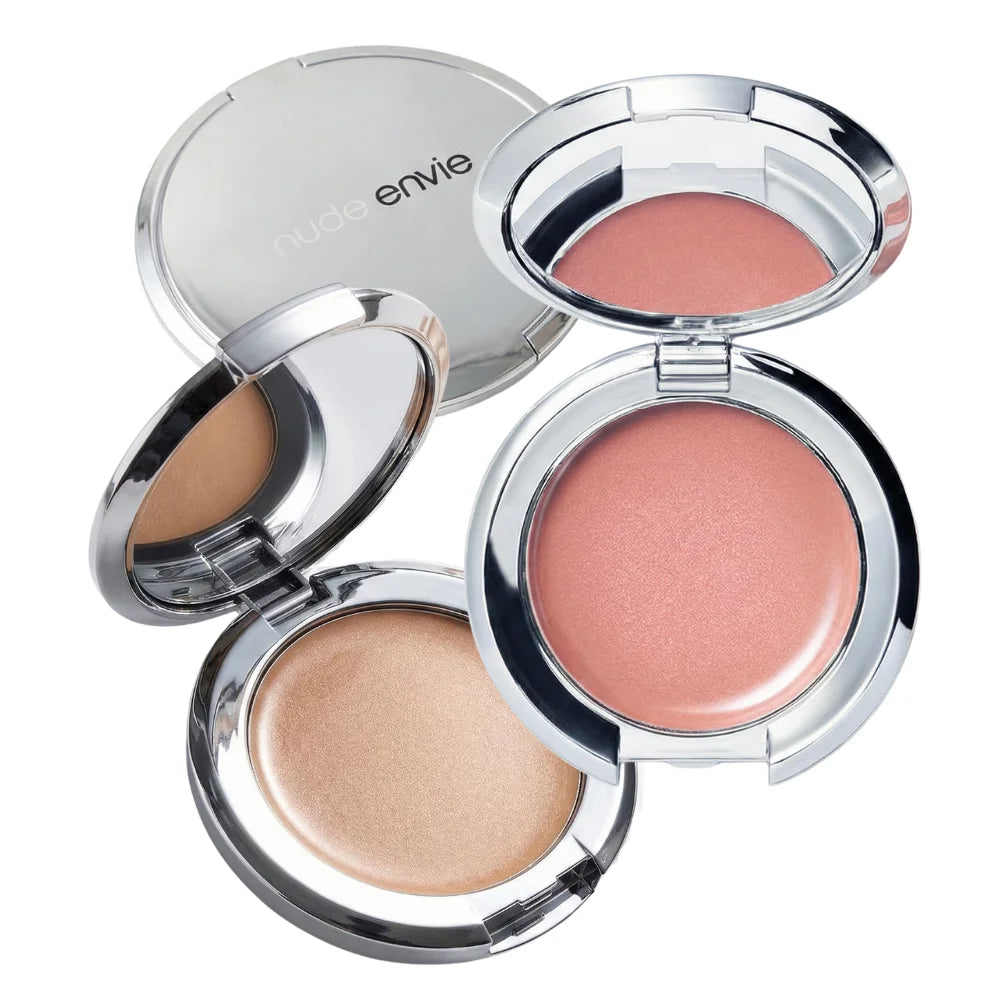
One of the most impactful changes you can make to your makeup routine is switching from powder products to creams. As we age, our skin naturally produces less oil, which can lead to dryness. Powders tend to absorb moisture, which can make skin look flat and emphasize texture. Cream formulas, on the other hand, are far more forgiving. Cream blushes, bronzers, and highlighters blend seamlessly into the skin, providing hydration and a dewy finish that looks healthy and natural. Our Enve Créme Blush melts into your cheeks for a perfect, lasting flush of color.
How to Apply Foundation and Concealer for a Seamless Finish
A great foundation and concealer can even out your skin tone and create a perfect base, but the real magic is in the application. The goal is to look like you have incredible skin, not like you're wearing a lot of makeup. With a few simple technique adjustments, you can achieve a smooth, radiant finish that looks and feels completely natural. It’s less about the amount of product you use and more about how and where you place it. Let’s get into the specific methods that make all the difference.
Use Stippling and Pressing for Even Coverage
Instead of wiping or rubbing foundation across your skin, which can cause streaks and tugging, try a stippling motion. This just means gently tapping or pressing the product into your skin with your brush or sponge. This technique builds coverage beautifully without disturbing any skincare or primer underneath, creating a flawless, almost air-brushed effect. It allows a lightweight, serum-like foundation to melt right into your skin for a finish that lasts for hours. Think of it as pressing the foundation into your skin, not just spreading it on top. This gives you more control and a much more natural-looking result.
Where to Place Concealer (and a 30-Second Trick)
When it comes to concealer, strategic placement is everything. Applying too much, especially under the eyes, can cause it to settle into fine lines. Instead, focus a small amount on the inner corners of your eyes to instantly brighten and counteract darkness. A little around the base of your nose will also help neutralize any redness. Here’s a simple trick for maximum impact: after dabbing on the concealer, wait about 30 seconds before you blend it out. This gives the formula a moment to thicken, providing more coverage with less product. It’s a game-changer for a bright, refreshed look using your favorite eye makeup.
Brushes vs. Sponges: How to Build Natural Coverage
The right tool can completely change your makeup application. While sponges are great for a sheer, dewy finish, a dense foundation brush often gives you more control for building seamless coverage. Using a brush with that same pressing or stippling motion helps you place the product exactly where you need it without lifting the layers underneath. This method is perfect for covering areas of redness or discoloration while keeping the rest of your skin looking fresh. If you’re ever unsure which tools or techniques are best for your specific skin needs, a Virtual Beauty Consultation can provide personalized advice to help you perfect your routine.
How to Enhance Your Eyes with Natural Makeup
A light touch is all you need to make your eyes pop. The goal isn't to hide behind heavy makeup, but to define your features and brighten your overall look. With a few simple techniques, you can create a soft, sophisticated eye that looks polished and awake. We’ll focus on using complementary neutral shades, soft definition, and well-groomed brows to frame your face beautifully. It’s all about enhancing what you have, not covering it up.
Choose Neutral Eyeshadows That Flatter You
The right eyeshadow can make a world of difference. For mature eyes, it's best to stick with neutral, matte, or satin-finish shadows, as shimmery formulas can sometimes settle into fine lines. Start by sweeping a soft, pinky-brown or taupe shade through your crease to add natural-looking depth. Then, apply a lighter vanilla or cream shade across your eyelid and just under the brow bone to brighten and lift the area. For a little more definition, especially on hooded eyes, you can press a deeper brown shadow into the outer corner, creating a subtle V-shape. Our Envision Eye Palette has the perfect curated shades for this.
Define Your Eyes with Soft Eyeliner
Harsh, black liquid liner can look severe and close off the eyes. Instead, reach for a creamy eyeliner pencil in a soft brown, charcoal, or deep plum. Gently trace the pencil as close to your upper lash line as possible, wiggling it between the lashes to create the illusion of a fuller lash line. Don't worry about making the line perfect. The secret is to immediately take a small smudger brush or even a cotton swab and gently soften the line. This creates a subtle, smoky definition that enhances your eye shape without looking heavy or emphasizing any texture on the lid.
Apply Mascara for a Natural Lift
Mascara is non-negotiable for an awake, wide-eyed look. It instantly lifts and defines your lashes. For the most natural effect, concentrate the application on your upper lashes. Wiggle the wand at the base of your lashes to build volume there, then sweep it through to the tips. One or two coats is usually plenty. Applying mascara to the lower lashes can sometimes cast a shadow and draw attention to dark circles, but a very light coat can work if you prefer a more rounded eye shape. A great mascara will give you length and volume without clumping, completing your natural eye makeup look.
Shape and Fill Your Brows for a Polished Look
Never underestimate the power of a well-groomed brow! Brows frame your entire face, and as we age, they can become sparse or lose their shape. Start by brushing your brow hairs up and over with a spoolie. Then, use a fine-tipped brow pencil or an angled brush with brow powder to fill in any gaps with light, hair-like strokes. Focus on defining the arch and extending the tail if needed. To finish, swipe a tinted brow gel through your brows. This not only sets them in place but also adds a touch of volume and can help cover any stray grays, giving you a polished and youthful finish.
Add Warmth and Dimension with Blush and Bronzer
Foundation creates a beautiful, even canvas, but it can also flatten your features. This is where blush and bronzer come in—they bring back the natural warmth and dimension to your face, making you look healthy and vibrant. The right application can instantly make you look more awake and refreshed. It’s not about drastically changing your face shape with harsh contouring, but about gently enhancing what’s already there for a soft, believable glow that looks like it comes from within. Think of it as the step that breathes life back into your complexion after you’ve perfected your base.
The secret to a youthful look is all in the placement and the formula. A touch of bronzer adds warmth where the sun would naturally kiss your skin, while blush gives you that healthy, happy flush. Together, they work to restore the natural highs and lows of your face for a more sculpted, yet completely natural, appearance. Forget any harsh contouring lines or overly bright stripes of color. We’re aiming for a seamless, lit-from-within effect that looks entirely your own. In the next few steps, we’ll walk through exactly where to place your products, which formulas work best for mature skin, and how to blend them perfectly for a flawless finish that lasts all day.
Place Blush and Bronzer for a Youthful Lift
You might have learned to smile and pop blush right on the apples of your cheeks, but this trick doesn’t always work as we get older. Instead, try applying blush a bit higher on your cheekbones, blending it up and back toward your temples. This placement creates a subtle lifting effect that defines your cheekbones and gives your entire face a fresher, more awake appearance. For bronzer, think about where the sun would naturally hit. Lightly sweep it across the high points of your face—your forehead, the tops of your cheekbones, and a little on your chin and the bridge of your nose for a cohesive, sun-kissed warmth.
Cream or Powder: Which Is Best for You?
When it comes to mature skin, cream formulas are often your best friend. Cream blush tends to provide a dewy, hydrated finish that melts into the skin for a truly natural look. Because it doesn’t sit on top of the skin like some powders can, it’s less likely to emphasize texture or settle into fine lines. It gives you that radiant, healthy-skin glow. If you have oilier skin or simply prefer a more matte finish, a finely milled powder can still be a great option. The key is to choose a silky texture and apply it with a very light hand.
Blend Like a Pro for a Natural Flush
Your blending technique can make all the difference. A great rule of thumb is to pat on your cream products and buff on your powders. For a cream blush, use your fingertips or a damp makeup sponge to gently tap the color onto your skin. The warmth from your fingers helps it melt in beautifully. Keep patting until you can’t see where the blush begins or ends. If you’re using a powder, grab a soft, fluffy brush. Swirl it in the product, tap off any excess, and apply it to your cheeks using light, circular motions to buff it into the skin. This gradual approach helps you build color without ever overdoing it.
Where to Apply Highlighter for a Subtle, Natural Glow
Highlighter is one of the most transformative products in a makeup bag, but it’s also one of the most misunderstood. The goal isn’t to add sparkle or glitter; it’s to create a subtle, lit-from-within radiance that looks like your skin is just naturally healthy and hydrated. It’s all about strategically placing a touch of light on the high points of your face where the sun would naturally hit. When done correctly, highlighter can give your features a soft lift and add beautiful dimension, making you look refreshed and awake.
The key is choosing the right formula and applying it with a light hand. Forget the blinding, metallic stripes you might see online. We’re aiming for a sophisticated glow that seamlessly blends into your skin. A creamy or liquid formula often works best, as it melts into your foundation and blush for the most natural finish. Think of it as the final touch that pulls your whole look together, leaving you with a fresh, youthful appearance that enhances your features without overpowering them.
Highlight These Key Spots to Flatter Your Features
To get that perfect, natural glow, you’ll want to apply highlighter to the high points of your face. Start with the tops of your cheekbones, sweeping the product up toward your temples for an instant lift. A small dab on the bridge of your nose can create a slimming effect, while a touch on your cupid’s bow gives the illusion of a fuller upper lip.
For a brighter, more wide-eyed look, place a tiny amount just above the arch of your brow bone and on the inner corners of your eyes. This simple trick really helps to open up the entire eye area. Use your ring finger or a small, soft brush to gently tap and blend the product into your skin until there are no harsh lines.
Light-Reflecting vs. Shimmer: What's the Difference?
When choosing a highlighter, you’ll notice that formulas generally fall into two categories: light-reflecting and shimmer. Light-reflecting products have a subtle finish that mimics your skin’s natural dewiness, while shimmer products contain larger glitter particles for a more intense effect. For mature skin, a light-reflecting formula is almost always the better choice.
Shimmery particles can settle into and emphasize texture or fine lines, which is the opposite of the smooth, radiant look we want. A light-reflecting cream or liquid provides a luminous glow without the sparkle, much like finding a great foundation that won't settle into fine lines. A luminous cream blush can also work beautifully to give your cheeks both color and a subtle glow in one step.
The Finishing Touches for a Lasting Natural Look
You’ve created a beautiful, radiant look, and now it’s time to make sure it stays that way. The final steps in your makeup routine are all about locking everything in place while maintaining that fresh, skin-like finish you worked so hard to achieve. The right finishing touches will ensure your makeup wears evenly throughout the day without looking heavy, cakey, or settling into fine lines. It’s the difference between makeup that sits on top of your skin and makeup that truly becomes one with it.
Many of us learned to dust powder all over our faces, but this can often work against us, especially as our skin changes. A heavy-handed approach can mattify the skin too much, taking away the dimension and glow we just created with cream blushes and highlighters. It can also emphasize texture and fine lines. The modern approach is much more strategic and focuses on perfecting the texture and wear of what you've already applied. By using a light touch with powder and finishing with a hydrating mist, you create a soft-focus effect that looks effortlessly natural. These two simple steps will give your look incredible staying power and a luminous, healthy-looking glow that feels as good as it looks.
Set Your Makeup Without It Settling into Lines
The key to setting your makeup is to be strategic. Instead of applying powder all over, which can dull your skin’s natural radiance, focus only on the areas that tend to get oily or where makeup might crease. A light dusting of a fine, translucent powder under the eyes and across the T-zone is often all you need. This technique sets your concealer and foundation, creating a smooth finish that minimizes texture and prevents makeup from settling into lines throughout the day. Use a small, fluffy brush to gently press a minimal amount of powder onto the skin. This targeted approach keeps your eye makeup looking perfect and controls shine without sacrificing your glow.
Use a Hydrating Mist for a Fresh, Dewy Finish
A hydrating setting spray is the secret weapon for achieving a truly seamless, dewy finish. This final spritz does more than just add longevity; it helps all your cream and powder products melt together and fuse with your skin. The result is a natural, second-skin look where you can’t tell where one product ends and another begins. For mature skin, a hydrating mist is especially wonderful because it adds a welcome layer of moisture and counteracts any potential dryness from powders. If you’re ever unsure which products will work best for your skin type, a virtual beauty consultation can offer personalized recommendations to complete your routine. Hold the bottle about an arm’s length away and mist your face a few times for a refreshed, luminous look that lasts.
How to Make Your Natural Makeup Last All Day
You’ve spent time creating a beautiful, natural look, and the last thing you want is for it to fade, crease, or disappear by lunchtime. Keeping your makeup looking fresh from morning to night can feel like a challenge, but it doesn't require heavy layers of product or constant reapplication. In fact, the secret to long-lasting makeup, especially on mature skin, is using the right techniques and products that work with your skin, not against it. It’s all about creating a solid foundation (both literally and figuratively) and knowing how to make small adjustments throughout the day without undoing all your hard work.
The goal is to maintain that effortless, radiant finish without looking overdone. A few simple habits can make a world of difference, ensuring your makeup looks just as good at dinner as it did when you first applied it. From how you prep your skin to the way you apply your foundation, every step plays a part in your makeup’s longevity. Think of it less as a chore and more as a finishing touch that locks in your artistry. And when you do need a little refresh, there are easy ways to do it without disturbing the makeup you already have on. Let’s get into some simple, effective strategies to give your natural makeup look serious staying power.
Simple Tips to Make Your Makeup Last Longer
The longevity of your makeup starts before you even pick up a brush. Your makeup will only look as good as the skin underneath, so a great skincare routine is non-negotiable. Once your skin is prepped, focus on your application technique. When applying foundation, use a pressing or "stippling" motion with your brush instead of rubbing. This builds coverage gently without disturbing any skincare or primer underneath. After applying your makeup, including your favorite cream blush, a hydrating setting spray is your best friend. A light mist will help melt any powders into your skin, giving you a seamless, second-skin finish that lasts.
How to Touch Up Without Messing Up Your Look
A midday touch-up should be quick and strategic. The key is to use less product, not more. If you need to brighten your under-eyes, apply concealer sparingly to avoid it settling into fine lines. A tiny dot blended well is all you need. To control shine, use a small, domed brush to apply a light dusting of translucent powder only where you need it. For a quick pick-me-up, add a light or nude eyeliner from our eye makeup collection to your lower waterline. This simple trick makes your eyes look bigger and more awake instantly. A fresh swipe of your favorite lipstick can also completely revive your look.
Related Articles
- 12 Makeup Tips for Mature Skin for a Flawless Look | Nude Envie
- Flawless Everyday Makeup for 50 Year Olds: A Guide | Nude Envie
- 5 Looks: Pictures of Eye Makeup for Over 50 | Nude Envie
Frequently Asked Questions
Why does my foundation suddenly look cakey or settle into my fine lines? This is a really common experience, and it usually comes down to two things: hydration and the type of formula you're using. As our skin matures, it naturally becomes drier and develops more texture. Heavy, matte foundations that used to work perfectly can now cling to dry areas and sink into lines. The solution is to focus on hydrating your skin thoroughly before makeup and switching to a lightweight, serum-like foundation or tinted moisturizer that moves with your skin instead of sitting on top of it.
I've heard I should switch to cream products. Does this mean I have to throw out all my powders? Not at all! It’s more about being strategic. Cream blushes, bronzers, and highlighters are fantastic because they blend seamlessly and add a dewy, hydrated look that's very forgiving on mature skin. However, a finely milled, translucent powder is still an excellent tool. Instead of applying it all over, just use a small, fluffy brush to lightly set areas that tend to get shiny, like your T-zone, or to keep concealer from creasing under your eyes.
What's the single most important step to get my makeup to look smooth and natural? Without a doubt, it's skin prep. Your makeup will only ever look as good as the canvas you put it on. Taking a few moments to properly moisturize and prime your skin makes a world of difference. When your skin is plump and hydrated, foundation glides on evenly instead of catching on dry patches. A good primer will also create a smooth surface, helping to soften the look of pores and fine lines for a truly flawless finish.
How can I make my eyes look more awake without using a lot of heavy makeup? A few simple tricks can really open up your eyes. Instead of a harsh black liner, try tightlining your upper lash line with a soft brown or charcoal pencil. This defines your eyes and makes your lashes look fuller without closing them off. Also, focus your mascara on the upper lashes, wiggling the wand at the root for a nice lift. Finally, never underestimate the power of well-groomed brows—they frame your entire face and provide an instant lift.
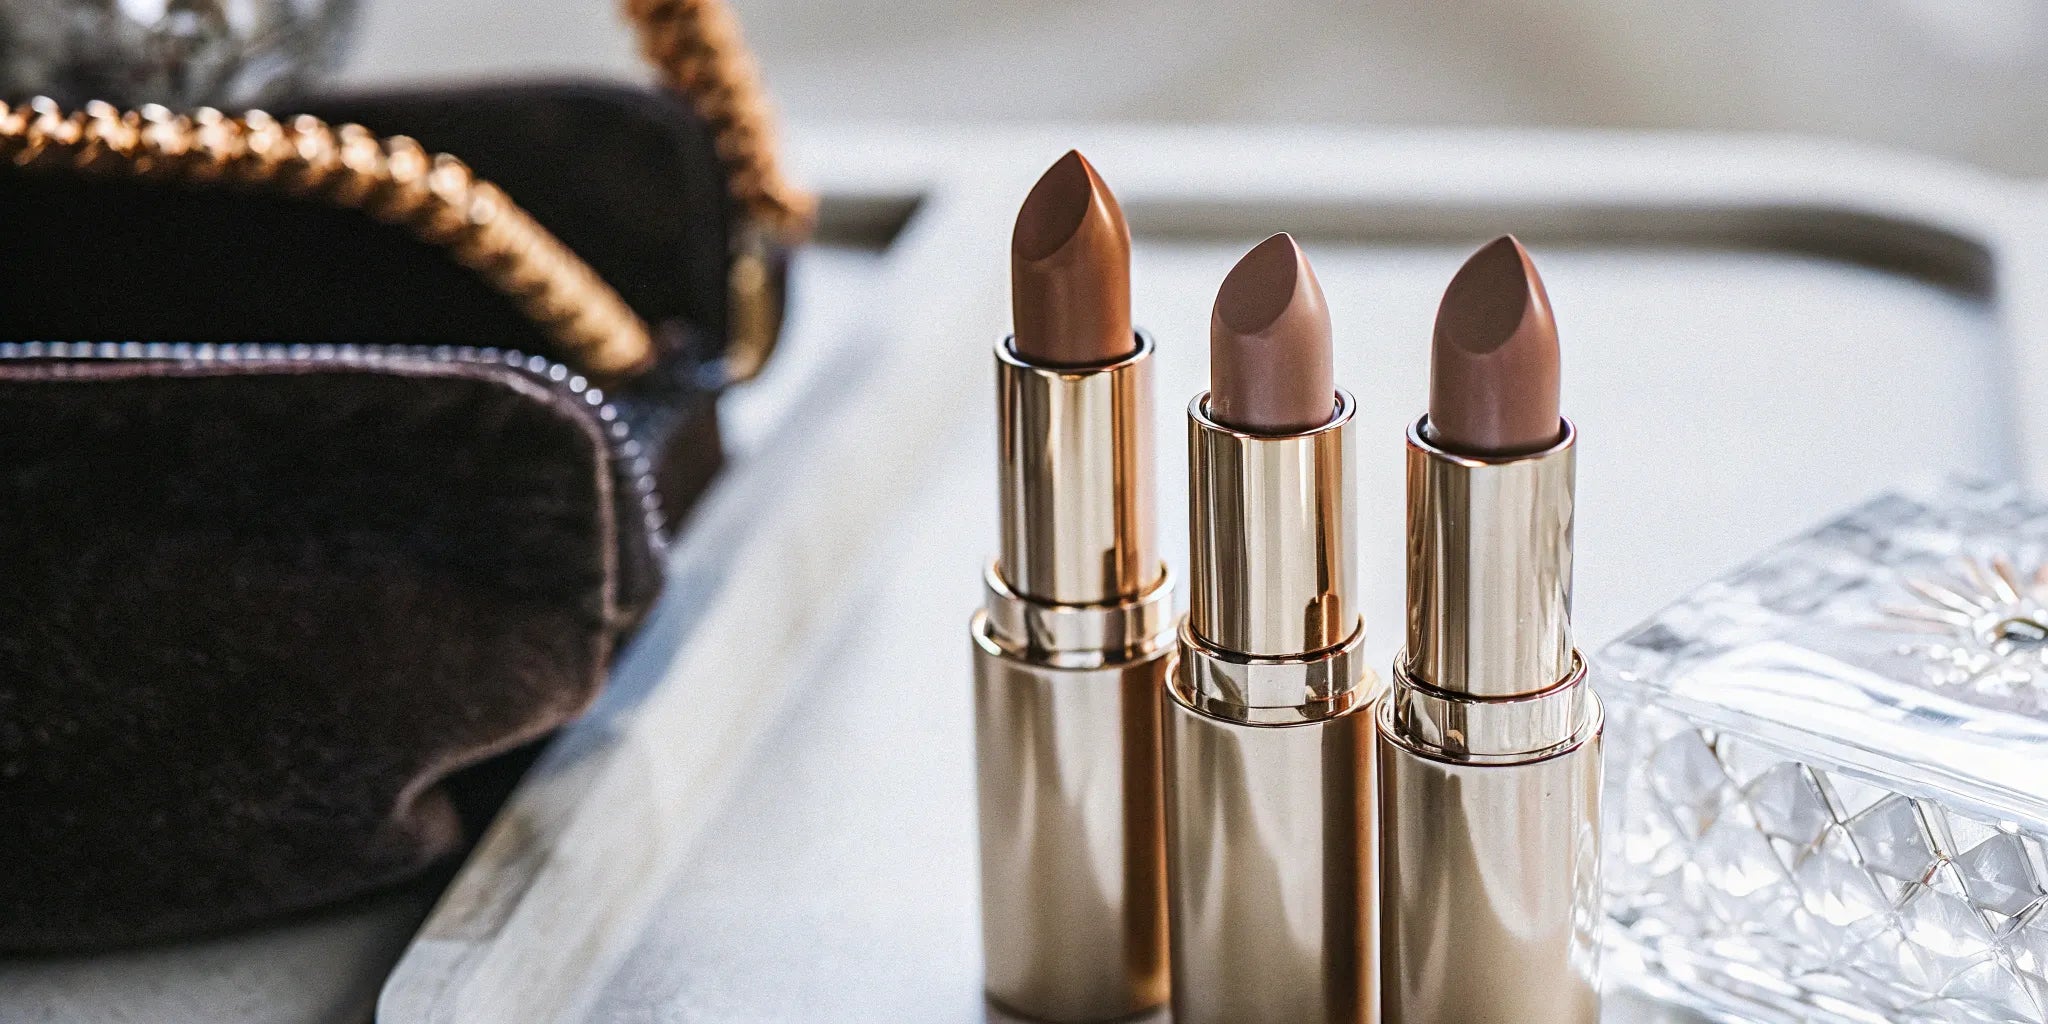
My lipstick tends to feather into the lines around my lips. What can I do? This is a frustrating issue, but it's fixable. The best defense is a good lip liner. Before applying your lipstick, carefully line and lightly fill in your lips with a liner that matches your chosen shade. This creates a barrier that prevents the color from bleeding. Choosing a creamy, hydrating lipstick formula over a very glossy one can also help, as it's less likely to travel outside the lip line.