Natural Eye Makeup for Women Over 50: A Visual Guide
A friend recently told me she felt stuck in a makeup rut. The techniques she’d used for years just weren’t working anymore, and her attempts to find inspiration by searching for pictures of eye makeup for over 50 left her feeling more confused than confident. Her story is so common. As our skin evolves, especially the delicate area around our eyes, our makeup routine needs to evolve, too. This isn't about a complete overhaul, but a simple refresh. It’s about learning how to work with your skin’s new texture to create looks that are flattering and feel authentically you. This guide is for anyone who feels that way—we’ll walk through the essential steps and pro tips to help you feel excited about your eye makeup again.
Key Takeaways
- Create a smooth canvas for lasting results: Always begin with a hydrating eye cream and an eyeshadow primer. This simple prep work prevents makeup from creasing into fine lines and helps your look stay fresh all day.
- Select textures that enhance, not hide: Choose products that work with mature skin. Velvety matte eyeshadows, soft pencil eyeliners, and a lengthening mascara will define your eyes beautifully without looking heavy.
- Focus on techniques that lift and brighten: Apply color with a light hand, blending everything for a soft-focus finish. Place shimmer on the center of the lid to draw light and keep the lower lash line minimal for a more open, awake appearance.
Your Guide to Mature Eye Makeup
As we move through different stages of life, our skin and style evolve—and our makeup routine should, too. This isn't about following a strict set of rules or hiding anything; it's about adapting your techniques to celebrate your beauty right now. The goal is to feel confident and radiant, and the right eye makeup can absolutely help you do that. The skin around our eyes changes over time, becoming more delicate and developing a unique texture. Understanding these shifts is the key to creating looks that are flattering, modern, and feel completely you.
Many of us learned makeup techniques that worked perfectly in our twenties and thirties, but those same methods might not give us the results we want anymore. That’s okay! It’s simply time for a refresh, not a complete overhaul. We'll walk through the simple but essential steps that make all the difference, from prepping your skin to choosing the right products. It all starts with creating the perfect canvas. When you give the delicate skin around your eyes a little extra care, your makeup will not only look better but also last longer. We’ll cover how to properly hydrate the area and why a good primer is your best friend for a smooth, crease-free finish that lets your eyeshadow colors truly shine.
How Your Eye Area Changes
As we get older, the skin around our eyes naturally becomes thinner and more delicate. You might notice more fine lines, a bit of dryness, or that your eyelids don't feel as firm as they once did. This is a completely normal part of life! Recognizing these changes is the first step toward adjusting your makeup application. Instead of working against this new texture, the goal is to work with it. A gentle touch and hydrating products will become your go-to tools for creating a beautiful, smooth look that enhances your features without settling into lines.
Prep Your Skin for a Flawless Finish
The secret to gorgeous eye makeup at any age is what you do before you even pick up a brush. Because mature skin tends to be drier, proper hydration is non-negotiable. Before applying any makeup, gently tap a nourishing eye cream around your entire eye area. This plumps the skin, smooths out fine lines, and creates a hydrated base for your products to glide over. This simple step prevents makeup from looking cakey or settling into creases, ensuring your final look is fresh, radiant, and comfortable all day long.
The Power of a Good Primer
If you're not already using an eye primer, it’s time to start. Think of it as the essential foundation for any eye look. A good primer creates a silky-smooth surface on your eyelid, which is especially helpful for evening out any texture or discoloration. It gives your eyeshadow something to grip onto, preventing it from creasing or fading throughout the day. Plus, it makes the pigment in your eye makeup appear more vibrant and true to its color in the pan. A tiny amount is all you need for a look that stays flawless from morning to night.
Find the Best Products for Mature Eyes
The makeup that worked in your 20s might not be the best fit now, and that’s completely okay. It’s all about adapting your toolkit to work with your skin today. The delicate skin around our eyes often shows changes first, so choosing formulas designed to flatter mature skin can make a world of difference. The right products will enhance your eyes beautifully without settling into fine lines or looking heavy.
The Best Eyeshadows for Mature Skin
As skin changes, you might notice more fine lines or hooded lids. The wrong eyeshadow can crease and draw attention to texture, which is why I always recommend powder formulas. Unlike creams that can slip, a quality powder provides a smoother, long-lasting finish. Opt for matte shades for your main color and definition. While shimmer can be fun, it often emphasizes wrinkles, whereas a beautiful matte adds depth for a sophisticated look. Our eye makeup collection features velvety matte powders perfect for creating a polished finish.
Choose an Eyeliner That Enhances Your Eyes
Eyeliner is fantastic for defining your eyes, but the technique needs a little tweaking. Instead of one thick line, apply liner in soft, short strokes close to the lash line, starting from the outer corner. If the skin on your eyelid is a bit crinkly, gently hold it taut for a smoother application. A soft pencil or even a dark matte eyeshadow applied with a thin, angled brush can be more forgiving than a liquid liner. This gives you a beautifully blended, soft-focus effect that really makes your eyes pop without any harshness.
Pick a Mascara for Fuller-Looking Lashes
A great mascara is a must-have at any age. Lashes can become thinner over time, but the right formula brings them back to life. Look for a mascara that offers both lengthening and volumizing benefits to create the illusion of fuller lashes. I suggest focusing the application on your upper lashes, wiggling the wand from root to tip. This creates a lifting effect that opens up the eyes. A couple of light, clump-free coats is all you need for beautifully framed eyes that look naturally defined and awake. It's a simple step that makes a huge impact.
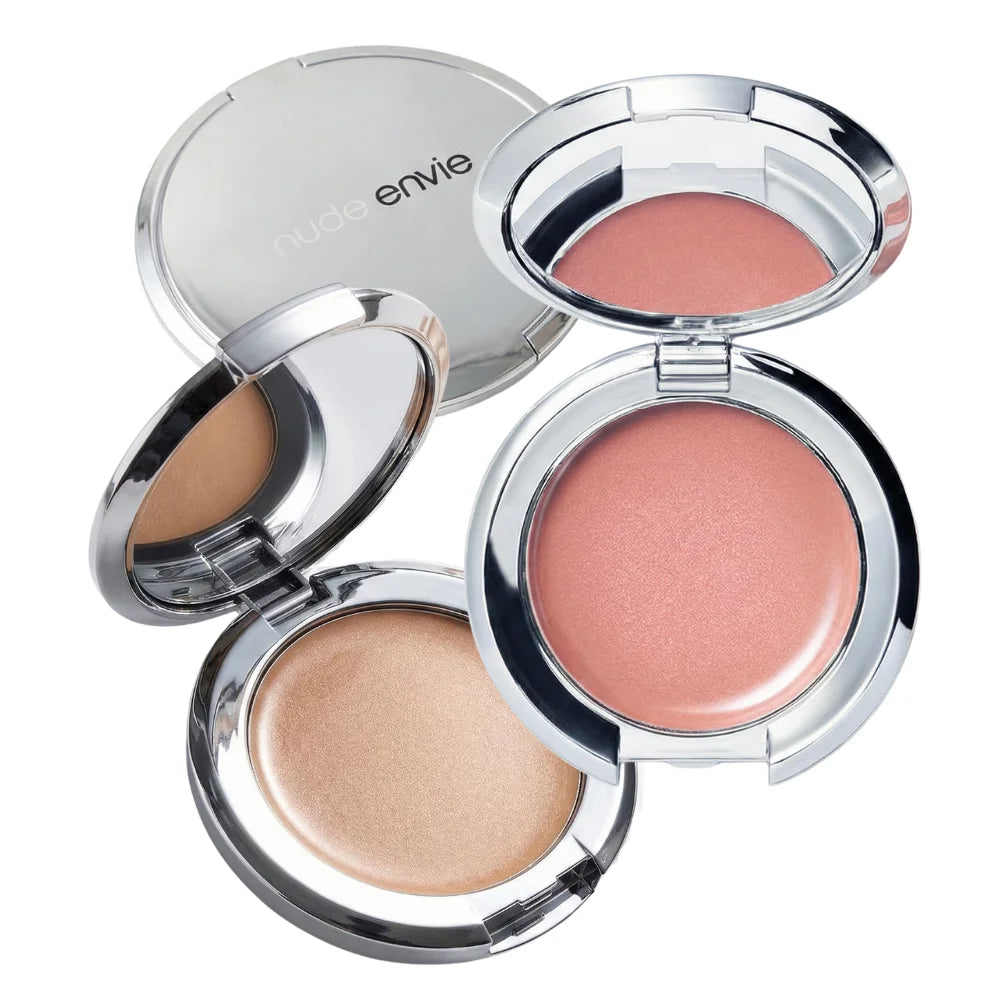
Explore Nude Envie's Natural Eye Collection
The goal of makeup for mature eyes is to subtly enhance your features, not hide them. It’s about letting your natural beauty shine with products that feel as good as they look. The entire Nude Envie eye makeup collection was created with this philosophy in mind. Our clean, luxurious formulas are designed to flatter every skin tone and age, helping you create looks that are effortlessly chic. If you're unsure where to start, a virtual beauty consultation can help you find the perfect shades to build your collection.
A Step-by-Step Guide to Natural Eye Makeup
Applying eye makeup should feel creative and fun, not complicated. With a few simple techniques tailored to mature skin, you can create a beautiful, natural look that highlights your eyes. This guide breaks down the process into five easy steps, from prepping your skin to adding the final brightening touch. Think of these as your new go-to moves for a polished, everyday eye that feels comfortable and looks incredible. Let's walk through it together.
Create a Smooth Canvas
The secret to makeup that looks great and lasts all day starts before you even pick up a brush. As we get older, the delicate skin around our eyes can become drier and more textured. That’s why proper prep is so important. Before applying any color, make sure the area is clean and well-moisturized with a good eye cream. Then, apply a thin layer of a hydrating eyeshadow primer. A primer creates a smooth surface for your eyeshadow to glide over, preventing it from settling into fine lines. It also helps the colors stay true and vibrant all day long.
How to Use Neutral Shades
When it comes to eyeshadow, neutral shades are your best friend for an elegant, timeless look. Colors like soft taupe, warm beige, and muted rose can make your eyes look bigger and brighter without appearing heavy. These shades are incredibly versatile and work to enhance your natural eye color and shape. The goal is to create soft definition, not drama. Start with a light, matte shade all over the lid as your base. Our Nude Envie eye makeup collection is filled with beautifully curated neutral palettes that make choosing the right colors simple and effortless.
Where to Place Your Eyeshadow
Knowing where to apply your eyeshadow makes all the difference. For a lifted effect, apply a medium matte shade from a palette like the Creator Eyeshadow Palette in your crease, just above the natural fold of your eye. This creates depth and dimension. If you love a bit of shimmer, place it strategically. Dab a shimmery shadow on the center of your eyelid, right above the pupil, and on the inner corner of your eye. This placement catches the light and makes your eyes pop. Avoid applying shimmer to areas with more texture, like the outer corners, as it can accentuate fine lines.
Define Your Eyes Without Harsh Lines
Eyeliner is fantastic for defining your eyes, but harsh, thick lines can sometimes look severe. For a softer, more flattering effect, opt for a pencil like our Kohl Eye Pencil or a dark eyeshadow applied with a thin, angled brush. Instead of drawing one solid line, use short, feathery strokes as close to your upper lash line as possible. This technique, called tightlining, makes your lashes look fuller and defines your eyes in a very natural way. If you have trouble getting a steady line, gently rest your pinky on your cheek for stability. A soft brown or charcoal shade is often more forgiving than a stark black.
Brighten Your Eyes Instantly
A final touch of brightness can instantly make you look more awake and refreshed. Take a light, luminous eyeshadow—our Eyeshadow in Luminous is perfect for this—and apply a small amount to the inner corner of your eyes. You can use a small brush or even your fingertip for this. This little trick reflects light and opens up the entire eye area. You can also sweep a tiny bit of this same light shade just under the arch of your eyebrow to create a subtle lift. It’s a simple step that pulls the whole look together for a polished, youthful finish.
Essential Application Tips for Women Over 50
As your skin changes, your makeup techniques can, too. A few simple adjustments to your application routine can make a world of difference, helping you highlight your features beautifully. It’s not about following strict rules, but about discovering what makes you feel confident. These tips are designed to work with your skin, not against it, for a fresh, radiant look every time.
Makeup Tricks for Hooded Eyes
If you have hooded eyes, where the skin of your brow bone covers some of your mobile lid, this trick is a game-changer. Instead of applying your crease color with your eyes closed, try doing it while looking straight ahead into a mirror with your eyes open. This allows you to see exactly where the color needs to go to be visible. Take a soft matte shadow and gently sweep it just above your natural crease. By placing the color a bit higher, you create the illusion of depth and a more lifted eye. Concentrate the color on the outer third of your eye, blending upward and outward to create a subtle, lifted effect.
How to Apply Makeup Around Fine Lines
The key to applying makeup around fine lines is to choose textures that smooth rather than settle. While a touch of shimmer can be beautiful, applying it all over the lid can sometimes accentuate texture. Instead, stick to creamy matte or satin-finish eyeshadows for your main lid color. These formulas glide on smoothly and provide a soft-focus effect. Similarly, a heavy, dark smoky eye can sometimes feel too harsh. For a more modern and flattering look, try a softly defined eye using neutral taupes, browns, or plums that enhance your eye color without overwhelming it. This approach keeps the focus on your beautiful eyes, not the makeup.
Blend Like a Pro
Blending is your best friend for creating a soft, seamless, and sophisticated eye look. Harsh lines can look severe and draw attention to texture, so the goal is to make sure every color melts into the next. After applying your eyeshadow, take a clean, fluffy blending brush and use gentle circular or windshield-wiper motions to diffuse the edges. For eyeliner, try smudging it slightly with a small, dense brush. This creates a softer, smokier line that is incredibly flattering and gives the appearance of a fuller lash line without any harshness. It’s a simple step that makes your entire look appear more polished and professional.
What to Do With Your Lower Lash Line
Applying dark liner or shadow along the lower lash line can sometimes drag the eye down, cast shadows that accentuate dark circles, and make your eyes appear smaller. For a brighter, more open look, it’s often best to keep the lower lash line clean and simple. If you feel bare without any definition, try this: take a light matte brown shadow on a small, angled brush and press it very gently into the roots of your outer lower lashes. This adds just a whisper of definition without the heaviness of a full line. The main focus should always be on lifting the eye upward for a fresh, awake appearance.
Where (and How) to Use Shimmer
You can absolutely wear shimmer! The secret is all in the placement. To avoid highlighting texture, place shimmery or satin eyeshadows on the smoothest parts of your eyelid. A perfect spot is right in the center of your mobile lid, just above your pupil. A light tap of a luminous shade here will catch the light when you blink, making your eyes look bigger and brighter. The inner corner of the eye is another fantastic place for a pop of light. Use your pinky finger or a small pencil brush to apply a touch of a light, shimmery shadow to instantly brighten your entire face and make you look more awake.
Classic Eye Makeup Looks to Master
Once you have your products and techniques down, you can start creating beautiful, timeless looks. The key is to focus on enhancing your features with elegance and confidence. Forget complicated trends and instead focus on these five classic eye makeup styles that are flattering at any age. Each one can be adapted to your personal style, whether you prefer something understated for the daytime or a touch more glamour for the evening. These looks are designed to be your go-to staples, helping you feel polished and put-together for any occasion. With a few high-quality products and a little practice, you’ll be able to master each one. If you ever want personalized guidance on which shades suit you best, a virtual beauty consultation can offer tailored advice to help you perfect your application.
The Everyday Natural Look
This is your essential, "you but better" look. The goal here isn’t to look like you’re wearing a lot of makeup, but to subtly enhance your features so you look bright and awake. The focus is on letting your natural beauty shine through. Start with a single, neutral matte eyeshadow swept across your entire lid, from the lash line to the crease. Choose a shade that is close to your skin tone, like a soft beige, taupe, or peach. This simple wash of color evens out any discoloration on the lid and creates a clean canvas. Finish with a coat of mascara to define your lashes, and you’re ready to go.
The Softly Defined Eye
When you want a little more definition than the everyday natural look provides, this is the perfect next step. It adds dimension to your eyes without using harsh lines or dark colors. After applying a light, neutral shade to your inner eyelid and under the brow bone to brighten, take a slightly deeper matte shade and gently blend it into your crease. Use a soft, fluffy brush and a light hand to build the color gradually. This technique creates a gentle contour that makes your eyes appear larger and more defined. You can also use this deeper shade to lightly line your upper lash line for a soft, smoky effect.
The Subtle Smoky Eye
A smoky eye can feel intimidating, but a softer version is incredibly chic and flattering. The trick is to avoid heavy black shadows, which can make eyes look smaller and settle into fine lines. Instead, opt for softer hues like charcoal, deep plum, or rich brown. Concentrate the darkest color close to your upper lash line, then use a clean blending brush to smudge and diffuse it upwards and outwards. Keep the color below the crease to maintain a lifted look. This modern approach gives you that sultry, defined effect without feeling heavy, making it a beautiful choice for an evening out.
A Look for Special Occasions
For those moments that call for a little extra polish, you can create a sophisticated look that feels special without being over the top. Instead of glitter, which can emphasize texture, try a cream eyeshadow or a powder with a subtle satin finish. These formulas provide a beautiful, luminous glow that catches the light elegantly. A creamy eyeshadow stick is perfect for this, as it glides on smoothly and gives a subtle radiance. Apply it to the center of your lid for a pop of light. This creates a refined and festive look that’s perfect for weddings, dinners, and celebrations. You can find stunning options in our eye makeup collection.
The Perfect Evening Eye
Creating an elegant evening look is all about strategic shimmer. A beautiful shimmery taupe or bronze applied to the center of your eyelid can make your eyes glow and draws attention to them in the best way. This placement helps create a focal point that can even draw attention away from crow's feet. Pair this with a well-defined lash line using a soft pencil liner, and finish with two coats of a volumizing mascara. The combination of soft shimmer and dark, full lashes creates a look that is both glamorous and sophisticated, ensuring your eyes are the center of attention for all the right reasons.
Make Your Makeup Last All Day
Once you’ve perfected your look, the last thing you want is for it to fade by lunchtime. A few simple adjustments to your routine can make a world of difference in your makeup’s staying power, keeping you looking fresh from your morning coffee to your evening plans. It’s all about smart prep, patient application, and the right finishing touches.
Common Makeup Mistakes to Avoid
One of the biggest culprits behind makeup that doesn’t last is using products that are too heavy. Thick, dense formulas have a tendency to settle into fine lines, which can accentuate texture and make your makeup look less flattering as the day goes on. Instead of reaching for heavy powders or full-coverage foundations, opt for lightweight, hydrating formulas. The goal is to enhance your features, not mask them. Choosing the right eye makeup with a creamy, blendable texture will help you create a look that feels comfortable and stays put without creasing or looking cakey.
How to Keep Your Makeup in Place
Great makeup starts with great skin. Think of your skincare routine as the foundation for everything else you apply. A clean, well-hydrated canvas helps makeup go on smoother and last much longer. Before you even think about primer, make sure your skin is moisturized. After applying your moisturizer and sunscreen, give them at least ten minutes to fully absorb. This simple pause prevents your makeup from sliding around and ensures it adheres properly to your skin. A consistent skincare routine not only improves your skin’s health but also creates the perfect base for a look that lasts all day.
The Right Way to Layer Your Products
Patience is your best friend when it comes to layering makeup. Applying products too quickly without giving them a moment to set can cause them to mix together, leading to a heavy or uneven finish. Whether you’re applying primer, foundation, or concealer, work in thin layers and allow each one to settle into the skin before moving on to the next. This technique helps each product perform its job correctly and builds a more durable, natural-looking finish. For example, when using a cream blush, tap it on gently and blend, then wait a minute before adding any finishing powder. This small step makes a huge impact.
Set Your Makeup for a Lasting Finish
Setting your makeup is the final, crucial step to lock everything in place. A common mistake is applying powder all over, which can leave mature skin looking dry and flat. Instead, be strategic. Use a light dusting of a translucent powder only on areas that tend to get oily, like your T-zone. For the rest of your face, a dewy setting mist can provide a fresh, radiant finish without compromising longevity. Throughout the day, if you notice any shine, reach for blotting sheets instead of more powder. They absorb excess oil without disturbing your makeup, keeping you looking polished. You can even build your own collection with the perfect finishing products for your skin type.
Secrets from a Professional Makeup Artist
Sometimes, the difference between a good makeup day and a great one comes down to a few simple techniques. Professional makeup artists have a playbook of tricks that help them create stunning, long-lasting looks on any face. The best part? These secrets aren't complicated. They’re small adjustments to your routine that can make a world of difference in how your makeup looks and feels. By incorporating a few of these pro tips, you can refine your application and create a polished, natural look that highlights your best features with confidence and ease.
Adapt Your Technique for Any Eye Shape
The goal of any eye makeup application is to make your eyes appear bigger, brighter, and more lifted. As we get older, the skin around our eyes can change, so your technique might need to change with it. A great rule of thumb is to avoid very dark, heavy makeup like a traditional smoky eye, which can sometimes make eyes look smaller. Instead, focus on creating brightness. Using shimmery shades strategically—like just on the center of the lid or the inner corner—can add a beautiful pop. The key is to enhance your eyes with light and dimension, creating a look that feels fresh and awake.
How to Pair Eyeshadow Colors
Choosing the right eyeshadow colors doesn't have to be complicated. A simple, foolproof method is to use three complementary neutral shades: a light, a medium, and a dark one. Start by sweeping the lightest shade all over your eyelid, from the lash line to the brow bone. This creates a bright, even base. Next, apply the medium shade into your crease to add depth and definition. Finally, use the darkest shade on the outer corner of your eye in a soft "V" shape to create the illusion of an almond shape and add a subtle lift. This classic eyeshadow technique works every time to softly sculpt and define your eyes.
The Must-Have Brushes and Tools
The right tools can completely change your makeup game. Before you even think about eyeshadow, an eye primer is your best friend. A thin layer of primer creates a smooth surface for makeup, prevents it from creasing in fine lines, and helps the color stay vibrant all day. When it comes to brushes, you only need a few key players. A flat shader brush is perfect for packing color onto the lid, a fluffy blending brush is essential for softening edges and creating seamless transitions, and a small pencil brush allows for precise application along the lower lash line or in the outer corner. Investing in a good eye primer and a few quality brushes makes application easier and more effective.
Master Your Application Pressure
How you apply your products is just as important as which products you use. A light, gentle hand is the secret to a soft, blended, and sophisticated look. When applying eyeliner, for example, use soft, short strokes right at the base of your lashes instead of trying to draw one single, harsh line. This technique creates a fuller-looking lash line that defines your eyes without closing them off. The same principle applies to eyeshadow; build the color gradually in thin layers. This gives you more control and prevents the color from looking heavy or patchy. Using a lighter touch ensures your eye makeup looks beautifully diffused and seamlessly blended into your skin.
Related Articles
- How to Perfect Your Eye Shadow Routine | Nude Envie
- How to Give Your Eyes a Lift Without Botox | Nude Envie
- Mature Skin | Nude Envie
- Eye Shadow to Lift the Eyes | Nude Envie
- Why Nude Lipstick is Perfect for Mature Skin | Nude Envie
Frequently Asked Questions
Can I still wear shimmer eyeshadow over 50? Yes, you absolutely can! The secret is all in the placement. Instead of sweeping a shimmery shadow all over your lid, use it as a strategic accent. A dab of a luminous shade on the very center of your eyelid or a touch on the inner corner of your eye will catch the light beautifully. This brightens your entire look without drawing attention to any texture.
My eyeshadow always creases by the end of the day. How can I stop this? This is a common frustration, and the fix is surprisingly simple. The most important step you can take is to apply an eyeshadow primer before any color. A good primer creates a smooth, even canvas on your eyelid for the shadow to adhere to. This prevents the product from moving around and settling into fine lines, keeping your look fresh all day.
What's the best way to apply eyeliner if my eyelids aren't as smooth as they used to be? The key is to move away from trying to draw one single, perfect line. Instead, use a soft pencil or even a dark matte eyeshadow on a thin, angled brush. Gently hold your eyelid taut and apply the color in short, soft strokes right at the base of your lashes. This technique gives you a beautifully defined lash line that looks fuller and softer, without any skipping or harshness.
Should I avoid putting any makeup on my lower lash line? For a brighter, more lifted look, it’s often best to keep the lower lash line minimal. A dark, heavy line underneath your eye can sometimes create shadows and make your eyes appear smaller. If you feel you need a little definition, try pressing a light matte brown shadow into the roots of your outer lower lashes with a small brush. This adds a whisper of color without weighing the eye down.
I have hooded eyes. What's the single most important tip for me? The biggest game-changer for hooded eyes is to apply your crease color while your eyes are open and you're looking straight into a mirror. This allows you to place the shadow slightly above your natural crease, ensuring the color is actually visible. This technique creates the illusion of depth exactly where you need it, giving your eyes a more defined and lifted shape.