Flawless Finish: Makeup Tips for Mature Skin

Does your foundation seem to settle into fine lines no matter how you apply it? Are you tired of lipstick feathering or powder blush emphasizing texture you’d rather soften? These common frustrations can make makeup feel more like a chore than a joy. The good news is that the solution isn't about applying more product—it's about using the right ones with the right techniques. This guide is your resource for actionable makeup tips for mature skin that address these hurdles head-on. We’ll show you how to create a smooth, radiant base and choose formulas that work with your skin for a flawless, comfortable finish that lasts all day.
Key Takeaways
- Embrace Cream Formulas for a Hydrated Glow: As skin changes, swap powders that can settle into lines for hydrating creams and liquids. Products like cream blush and satin lipsticks blend seamlessly for a radiant, skin-like finish.
- Master Your Technique with Blending and Placement: How you apply makeup matters more than how much you use. Press foundation into the skin with a damp sponge for a flawless base and apply blush on the apples of the cheeks, blending upward to create a natural lift.
- Define Your Features with a Softer Touch: Create a polished look without harsh lines. Use a lip liner to keep color in place, try tightlining the upper lash line for fuller-looking lashes, and gently fill in brows to frame your face.
What Your Skin Needs as It Matures
As your skin evolves, so should your makeup routine. The products and techniques that worked for you years ago might not deliver the same results now. But that’s not a bad thing—it’s an opportunity to discover new ways to highlight your features and achieve a radiant, timeless look. Understanding what your skin needs is the first step toward mastering an application that feels fresh, modern, and authentically you. It’s all about working with your skin, not against it, to create a finish that looks and feels beautiful.
How Your Skin Changes
The makeup that was your holy grail in your twenties might not be your go-to anymore, and that’s completely okay. As we age, our skin naturally changes. You might notice a different texture, a bit less elasticity, and skin that feels drier than it used to. This isn't about fighting these changes, but learning to work with them. The key is to adapt your routine and be open to trying new formulas and techniques. A simple switch in product or application can make all the difference in creating a fresh, radiant look that celebrates your skin exactly as it is now.
Key Ingredients for Skincare Prep
A flawless makeup application always starts with well-prepped skin. Mature skin often needs more hydration, as our natural levels of hyaluronic acid—the molecule responsible for retaining moisture—tend to decrease over time. When shopping for skincare and makeup, look for products packed with nourishing ingredients. Hyaluronic acid is a hero ingredient for adding a plump, hydrated feel. Vitamins B, C, and E are also fantastic for soothing and protecting the skin. Think of your makeup as an extension of your skincare; the right ingredients will keep you looking radiant long after you've applied your lipstick.
Common Makeup Hurdles (and How to Clear Them)
One of the most common instincts is to apply more makeup to cover fine lines or uneven tone, but this can often have the opposite effect. Heavy, matte foundations and powders can settle into creases, making them more noticeable and creating a dated, heavy look. The secret is often to use less product, not more. Opt for lightweight, liquid, or cream formulas that melt into the skin for a luminous, second-skin finish. A sheer wash of a creamy blush can add a youthful flush of color without emphasizing texture, proving that a light touch is your most powerful tool.
Create the Perfect Base
A truly radiant makeup look begins long before you pick up a brush. Creating a smooth, hydrated canvas is the secret to a flawless finish that looks fresh all day. When your skin is well-prepped, your makeup glides on beautifully instead of settling into fine lines or clinging to dry patches. Think of it as priming a wall before you paint—it makes all the difference in the final result and how long it lasts. This prep work doesn't have to be complicated, but it is the most important step for mature skin. It’s about giving your skin what it needs to look its best, so your makeup can enhance your natural beauty rather than mask it.
As skin matures, its texture and hydration levels change, which means the way we apply makeup needs to adapt too. The goal is no longer to cover, but to enhance. A well-prepared base ensures that products like foundation and concealer work with your skin, not against it. It prevents that heavy, cakey look and instead promotes a luminous, skin-like finish that looks healthy and vibrant. By focusing on hydration and using the right products to smooth your skin's texture, you create a base that not only looks better but feels more comfortable throughout the day. Let’s walk through the simple steps to build a perfect base.
Your Pre-Makeup Skincare Routine
The first step to gorgeous makeup is always great skincare. Before anything else, make sure your skin is clean and deeply hydrated. Start with a gentle cleanser, followed by a hydrating serum and a rich moisturizer to plump the skin and create a smooth surface. This simple routine helps your makeup apply evenly and prevents it from looking dry or cakey. Well-hydrated skin is the foundation for everything that follows, ensuring your makeup looks like a second skin, not a mask.
Choose the Right Primer
Think of primer as the bridge between your skincare and your makeup. A good primer can fill in fine lines, soften the look of pores, and give your foundation something to grip onto for longer wear. For mature skin, a hydrating primer is fantastic for adding an extra layer of moisture and creating a dewy, glowing base. If you’re concerned about texture, a silicone-based primer can help makeup glide on smoothly. Apply a thin layer to your face, eyelids, and even your lips to prepare every area for color.
Find and Apply Your Perfect Foundation
When it comes to foundation, less is always more. The goal is to even out your skin tone, not cover it up. Choose a lightweight liquid formula that feels hydrating and looks like skin. Heavy, matte foundations can settle into lines and accentuate texture, while a luminous formula will give you a more youthful, radiant finish. For the most natural application, use a damp makeup sponge or a foundation brush to gently press and blend the product into your skin. This technique melts the foundation seamlessly for an undetectable finish. If you need personalized help finding your perfect shades, a virtual beauty consultation can offer expert guidance.
How to Use Color Correctors
Color correctors are a game-changer for neutralizing discoloration before you even apply foundation. If you have dark spots, redness, or dark under-eye circles, a light layer of a color corrector can work wonders. A peach or pink-toned corrector is perfect for counteracting blue or purple tones under the eyes and brightening the area. Simply tap a small amount onto the areas of concern with your finger or a small brush before applying your foundation or concealer. This targeted approach allows you to use less concealer later on, keeping your base light and fresh.
Make Your Eyes Shine
The eyes are where we show so much expression, and the right makeup can make them look bright and captivating. As skin matures, the delicate area around the eyes changes, which just means our techniques get to evolve, too. The goal is to enhance and define your eyes without using heavy products that can settle into fine lines. A few simple adjustments to how you apply eyeliner, eyeshadow, and mascara can create a more open, lifted appearance that looks fresh all day.
It’s all about working with your features, not against them. Soft, blendable formulas and strategic placement are your best friends. Forget about complicated, multi-step tutorials that require a dozen products. We’ll walk through how to define your lash line for a fuller look, choose eyeshadows that glide on smoothly, and frame your face with beautifully shaped brows and curled lashes. These small steps make a huge impact, giving you a polished and radiant look that feels completely you. With the right approach, you can draw attention to your eyes in a way that feels both effortless and elegant, ensuring your makeup complements your natural beauty instead of masking it.
Tips for Hooded Lids
If you have hooded lids, you know that eyeliner and shadow can sometimes disappear when your eyes are open. The key is to create definition that stays visible. Instead of a harsh pencil, try using a dark brown eyeshadow with a damp, fine-tipped eyeliner brush. This creates a softer, more diffused line that’s incredibly flattering. When applying liner to your lower lash line, concentrate the color on the outer third of the eye. This simple trick draws the eye outward and upward, making your eyes appear larger and more open. It’s a subtle change that delivers a beautifully lifted effect.
How to Apply Eyeliner
A well-applied eyeliner can make your lashes look thicker and your eyes more defined. For a soft yet impactful look, consider a rich gel or kohl pencil. Brown often looks more natural than a stark black. One of the best techniques for mature eyes is tightlining, which means applying liner to your upper waterline, right underneath your top lashes. This method defines the eye and adds the illusion of fullness at the lash line without taking up any visible lid space. Our Kohl Eye Pencil in Define is perfect for this, offering rich color with a smooth glide.
Eyeshadow Application Made Easy
When it comes to eyeshadow, texture is everything. Cream formulas are fantastic because they glide over the skin without catching or creasing, and their moisturizing properties are a bonus for drier skin. They are incredibly easy to blend with just your fingertips for a seamless wash of color. If you prefer powders, look for finely milled, velvety textures that won’t look chalky. Our eyeshadow palettes are designed to be buttery and buildable. A satin or matte finish on the lid is often more flattering than heavy shimmer, which can sometimes emphasize texture. Apply a lighter shade all over the lid to brighten, and a medium shade in the crease to add soft dimension.
Frame Your Face: Lashes and Brows
Your lashes and brows are the beautiful frames for your eyes, and giving them a little attention completes any makeup look. Always start by curling your eyelashes—it’s a non-negotiable step that instantly opens up the eyes. When you apply mascara, build it up in thin layers to get both length and volume without clumping. For extra fullness, try applying two coats of brown mascara first, then finish with a single coat of black. Don’t forget your brows! Well-defined brows structure your entire face. Use a light hand to fill in any sparse areas with a quality brow product like our Brow Envie Perfect Brow Trio.
Add a Natural, Radiant Color
As we age, our skin can lose some of its natural vibrancy. The right color products can bring back that healthy, youthful warmth, but the key is choosing the right formulas and application techniques. Forget harsh lines or cakey finishes; the goal is a soft, radiant glow that looks like it’s coming from within. By focusing on creamy textures and strategic placement, you can add dimension and life to your complexion for a truly flawless finish. It’s all about enhancing your natural beauty, not covering it up.
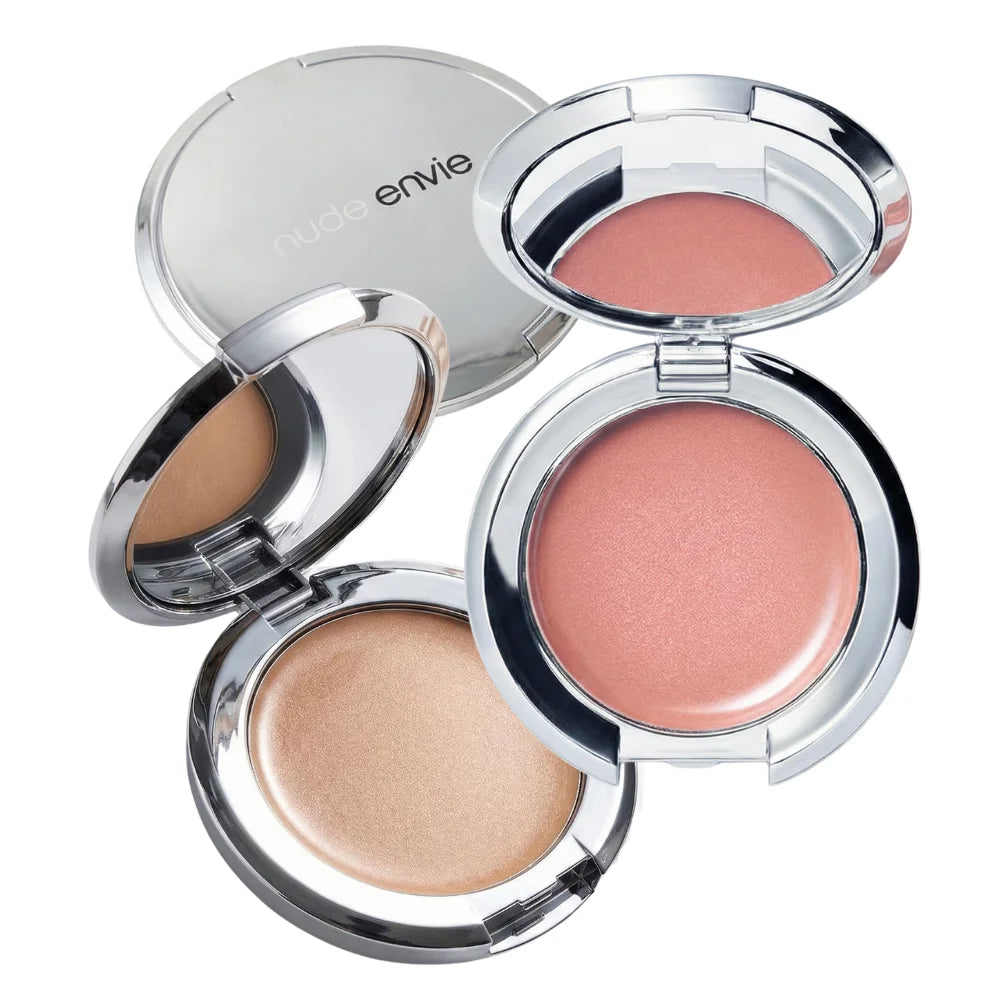
Cream vs. Powder: Which Is for You?
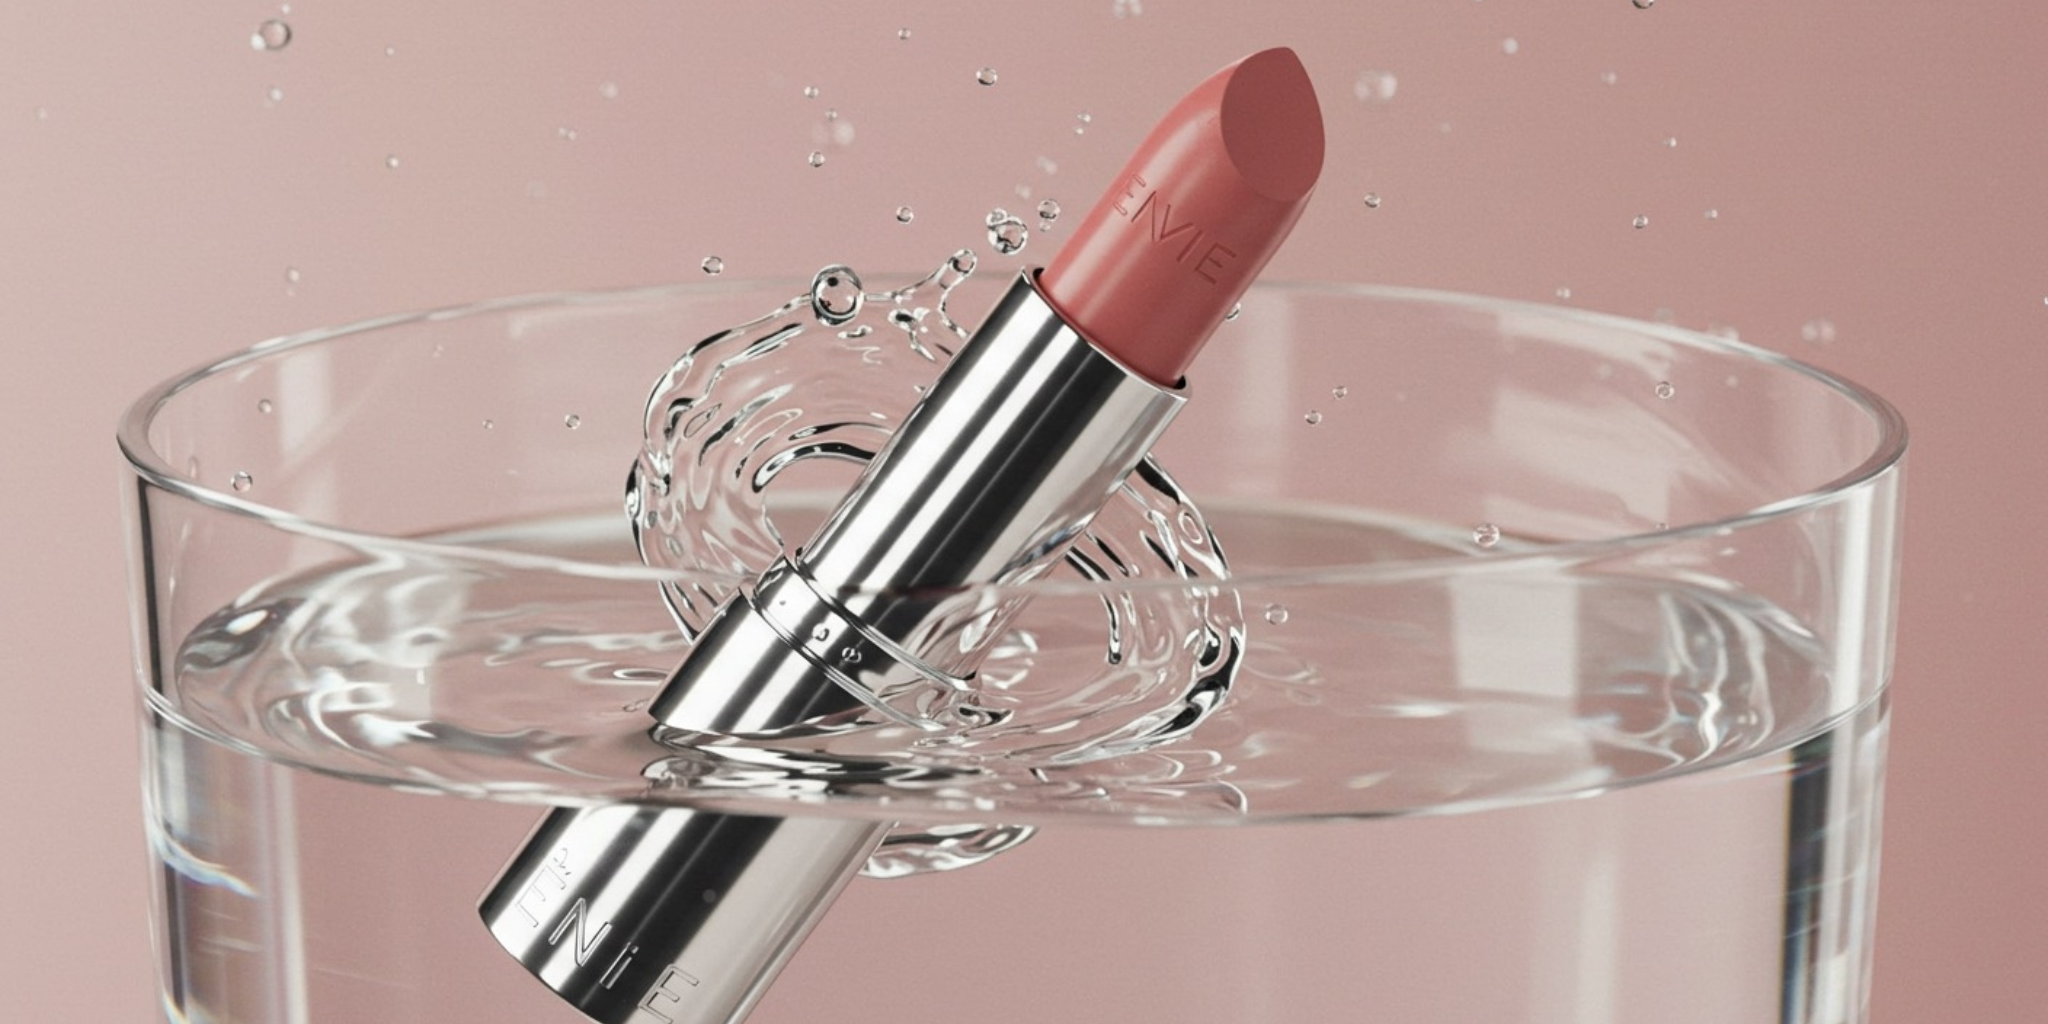
If you’ve been loyal to powder blush for years, it might be time to make a switch. As skin matures, it tends to become drier, and powders can sometimes emphasize fine lines and texture. Cream formulas, on the other hand, are a game-changer. They glide on smoothly, blend seamlessly into the skin, and often contain hydrating ingredients that add a dewy, youthful plumpness. A great cream blush melts into your foundation, giving you a natural-looking flush that won’t settle into creases. This simple swap can make a world of difference in achieving a fresh, radiant complexion.
Where to Apply Blush for a Natural Flush
The way you apply blush can instantly change the look of your face. To create a lifted effect, smile softly to find the apples of your cheeks—that’s your starting point. Dab a small amount of cream blush there, then use your fingers or a dense brush to blend the color upward and outward, moving toward your temples. This technique draws the eye up, creating a subtle lift that defines your cheekbones without any harsh contouring. Avoid applying blush too low on your face, as this can drag your features down. The goal is a gentle, believable flush that brightens your entire face.
How to Highlight for a Subtle Glow
A touch of highlighter can bring a beautiful luminosity to your skin, but it’s important to be strategic. Instead of glittery powders, opt for a cream or liquid highlighter that imparts a subtle, pearlescent sheen. This creates a genuine-looking glow rather than a sparkly finish. Using your fingertip, lightly tap the product onto the high points of your face where light would naturally hit: the tops of your cheekbones, the bridge of your nose, and just above your cupid's bow. This technique adds a touch of radiance and dimension, making your skin look healthy and hydrated.
Contour Gently for Soft Definition
Contouring doesn’t have to be complicated or dramatic. For mature skin, the goal is to add soft definition and warmth, not to create sharp angles. Cream and gel bronzers are perfect for this. Their blendable formulas add a natural-looking warmth and gently shape the face. Apply a small amount just below your cheekbones, along your jawline, and on your temples to create a soft shadow. Be sure to blend thoroughly so there are no obvious lines. This gentle approach enhances your bone structure while maintaining a fresh, natural appearance.
Perfect Your Lip Look
A beautifully defined lip can brighten your entire face and complete your makeup look. As we get older, the natural shape and color of our lips can soften, and fine lines may appear around the mouth. The right techniques and products can address these changes, helping you create a polished, youthful pout that feels comfortable and lasts all day. It’s not about changing your look, but enhancing the beautiful features you already have. From preventing color from bleeding to choosing the most flattering, hydrating formulas, these simple steps will help you master a flawless lip every single time.
Stop Lipstick from Feathering
One of the most common frustrations with lipstick is when it "feathers" or bleeds into the fine lines around your mouth. The best way to prevent this is with a good lip liner. Think of it as a primer and a barrier all in one. By outlining your lips first, you create a crisp, defined edge that holds your lipstick in place. For the most natural look, choose a shade that matches your lips or your chosen lipstick color. Gently trace just along your natural lip line to define your shape and give the appearance of subtle fullness. This simple step makes a world of difference in keeping your color looking sharp and clean.
Choose Hydrating Lip Products
Matte lipsticks can look incredibly chic, but they can also be drying and may settle into lines, making lips appear less full. Instead, opt for creamy or satin-finish lipsticks that glide on smoothly and provide a dose of moisture. These formulas often contain nourishing ingredients that keep your lips feeling soft and comfortable throughout the day. If your lips are particularly dry, a touch of a hydrating lip gloss over your lipstick can add a beautiful sheen and extra hydration. Prepping your lips with a balm before you even start your makeup routine is also a great habit to get into for a smooth canvas.
How to Apply Lipstick Flawlessly
For a professional-looking application, start with your lip liner. After outlining your lips, lightly shade them in toward the center. This creates an even base and ensures your lip color wears off more evenly. Next, take your lipstick and apply it directly from the tube or with a lip brush for more precision. Start at the center of your lips and blend the color out toward the corners. For a final touch that adds dimension, dab a small amount of a sheer, complementary gloss right in the center of your bottom lip. This little trick catches the light and creates the illusion of a fuller, more luscious pout.
Make Your Lip Color Last All Day
To give your lip color serious staying power, a lip liner is your best friend. After outlining your lips, use the side of the pencil to fill in your entire lip area. This creates a waxy base that your lipstick can grip onto, extending its wear time significantly. Apply your favorite lipstick over the liner. For even more longevity, gently blot your lips with a tissue, then apply a second, lighter coat of lipstick. This layering technique helps set the color, ensuring it stays vibrant and in place for hours without needing constant touch-ups. You can confidently go about your day knowing your lip look is locked in.
Find the Right Tools and Techniques
Having the right makeup is only half the battle; how you apply it makes all the difference. The secret to a truly flawless, skin-like finish lies in your tools and techniques. The right brushes can diffuse color beautifully, while the perfect blending method ensures your makeup never looks like it’s just sitting on top of your skin. It’s about working with your products to create a seamless look that enhances your features without settling into fine lines.
Think of your brushes and sponges as your artists’ instruments. They give you the control to build, blend, and set your makeup for a polished look that lasts. Mastering a few key application methods will completely change your makeup game, helping you achieve that radiant, put-together look every single time.
Select Your Brushes and Sponges
When applying makeup on mature skin, your tools can be your best friends. For liquid and cream formulas, like foundation or a dewy cream blush, try using a damp beauty sponge. A sponge helps melt the product into the skin, giving you a smoother, more integrated finish that looks incredibly natural. It presses the product in, rather than just moving it around, which is key for avoiding a heavy or cakey appearance.
For powders, opt for soft, fluffy brushes that don’t pack on too much product at once. The goal is a light dusting of color or setting powder, not a thick layer. Using the right tools ensures your cream blush gives you a perfect, natural flush every time.
Master the Art of Blending
Blending is absolutely crucial for a flawless look, especially when you want to prevent makeup from emphasizing texture or fine lines. Using a damp sponge or a flat foundation brush helps everything blend smoothly and keeps products from settling where you don’t want them. The key is to use gentle patting or stippling motions to press the makeup into your skin.
If you notice any makeup gathering in creases throughout the day, don’t worry. Just use a Q-tip to gently swipe away the excess, then blend the area again with your brush or sponge. This simple trick keeps your makeup looking fresh and smooth. It’s the perfect way to apply our lip and cheek creams for a seamless wash of color.
How to Set Your Makeup
The idea of using powder can be a little scary, as no one wants a dry or cakey finish. The trick is to use it very, very lightly. A light dusting of a fine, translucent powder is all you need to keep your makeup in place without dulling your skin’s natural radiance. Focus on lightly setting areas where concealer tends to crease, like under your eyes and around your smile lines.
For extra staying power, a setting spray can help the powder blend into your foundation and make your makeup last longer. This final step ensures your look stays put while maintaining a fresh, hydrated appearance, allowing your beautiful highlighter to shine through all day.
Pro Tips for a Flawless Finish
Once you’ve mastered the basics, a few extra tricks can make all the difference in your makeup application. These are the secrets that take your look from good to truly radiant, ensuring it looks just as fresh hours later as it did when you first applied it. It’s all about smart layering, quick fixes, and choosing products that work with your skin, not against it. With these tips in your back pocket, you’ll feel confident that your makeup is enhancing your natural beauty all day long.
Layer Your Products Like an Expert
Think of your makeup application as building a beautiful look, layer by layer. Start with a hydrating primer after your skincare to create a smooth, glowing canvas. When you apply foundation, use a damp sponge or a flat foundation brush to press and blend the product into your skin. This technique gives you a seamless finish and prevents makeup from settling into fine lines. For color, cream products are your best friend. They melt into the skin for a natural, dewy look that powders can’t always replicate. A touch of cream blush on the apples of your cheeks will give you a healthy, youthful flush.
Quick and Easy Touch-Up Tricks
Even the most perfectly applied makeup can need a little refresh throughout the day. If you notice foundation creasing or settling into expression lines, don’t panic. Simply take a cotton swab and gently swipe away the excess product, then use your finger or a brush to lightly blend the area again. It’s a simple fix that works wonders. To keep everything in place and give your skin a fresh, hydrated look, a light mist of setting spray is a game-changer. It helps powders and creams meld together beautifully, taking away any powdery finish and locking in your look for hours.
Tips for All-Day Wear
The secret to long-lasting makeup often starts with using less product than you think you need. A lightweight, liquid foundation that feels like a second skin will wear more gracefully than a heavy, full-coverage formula. Also, pay attention to what’s underneath. A heavy daytime moisturizer can cause makeup to slide off, so opt for lighter lotions before you apply your primer. Look for makeup infused with skin-loving ingredients like hyaluronic acid and vitamins. These ingredients help nourish and moisturize your skin, so you’re getting skincare benefits while wearing your favorite products.
Common Makeup Mistakes to Avoid
As we get more comfortable with our makeup routines, it’s easy to fall into habits that no longer serve our skin. What worked beautifully a decade ago might not create the same effect today. The key is to adapt your techniques and product choices to celebrate your skin exactly as it is now. Let’s walk through a few common makeup missteps and how to adjust them for a fresh, radiant finish that feels like you. Think of these not as mistakes, but as simple swaps that can make a world of difference in your daily look.
Picking the Wrong Products
The truth is, as your skin changes, your makeup should, too. Don't be afraid to experiment with new formulas to find what makes you feel your best. Heavy, matte foundations, for example, can settle into fine lines and emphasize texture. Instead, look for lightweight liquid foundations that provide coverage while looking like a second skin. The same principle applies to concealer; a hydrating formula is less likely to crease or look cakey under the eyes. If you’re unsure where to start, a virtual beauty consultation can offer personalized advice to help you find your perfect match.
Common Application Missteps
One of the most transformative shifts you can make is adopting a "less is more" approach. Applying too much product can actually make you look older by causing makeup to gather in lines. Start by applying foundation only where you need it to even out your skin tone, then blend it out carefully. If you notice makeup settling into creases throughout the day, don't panic. Simply take a clean Q-tip to gently swipe away the excess, then use your brush or a fingertip to re-blend the area. This small trick keeps your makeup looking smooth and fresh from morning to night.
Working with Textures and Formulas
Switching from powder to cream formulas can be a game-changer for mature skin. Cream-based products tend to be more hydrating and melt into the skin for a seamless, natural finish. For a youthful flush, try a cream blush, which glides on smoothly without settling into fine lines. The same goes for eye makeup; cream eyeshadows offer a smooth application that won’t look dry and can be more moisturizing than their powder counterparts. As a general rule, try to avoid overly matte or oil-free products, as these are formulated for oily skin and can sometimes appear drying.
Get Ready for Any Special Occasion
Whether it’s a wedding, a milestone birthday, or an elegant evening out, special occasions call for makeup that not only looks beautiful but also lasts from the first photo to the last dance. The key is using the right techniques and products to create a look that’s both durable and radiant. With a few simple adjustments to your routine, you can feel confident that your makeup will stay flawless through any event, no matter the lighting or the weather.
Techniques for Long-Lasting Looks
To ensure your makeup has staying power, focus on how you apply your base. Using a damp beauty sponge to press liquid and cream products into the skin is a game-changer. This technique helps melt the makeup for a seamless, skin-like finish that’s less likely to shift or settle into fine lines. It works beautifully with everything from foundation to our cream-to-powder Envie de Blush.
Once your makeup is complete, a final mist of setting spray is essential. A good setting spray locks everything in place and can help meld powder products into the skin, removing any chalky appearance and creating a unified, natural look that lasts for hours.
How to Look Great in Photos
Flash photography can be unforgiving, but the right makeup choices will have you looking your best in every shot. Instead of a flat, matte finish, choose foundations that give your skin a radiant, healthy glow. Luminous formulas catch the light beautifully and prevent your skin from looking dull in pictures.
For the under-eye area, a concealer with light-reflecting properties is your best friend. It works to brighten shadows and create a well-rested, vibrant appearance. This simple swap can make a huge difference in photos, helping you look as refreshed as you feel. Explore our best sellers to find products that deliver that perfect, photo-ready radiance.
Makeup That Withstands Heat and Humidity
Warm weather and humid climates present a unique challenge, but your makeup can hold up with the right preparation. It all starts with your skincare. Before any makeup, apply hydrating products like a hyaluronic acid serum followed by a broad-spectrum SPF. Avoid heavy, thick creams during the day, as they can cause your makeup to slide right off.
Next, a hydrating primer will create a smooth, glowing canvas that helps your foundation adhere better and last longer. For color, stick with lightweight formulas. A swipe of a nourishing lip gloss and a touch of cream blush will give you a fresh, polished look that feels comfortable and stays put, even when the temperature rises.
Related Articles
- Flawless Everyday Makeup for 50 Year Olds: A Guide | Nude Envie
- 5 Looks: Pictures of Eye Makeup for Over 50 | Nude Envie
- Basic Makeup for Over 50: A Step-by-Step Guide | Nude Envie
- A Beginner's Guide to Basic Makeup for Over 50 | Nude Envie
Frequently Asked Questions
My foundation always settles into my fine lines. What am I doing wrong? This is such a common issue, and it usually comes down to the formula and your application. Heavy, matte foundations can be drying and tend to sink into creases as the day goes on. Try switching to a lightweight, hydrating liquid formula that has a more radiant finish. Also, how you apply it matters. Instead of wiping foundation on, use a damp makeup sponge to gently press and bounce the product into your skin. This creates a seamless, second-skin finish that's much less likely to settle.
How can I cover dark circles without my concealer looking heavy or cakey? The secret here is to work smarter, not harder. Before you even reach for concealer, try using a color corrector. A small amount of a peach or pink-toned corrector tapped over any dark areas will neutralize the blue or purple tones. This means you'll need much less concealer on top to get the job done. When you do apply concealer, choose a hydrating formula and apply it only where you need it, blending the edges well with your ring finger or a small brush.
I've used powder blush for years, but now it looks dry on my skin. Should I just skip it? Definitely not! A flush of color is one of the best ways to bring life to your complexion. This is the perfect opportunity to try a cream blush. Cream formulas are a game-changer because they melt right into your skin, giving you a natural, dewy glow that looks like it’s coming from within. They don't sit on top of the skin or emphasize texture the way powders sometimes can. Just tap a small amount onto the apples of your cheeks and blend upward toward your temples for a subtle lift.
My lipstick always bleeds into the lines around my mouth. How can I make it stop? A good lip liner is the absolute best solution for this. It creates a clean border that keeps your lipstick exactly where you want it. Choose a liner that closely matches your natural lip color or your lipstick shade. Carefully outline your lips, then lightly fill them in completely before applying your lipstick. This creates a waxy base for the color to grip onto, which not only prevents feathering but also helps your lipstick last much longer.
I want my eyes to look more defined, but heavy eyeliner feels too harsh now. What's a softer alternative? A great technique for defined yet soft eyes is called tightlining. Instead of drawing a line on top of your eyelid, use a soft kohl or gel pencil to apply color to your upper waterline, which is the rim right underneath your top lashes. This makes your lash line look instantly thicker and more defined without a visible, harsh line on your lid. Using a rich brown pencil instead of a stark black can also create a softer, more natural effect that's incredibly flattering.