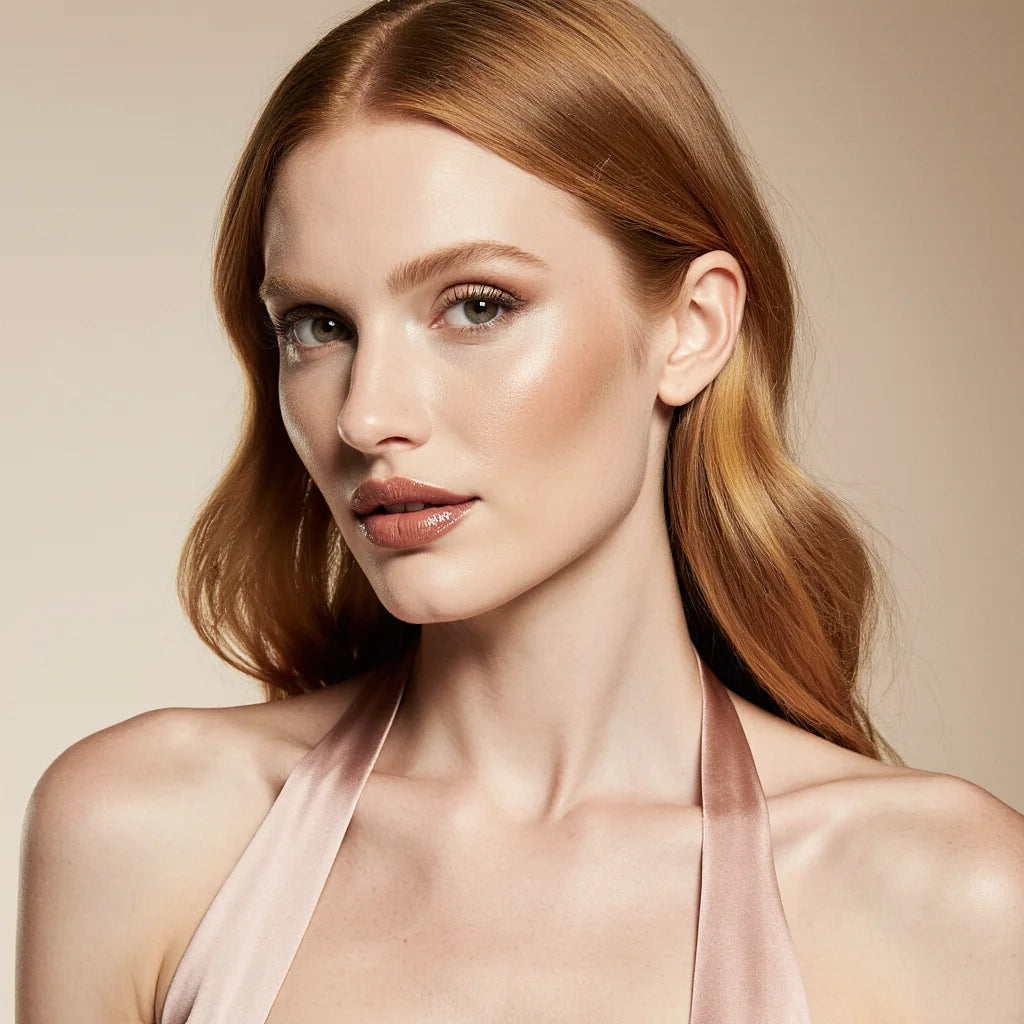
Where to Apply Highlighter for a Radiant Glow
Think of highlighter not just as a way to add shine, but as a tool to gently sculpt and define your features with light. When used correctly, it can create the illusion of higher cheekbones, brighter eyes, and a more defined jawline, all without a single contouring powder. It’s about working with your unique face shape to bring your best features forward. This artistic approach turns makeup into a personalized ritual. The foundation of this technique is understanding where to apply highlighter. By strategically placing light on the high points of your face, you create a soft-focus, dimensional effect that looks effortlessly polished and naturally radiant.
Key Takeaways
- Highlight with Intention: Apply product only to the high points of your face, like cheekbones and brow bones, to create natural-looking dimension and lift. This strategic placement is what separates a sophisticated glow from simple shine.
- Choose the Right Tools for Your Skin: Your skin type and undertone are your best guides. Cream highlighters give a dewy finish perfect for dry skin, while powders offer a controlled shimmer for oily skin. Matching the shade to your undertone ensures the glow looks like it's your own.
- Technique Is Key for a Natural Finish: The secret to a believable glow is to start with a small amount of product and blend until there are no visible edges. Use your fingertips or a damp sponge to gently press the highlighter into your skin for a seamless, lit-from-within look.
What Is Highlighter (and Why You'll Love It)
If you’ve ever admired someone’s radiant complexion and wondered how they got that fresh, dewy glow, highlighter is likely their secret. Think of it as your personal lighting crew in a compact. This light-reflecting makeup product is designed to catch the light and draw attention to the high points of your face, adding dimension and a beautiful luminosity. It’s the key to faking a full night’s sleep and achieving that coveted “lit-from-within” look. Whether you prefer a subtle sheen or a striking shimmer, incorporating a
What Does Highlighter Do?
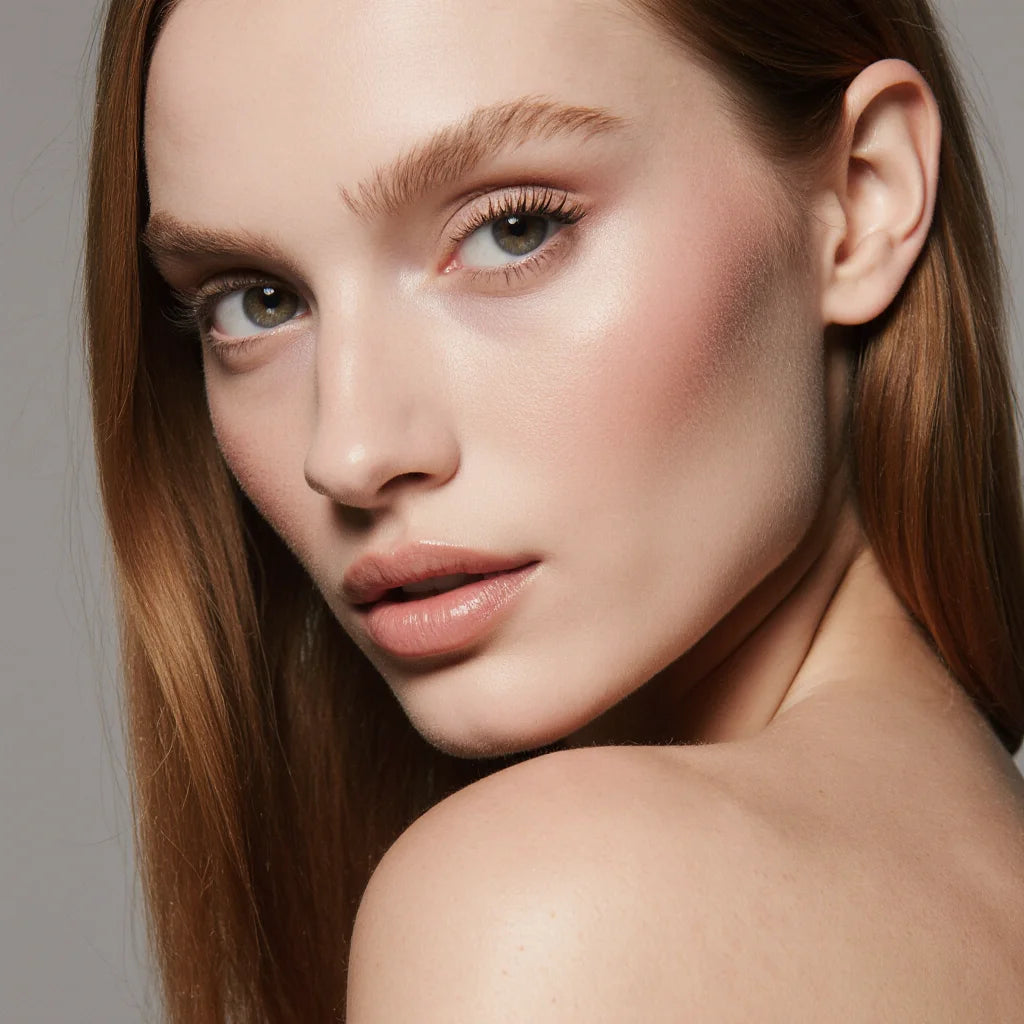
At its core, highlighter makes your face appear more defined, bright, and youthful. By strategically applying it, you can create the illusion of light hitting your features in the most flattering way. It can make your cheekbones stand out, your jawline look sharper, and your nose appear more refined. A touch of highlighter can also make your eye makeup pop, making your eyes look bigger and your brows appear more lifted. Even your lips can look fuller with a carefully placed dab of shimmer on your cupid's bow. It’s a versatile tool that works with the rest of your makeup to enhance your natural bone structure and give your skin a healthy, radiant finish.
Powder, Liquid, or Cream: Which Is for You?
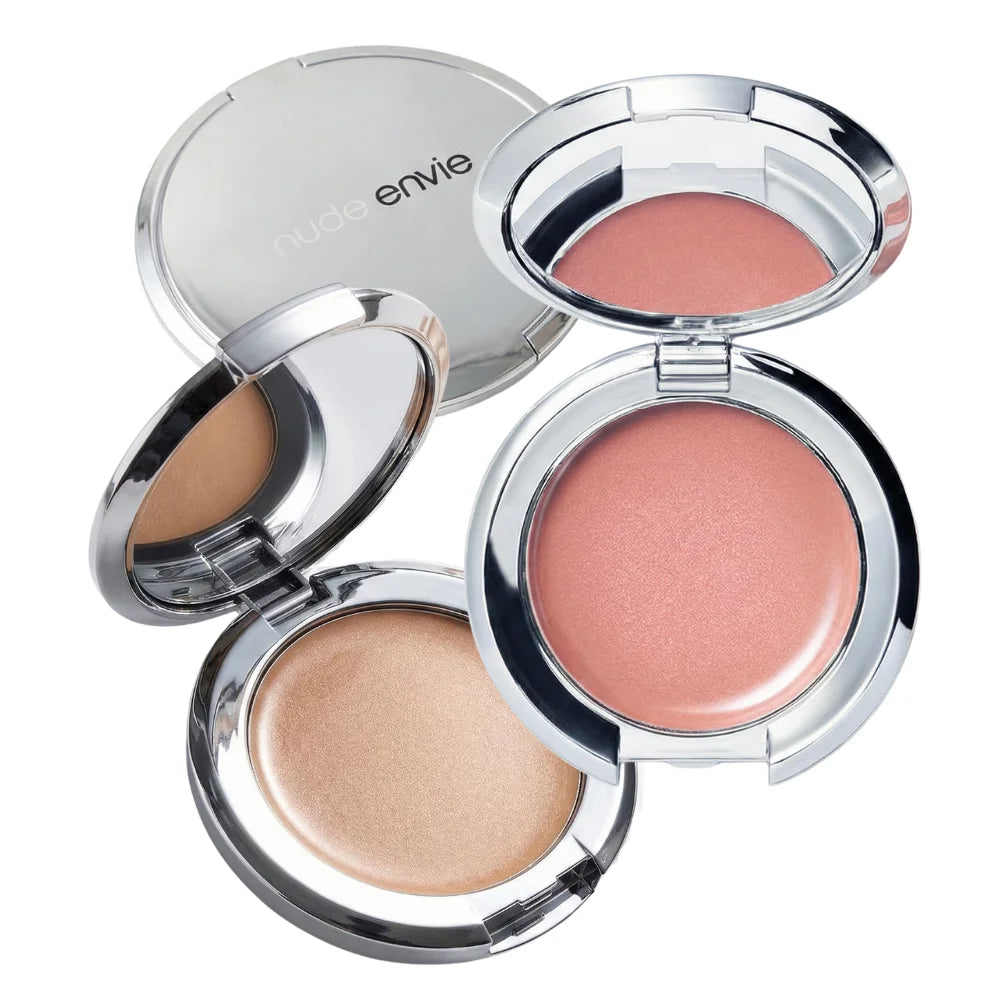
Choosing the right highlighter formula often comes down to your skin type and the finish you want to achieve. Generally, liquid and cream highlighters are fantastic for those with dry or mature skin. These formulas are designed to melt into your skin, providing a hydrated, dewy finish that looks incredibly natural. Cream formulas are especially wonderful for a soft, believable glow. If you have oily or combination skin, a powder highlighter might be your best friend, as it can help control shine while still delivering a beautiful shimmer. You can build your own collection with the perfect formula to complement your foundation and blush, creating a seamless and radiant look.
Where to Apply Highlighter for a Natural Glow
Think of highlighter as your secret weapon for a radiant, "lit-from-within" look. The key is knowing exactly where to place it. Instead of applying it all over, you want to strategically hit the high points of your face where light would naturally catch. This simple technique adds dimension and brings your best features forward, giving you a healthy, luminous finish without looking glittery. Ready to get glowing? Here are the key spots to focus on for a flawless, natural look.
Lift Your Cheekbones and Temples
For an instant lift, your cheekbones are the perfect place to start. Using a soft brush, gently sweep your highlighter in a "C" shape. Begin at the top of your cheekbone, just above where you applied your blush, and curve the product up toward your temple. This placement not only makes your cheekbones pop but also gives your entire face a subtly lifted appearance. It’s one of the most effective ways to create definition and add a beautiful, sophisticated sheen to your complexion. Our Golden highlighter is perfect for creating this soft, luminous effect that catches the light just right.
Brighten Your Eyes and Nose
Want to look more awake in seconds? A little highlighter around your eyes works wonders. Place a tiny dab on the inner corner of each eye to instantly brighten them up. You can also add a touch to the center of your eyelids for a subtle pop that makes your eyes appear larger and more vibrant. To add a bit of definition to your nose, lightly dust highlighter down the bridge, stopping before you get to the tip. Then, add a small dot right on the tip. This creates the illusion of a more sculpted, refined nose. This technique pairs beautifully with a soft wash of color from our eye makeup collection.
Define Your Lips and Inner Corners
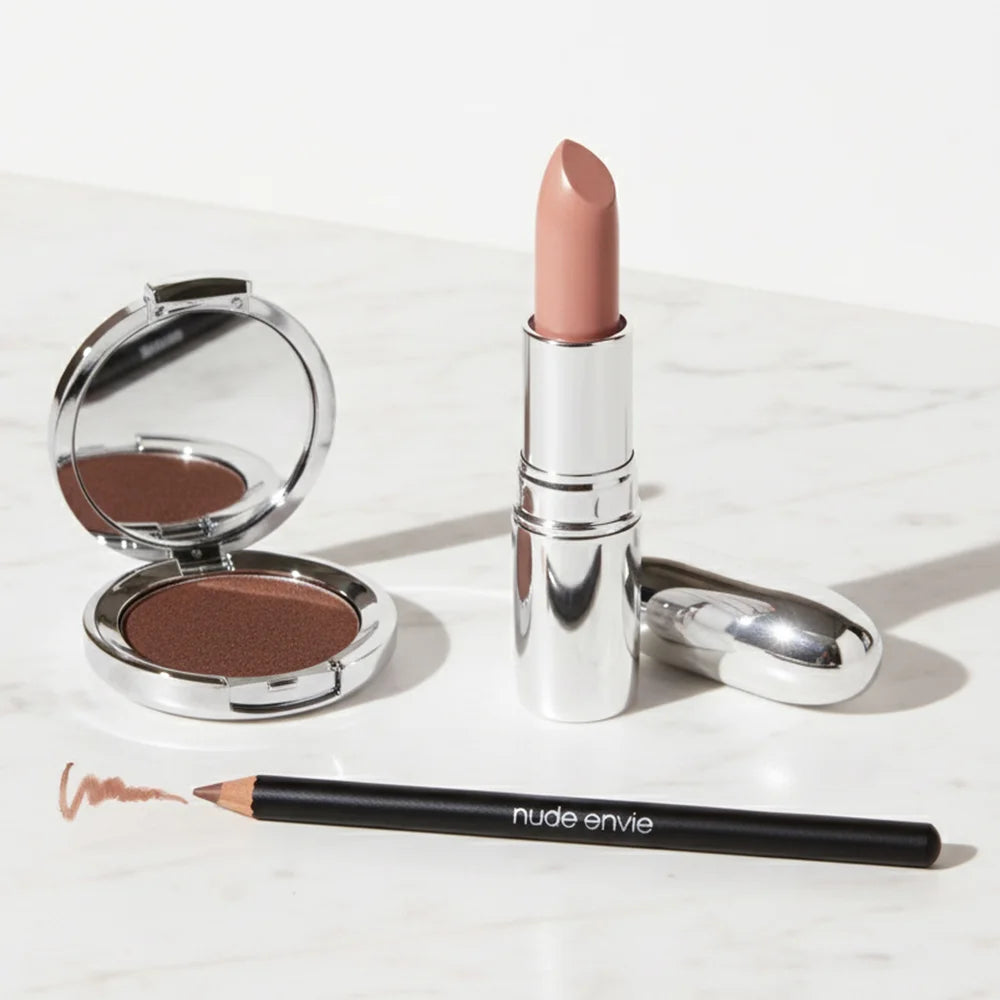
A few well-placed dabs of highlighter can beautifully define your features. We already mentioned the inner corners of your eyes for a brightening effect, and that same principle applies to other small areas. To create the look of a fuller pout, apply a touch of highlighter to your Cupid’s bow, which is the small dip just above the center of your upper lip. This simple step catches the light and enhances your lip shape. For a more defined brow, sweep a little highlighter just beneath the arch of your eyebrow. This creates a clean line and adds a subtle lift to your eyes. This trick looks stunning when paired with your favorite Nude Envie lipstick.
Other Places to Add a Touch of Light
Once you’ve highlighted the main points on your face, there are a few other spots you can touch for an all-over glow. If you’re wearing an open neckline, sweeping a bit of highlighter across your collarbones adds an elegant, defined look. You can also add a touch to the center of your chin to balance the glow from your forehead and nose. Remember the key spots: the tops of your cheekbones, the bridge of your nose, your Cupid's bow, and your brow bone. Mastering these placements allows you to build a look that’s as subtle or as radiant as you want it to be. Feel free to experiment and build your own collection with the perfect highlighter and complementary products for your signature look.
Find Your Perfect Highlighter
Finding the right highlighter is like finding the perfect pair of jeans: it should fit you flawlessly and make you feel amazing. The perfect shade and formula will melt into your skin, creating a believable, lit-from-within radiance instead of just sitting on top. With so many options, it can feel a little overwhelming, but it doesn't have to be. Let's break down how to choose the highlighter that will become your new favorite, focusing on formula, undertone, and shade to get your glow just right.
Choose Your Formula: Powder, Liquid, or Cream
The texture of your highlighter can make a big difference in the final look. If you have oily or combination skin, a powder formula can help you achieve a beautiful sheen without adding extra shine. For those with dry or mature skin, a cream highlighter is a fantastic choice. It adds a dose of hydration and creates a dewy, natural-looking glow that won’t settle into fine lines. Our Créme-to-Powder Highlighter gives you the best of both worlds: it applies like a silky cream and sets to a long-lasting, luminous powder finish that works for all skin types.
Match Your Skin's Undertone
For the most natural-looking glow, try matching your highlighter to your skin's undertone. Not sure what yours is? A quick look at the veins on your wrist can help. If they appear blue or purple, you likely have cool undertones. If they look greenish, you probably have warm undertones. If you can’t quite tell, you may be neutral. For cool undertones, look for pearly or silvery shades. For warm undertones, golden and peachy hues are stunning. If you're still unsure, a virtual beauty consultation can offer personalized advice to help you find your perfect match.
Pick the Right Shade for Your Skin Tone
Once you know your undertone, you can narrow down the perfect shade based on your skin tone. For fair and light skin, highlighters with a touch of pearl, champagne, or soft pink will beautifully complement your complexion. Medium skin tones look radiant in golden, peachy, or warm champagne shades. If you have a deep or dark skin tone, you can really play with rich, warm colors. Look for highlighters in shades of warm bronze, rich gold, or copper to create a stunning, warm glow that enhances your natural radiance.
Master Your Highlighter Application
Once you've found your perfect shade, the real magic is in the application. The right tools and techniques are what create a subtle, believable glow instead of a stripe of glitter. Mastering your application ensures your highlighter melts into your skin for that coveted lit-from-within radiance. It all comes down to your applicator, blending technique, and layering with intention.
Your Toolkit: Brushes, Sponges, or Fingers?
The tool you choose depends on the formula and the effect you want. For cream and liquid highlighters, your fingertips are often best. The warmth from your skin helps the product melt seamlessly for a natural finish. For precise placement on the tip of your nose or cupid's bow, a small brush works wonders. You can also gently tap highlighter onto the inner corners of your eyes, which pairs beautifully with a soft eye makeup look. A damp beauty sponge is also great for pressing product into the skin without disturbing your foundation, giving you a soft, diffused radiance.
Blend for a Seamless, Radiant Finish
Blending is the most crucial step for a flawless finish. The goal is to diffuse the product so there are no harsh lines, making the glow look like it’s coming from your skin. Use a light hand and gentle tapping motions with your finger or a damp sponge to melt the highlighter into your skin. If you're using a brush, use soft, sweeping motions to buff out the edges. A great tip is to blend the edge of your highlighter into your blush for a completely seamless transition of color and light on your cheeks. This creates a beautiful, cohesive look that appears effortlessly natural.
Layer for a Subtle or Standout Glow
The intensity of your glow is completely up to you. For a subtle daytime look, a single, sheer layer is perfect. If you want more radiance, you can build it up by layering. Always start with a small amount and add more as needed. For a high-impact effect, try applying a cream highlighter first, then setting it with a light dusting of a powder highlighter. This technique creates a beautiful, multi-dimensional shine that stays put. It's all about creating a look that feels right for you, just like when you build your own collection of makeup essentials.
Apply Highlighter for Your Face Shape
While the classic highlighter spots work beautifully for just about everyone, you can take your glow to the next level by tailoring your application to your unique face shape. Think of it as strategic placement. Instead of just adding shine, you’re using light to play up your favorite features and create a sense of balance and dimension. This isn’t about trying to change your face; it’s about celebrating what you have and learning how to make it pop. It's a subtle shift in mindset that can completely change how you approach your makeup routine, making it feel more personal and effective.
Understanding your face shape helps you place your highlighter with intention. For some, this might mean creating the illusion of higher cheekbones, while for others, it could be about softening angles or adding a touch of width. It’s a simple adjustment that makes a significant impact, turning a standard makeup step into a personalized technique. With the right creamy highlighter and a little know-how, you can sculpt and define your features in the most natural, radiant way. Before you even pick up a brush, take a moment to look at your face in the mirror and identify its beautiful structure. Are your cheekbones prominent? Is your jawline soft or defined? Answering these questions will guide your hand and help you achieve a truly custom glow.
For Round and Oval Faces
If you have a round or oval face, your goal is to add a bit of definition and lift. For round faces, applying highlighter in thin, slightly more vertical strokes can create a subtle illusion of length and angles. Instead of a wide sweep on the cheekbone, try placing the product a little higher up, blending it toward your temple. A light touch down the center of your forehead and chin can also help guide the eye vertically, adding soft dimension. Oval faces are quite versatile, but this technique can also give your bone structure an extra-defined, sculpted appearance when you’re in the mood for it.
For Square and Heart-Shaped Faces
For square and heart-shaped faces, the key is to soften angles and create balance. A great technique is to apply highlighter in a "C" shape. Start at the top of your cheekbone and gently curve the product up and around your temple, toward the end of your eyebrow. This placement softens the corners of a square face and draws light upward, which helps balance a wider forehead on a heart-shaped face. If your face is heart-shaped, you can also add a small dab of highlighter to the center of your chin to bring a little light to the lower part of your face.
For Long Faces
If you have a long face, your highlighter can help create the illusion of a little more width. The trick is to think horizontally. Apply your highlighter to the apples of your cheeks and blend it outward, toward your ears. This horizontal application draws the eye from side to side, which can make your face appear a bit wider and your cheekbones more pronounced. Try to avoid applying highlighter in long, vertical lines down the bridge of your nose or the center of your forehead, as this can emphasize length. A horizontal sweep of light is your best friend for a balanced, beautiful glow.
Common Highlighter Mistakes (and How to Fix Them)
Highlighter is all about creating that beautiful, lit-from-within radiance. But sometimes, a simple slip of the hand can take your look from glowing to glittery. The good news is that the most common highlighter mishaps are incredibly easy to fix. If you’ve ever felt your highlighter looked a little too obvious or just not quite right, you’re not alone. Many of us have been there, ending up with a stripe of shimmer instead of the soft, ethereal glow we were hoping for. The key is to understand how light and texture play together on your skin. With a few small adjustments to your technique, you can make sure your glow always looks intentional, natural, and effortlessly chic. Let’s walk through a few frequent mistakes and how to correct them for a flawless finish every time.
Using Too Much or Applying in the Wrong Place
One of the quickest ways to go wrong with highlighter is by applying too much product. High-quality formulas are often very pigmented, so a little truly goes a long way. Starting with a heavy hand can create a stark, metallic stripe instead of a soft sheen. Another common issue is choosing a shade that doesn't complement your skin tone, which can look unnatural.
The fix: Always start with a minimal amount of product on your brush or finger. You can build up the intensity gradually. If you do apply too much, simply take a clean, fluffy brush or a damp makeup sponge and gently buff over the area to diffuse the product. This will soften the edges and tone down the shimmer for a more believable glow.
Forgetting to Blend
Have you ever spotted someone with a distinct line of shimmer on their cheekbones? That’s usually the result of unblended highlighter. When highlighter isn't seamlessly melted into your skin and the makeup underneath it, it sits on top of your face and looks artificial. The goal is to create a glow that appears to come from your skin itself, not from a product you’ve applied.
The fix: Blending is non-negotiable. Whether you use your fingertips, a sponge, or a brush, take a moment to gently tap and press the product into your skin until there are no visible edges. For a truly seamless look, you can even go over the edges with the brush you used for your blush to marry all the products together.
Highlighting Bumps or Texture
Highlighter works by catching the light, which means it illuminates and brings forward anything you put it on. While this is great for high points like your cheekbones, it can backfire if you apply it over areas with texture, such as bumps, acne, or fine lines. Placing shimmer on these spots can emphasize them, creating a look that’s shiny but not in a flattering way.
The fix: Be selective with your placement. Apply highlighter only to the smoothest surfaces of your face. If you have texture on the tops of your cheeks, try applying your glow just a bit higher or lower. If you’re unsure about the best placement for your features, a virtual beauty consultation can offer personalized advice to help you highlight your best assets.
Adjust Your Technique for Your Skin Type
The secret to a truly flawless glow isn’t just about where you apply highlighter, but also how you adapt your technique for your skin. The right formula and application can make the difference between a radiant finish and one that emphasizes texture or shine. Think of it as a partnership between your makeup and your skin. When they work together, the result is a beautiful, natural-looking luminosity that looks like it comes from within. By choosing the right product for your skin’s needs, you ensure your glow looks effortless and intentional.
Tips for Dry or Mature Skin
If your skin is on the drier side or you’re working with mature skin, a cream highlighter will be your new best friend. Cream formulas melt into the skin, providing a dewy, natural-looking glow without settling into fine lines. They offer a touch of hydration and give your skin a plump, youthful radiance that powder can sometimes flatten. To apply, use your fingertips to gently tap the product onto the high points of your face. The warmth from your fingers helps it blend seamlessly for a finish that looks like real, healthy skin.
Tips for Oily or Combination Skin
For those with oily or combination skin, the goal is to get a glow without adding extra shine. This is where a great powder highlighter comes in. Powder formulas are perfect for adding radiance while helping to control excess oil. Our Golden Highlighter gives you a sophisticated sheen that won’t slide around or contribute to a greasy look by midday. Use a soft, fluffy brush to lightly sweep the powder over your cheekbones and brow bones. This gives you precise control and builds a luminous finish that looks intentional and polished, not oily.
Make Your Glow Last All Day
Want a glow that sticks with you from your morning coffee to your evening plans? The key is often in the formula and layering. Liquid highlighters are fantastic for their staying power, as they create a stunning, lit-from-within look that really lasts. For any formula, you can set your look with a light dusting of translucent powder around the highlighted areas (not directly on top) to keep everything in place. Another pro tip is to apply a cream or liquid highlighter first, then set it with a light layer of a matching powder highlighter for a truly bulletproof glow.
Get That "Lit-From-Within" Look
The secret to that enviable, healthy radiance isn’t complicated. It’s all about using highlighter to play with light, creating a glow that looks like it comes from within. Forget the glittery, obvious streaks of the past. Modern highlighting is about a soft, sophisticated sheen that enhances your natural features. Here’s how to master that perfect, believable glow for any occasion.
Create a Subtle Daytime Glow
For an everyday look, think "subtle glow," not "bright shine." The goal is to make your skin look healthy and hydrated. A well-placed highlighter brings attention to your best features, like the tops of your cheekbones or the bridge of your nose, without looking like you’re wearing a lot of makeup. Start with a small amount of product and build it up slowly. A sheer, creamy formula is perfect for this, as it melts into the skin for a truly natural finish. Our Golden highlighter gives you that perfect "low-lighter" effect, catching the light just so.
Add Dimension, Not Glitter
The right highlighter adds dimension to your face, not just a layer of glitter. To get a believable glow, apply it sparingly only on the high points where light would naturally hit. This technique creates a soft-focus effect rather than that obvious stripe of shimmer. Cream highlighters are especially wonderful for achieving this look because their texture blends seamlessly with your skin. Our Cream Cheek Glow is designed to give you a dewy, skin-like finish that looks radiant, not sparkly. It’s the perfect way to sculpt your features with light for a sophisticated, polished appearance.
Always Check Your Work in Natural Light
This might be the most important tip of all: always check your makeup in natural light before you head out the door. The artificial lighting in your bathroom can be misleading, making you think you’ve applied less product than you actually have. A quick glance by a window will show you exactly how your highlighter looks to the rest of the world. Remember to dab the product on, not swipe it. This helps you control the amount and prevents over-application. If you're ever unsure about your technique, a virtual beauty consultation can provide personalized tips to help you apply highlighter flawlessly every time.
Related Articles
- The Ultimate Guide to the Golden Highlighter Makeup Look | Nude Envie
- Your Guide to a Subtle Champagne Highlighter – Nude Envie
- 6 Best Subtle Powder Highlighters of 2026 – Nude Envie
- The Guide to Sheer Powder Highlighter Makeup – Nude Envie
- 8 Best Natural Looking Powder Highlighters | Nude Envie
Frequently Asked Questions
Can I wear highlighter without foundation? Absolutely. Wearing highlighter on bare skin is a wonderful way to get a fresh, dewy look. The key is to use a cream or liquid formula that will melt into your skin for a natural finish. Just apply it to the high points of your face after your skincare and SPF for a simple, radiant glow.
My highlighter looks like a glittery stripe. How do I get a more natural glow? This common issue usually comes down to blending and choosing the right formula. For a believable glow, opt for a highlighter with a fine shimmer rather than obvious glitter. Apply it with a light hand, and then use your fingertips or a damp sponge to gently tap and press the product into your skin until there are no harsh edges.
What's the best tool for applying highlighter: a brush, a sponge, or my fingers? Each tool gives a slightly different effect, and the best one often depends on the highlighter's formula. Your fingers are fantastic for cream highlighters, as their warmth helps the product melt seamlessly into the skin. A damp sponge is great for a soft, diffused application, while a small, fluffy brush offers more precision for powder formulas.
Can I still use highlighter if I have textured skin or acne? Yes, you can. The trick is to be strategic with your placement. Since highlighter brings attention to any surface it's on, avoid applying it directly over bumps or textured areas. Instead, place the product on the smoothest nearby planes of your face, like the brow bone or the bridge of your nose, to get a beautiful glow without emphasizing texture.
Should I apply highlighter before or after blush and bronzer? For the most seamless and natural look, highlighter should be one of your last steps. A good rule of thumb is to apply your face products in this order: foundation, concealer, bronzer, blush, and then highlighter. Applying it last allows you to place it precisely on the highest points of your face, creating a beautiful layer of light over your color products.