How to Master the Golden Highlighter Makeup Look

Some makeup trends come and go, but a luminous, golden glow is forever. It’s a timeless look that signifies health, radiance, and effortless sophistication. The universal appeal of a golden highlighter is its incredible versatility; it enhances every skin tone, from the fairest porcelain to the deepest ebony, by adding a touch of believable warmth. It’s the one product that can instantly make you look more rested and put-together. In this guide, we’ll explore how to choose the right formula and shade for you, ensuring you can create a stunning golden highlighter makeup look for any occasion, from a subtle daytime sheen to a dramatic evening effect.
Key Takeaways
- Find Your Perfect Gold: The key to a natural-looking glow is matching the highlighter to your skin tone. Choose soft champagnes for fair skin, true golds for medium tones, and rich, bronzed shades for deeper complexions to ensure the color melts seamlessly into your skin.
- Master Your Application: For a flawless finish, apply highlighter to the high points of your face—like cheekbones and the bridge of your nose—with a light hand. Start with a small amount and build the intensity, making sure to blend the edges so there are no harsh lines.
- Pair It with Complementary Colors: Your highlighter looks best when it works with the rest of your makeup. Harmonize your golden glow with warm-toned blush, bronzer, and neutral lip colors to create a balanced and polished look.
Why Golden Highlighter Works for Everyone
If there’s one makeup product that has a permanent spot in my beauty bag, it’s a golden highlighter. There's something truly magical about the way a touch of gold can instantly warm up the complexion and give you that coveted lit-from-within radiance. Unlike cool-toned silvers or trendy iridescent shades that can sometimes look stark, gold has a natural warmth that complements nearly every skin tone. It mimics the way sunlight naturally kisses the high points of your face, creating a believable, healthy glow that never feels overdone.
Gold is synonymous with luxury and light, and when translated into makeup, it brings that same sophisticated energy to your look. It doesn't just sit on top of your skin as a layer of shimmer; a well-formulated golden highlighter blends seamlessly to become part of your skin, making you look genuinely luminous and well-rested. The real secret to its universal appeal lies in how it works with your skin's own undertones. Instead of fighting against your natural coloring, it harmonizes with it, enhancing what’s already there to create a flawless, sun-kissed finish.
What Are Golden Undertones?
Before we get into application, let's talk about undertones. Think of them as the subtle, underlying color of your skin that doesn't change with a tan. Most of us have a mix of warm (yellow, peachy, golden), cool (pink, red, blue), or neutral undertones. If you're not sure what yours are, there are simple ways to find your skin's undertone. The beauty of a golden highlighter is that it harmonizes beautifully with the warmth that’s naturally present in so many skin tones. It picks up on those golden, peachy notes and amplifies them, making your skin look vibrant and healthy.
The Universal Appeal of a Golden Glow
It’s true—every single skin tone can pull off a golden highlighter. The key is simply finding the right shade of gold for you. Think of it like jewelry; some golds are bright and yellow, while others are soft and champagne-hued. For fair skin, a light champagne or pearly gold adds a delicate, ethereal shimmer without looking too intense. If you have a medium skin tone, you can wear a true, classic gold beautifully. For olive and dark skin tones, richer, warmer golds and bronzed shades create a stunning, radiant effect that truly pops. This versatility is why a golden glow is always in style and so easy to achieve.
How to Choose the Right Golden Highlighter for Your Skin
Finding your perfect golden highlighter is all about matching the shade to your skin’s unique tone. The right hue will melt into your skin, creating a believable, lit-from-within radiance. The wrong one can look stark, ashy, or unnatural. Think of it like finding the perfect pair of jeans—the right fit makes all the difference. We’ll walk through how to pick the most flattering shade of gold so you can achieve that effortless, sun-kissed glow every single time. It’s simpler than you think, and once you know what to look for, you’ll be able to spot your ideal match instantly.
For Fair Skin: Champagne and Light Gold
If you have fair or light skin, your best bet is a soft, delicate gold. Think pale champagnes, pearly tones with a hint of gold shimmer, or light, buttery golds. These shades are subtle enough to enhance your complexion without overwhelming it. A highlighter that’s too yellow or deep can create a noticeable stripe of color instead of a seamless glow. The goal is to find a shade that mimics how your skin would naturally catch the light. A finely milled powder formula will give you a beautiful, buildable sheen that looks both polished and natural, perfect for a subtle daytime look or a more luminous evening effect.
For Medium Skin: True, Rich Gold
Medium skin tones truly shine in a classic, true gold. You have enough warmth in your complexion to carry a richer, more pigmented highlighter. Look for shades that are pure gold—not too icy and not overly bronze. This perfect middle ground will complement your skin’s natural warmth and give you a gorgeous, sun-drenched look. A beautiful golden highlighter can be swept across the high points of your face to add dimension and a healthy radiance. This is the kind of glow that looks like you just returned from a relaxing vacation, effortlessly luminous and warm.
For Olive and Dark Skin: Warm, Bronzed Gold
For those with olive or deep skin tones, this is where you can really play with warm, vibrant golds. Rich, bronzed golds, coppery tones, and even bright yellow-golds look absolutely stunning and create a beautiful contrast. These deeper shades add incredible warmth and dimension without ever looking ashy or chalky, a common issue with lighter, icier highlighters. Don’t be afraid of a little intensity—your skin can handle it! A warm golden shimmer will make your features pop and give your skin a luminous, healthy-looking finish that glows all day long. It’s a powerful way to highlight your natural beauty.
What to Look For in a Formula
Beyond the shade, the formula of your highlighter plays a huge role in the final look. Your skin type is the best guide here. If you have oily or combination skin, a powder highlighter is a fantastic choice because it helps control shine while delivering a buildable glow. For those with dry or mature skin, cream or liquid formulas are ideal. They blend seamlessly into the skin, adding a touch of moisture for a dewy, skin-like finish that won't settle into fine lines. If you’re ever unsure which formula or shade is right for you, a virtual beauty consultation can offer personalized advice to help you find your perfect match.
Our Favorite Golden Highlighters
Now for the fun part: shopping. Finding the right highlighter can feel like a quest, but I’ve tried my fair share and have narrowed down some of the best options out there. Whether you’re ready to invest in a forever favorite or just want to experiment with an affordable find, there’s a perfect golden highlighter waiting for you. I’ve broken down my top picks by category to help you find the one that fits your style and budget.
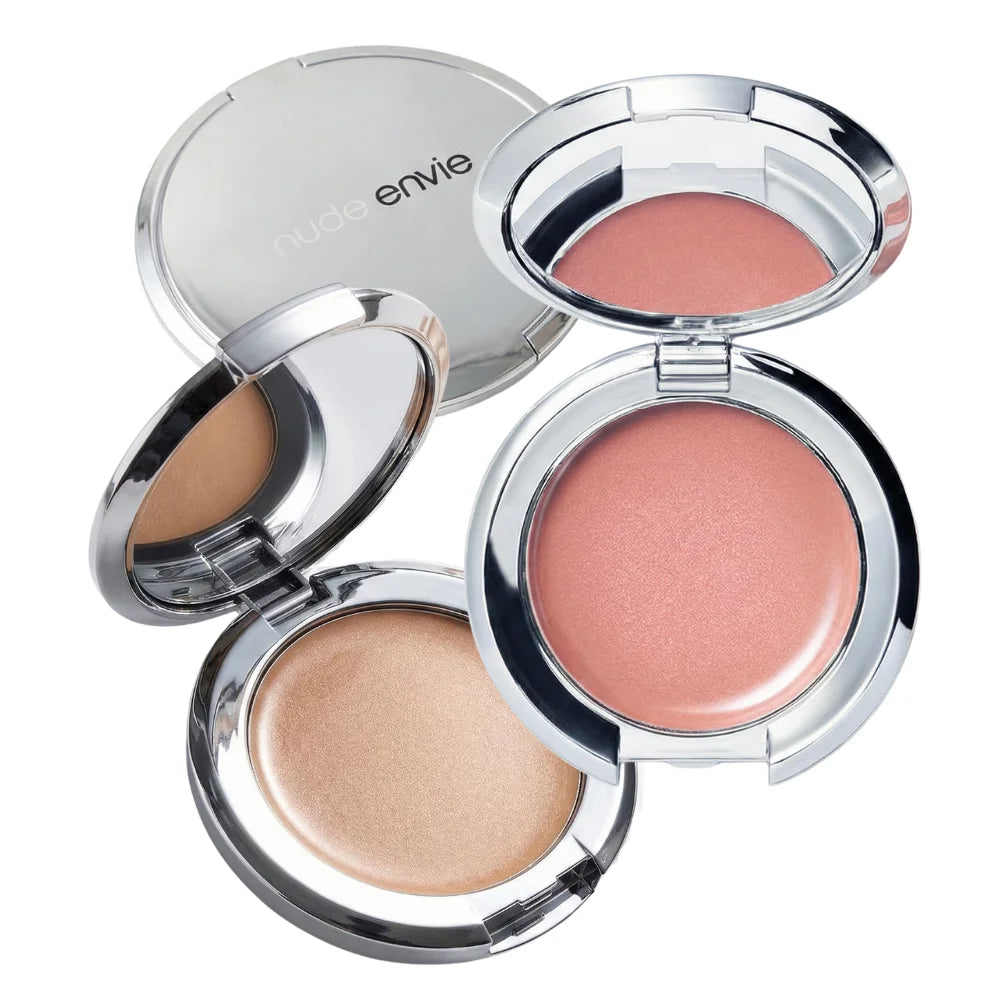
The Nude Envie Collection
It’s no secret that I adore the formulas from Nude Envie, and their highlighters are no exception. The Enlumine Powder Highlighters are my go-to for creating that radiant, lit-from-within look. The powder is so finely milled that it melts into your skin without a trace of chalkiness or glitter. For medium skin tones, shades like Honey or Golden add a beautiful, warm sheen. If you have a deeper complexion, Glow delivers a stunning, rich warmth that looks incredible. These are the highlighters I reach for when I want a clean, luxurious finish that enhances my skin rather than just sitting on top of it.
Other Luxury Options
If you love the ritual of makeup and enjoy exploring different brands, the luxury market has some truly beautiful golden highlighters. Brands like Dior, Hourglass, and Charlotte Tilbury are known for their sophisticated formulas that give skin an ethereal, almost airbrushed finish. When you invest in a high-end highlighter, you're often paying for innovative textures—from silky powders to creamy gels—that blend seamlessly. Exploring these luxury beauty options can be a great way to find unique shades and finishes that feel special every time you use them. They often come in stunning packaging that makes them a beautiful addition to any vanity.
Great Finds on a Budget
You absolutely do not need to spend a lot of money to get a gorgeous glow. The drugstore has some incredible highlighters that perform just as well as their high-end counterparts. Brands like Wet n Wild and ColourPop consistently create buttery, pigmented formulas that have earned a cult following for a reason. These affordable highlighters are perfect if you’re new to highlighting and want to experiment with different shades of gold without a big commitment. They prove that a high-impact glow is accessible at any price point, making it easy to shine on a budget.
How to Apply Golden Highlighter for a Flawless Finish
Getting that perfect golden glow is less about having a dozen tools and more about having the right ones. A beautiful, creamy formula is your starting point. For application, a soft fan brush will give you a light, ethereal dusting of shimmer, while a smaller, tapered brush allows for more precise placement. Don’t underestimate your fingertips, either! The warmth from your skin helps press cream or liquid formulas seamlessly into your foundation for the most natural finish, making them a fantastic tool for blending.
A Simple Step-by-Step Application
Applying highlighter is one of the most satisfying steps in a makeup routine. After your foundation is set, it’s time to add radiance. Using your chosen brush or fingertip, pick up a small amount of product. Gently sweep or tap it onto the high points of your face where light naturally hits. Focus on the tops of your cheekbones, just under the arch of your brows, down the bridge of your nose, and a tiny dab on your Cupid’s bow. The goal is to enhance your features, creating a lifted and luminous effect that looks effortless.
Build Your Glow: From Subtle to Stunning
The beauty of a great highlighter is its versatility—you are in complete control of the intensity. For a subtle, daytime radiance that looks like you’re glowing from within, use a light hand and a single layer. This gives a soft-focus sheen that’s perfect for every day. When you’re ready for a more glamorous evening look, simply apply another layer. Building the product slowly allows you to customize your glow, taking it from a delicate shimmer to a stunning, high-impact finish without ever looking overdone. Start small and add more until you reach your desired luminosity.
Blend for a Seamless, Natural Look
The secret to a highlighter that looks like real, dewy skin is blending. After applying the product, take a moment to soften the edges. Use a clean brush, a damp makeup sponge, or your ring finger to gently tap the highlighter into your skin until there are no harsh lines. A flawless base is also essential; if your foundation isn't well-blended, your highlight can look patchy. For a truly cohesive look, make sure your highlighter works in harmony with your other cheek products, like a complementary blush and bronzer, to tie everything together beautifully.
Where to Apply Highlighter for the Best Effect
Knowing where to apply highlighter is the secret to achieving that coveted lit-from-within radiance instead of a glittery stripe. The goal is to strategically place light on your face to enhance your bone structure and create a healthy, dimensional glow. It’s less about changing your features and more about accentuating the beautiful ones you already have. By focusing on specific areas, you can create a look that’s both polished and effortlessly natural.
Target the High Points of Your Face
Think about where sunlight would naturally hit your face—those are the spots you want to highlight. Applying a golden highlighter to these high points creates a lifting effect and adds a soft-focus luminosity. Start with the tops of your cheekbones, sweeping the product up toward your temples. A touch on the brow bone right under the arch of your eyebrow will make your eyes look brighter and more awake.
For a complete look, add a little down the bridge of your nose, on your Cupid’s bow to define your lips, and a tiny dot on the inner corners of your eyes. These simple placements catch the light beautifully and give your skin a fresh, dewy finish. Our best-selling highlighters are perfect for creating this subtle dimension.
Tailor Placement to Your Face Shape
While the high points are a fantastic guide, the most flattering application is one that’s tailored to you. The most common highlighter mistakes often come down to placement that doesn't suit a person's unique features. For example, if you have a rounder face, applying highlighter in a more vertical C-shape along the cheekbones and temples can create an elongating effect. For a heart-shaped face, highlighting the chin can help balance your proportions.
The key is to experiment and see what makes you feel your best. Remember that a flawless base is crucial; highlighter can look harsh if your foundation isn't well-blended. If you’re unsure where to begin, a virtual beauty consultation can offer personalized tips to help you master your technique.
Common Highlighter Mistakes to Avoid
Even with the most beautiful golden highlighter, the magic is all in the application. We’ve all had those moments where we look in a different light and realize our glow is a little more glitter-bomb than goddess. The good news is that most common highlighter mishaps are easy to fix. A few small adjustments to your technique can make a world of difference, ensuring your glow looks intentional and effortlessly radiant every single time. Let’s walk through some of the most frequent mistakes and how to correct them for a flawless finish.
Using Too Much Product
One of the quickest ways to go from a subtle sheen to a metallic stripe is by applying too much product at once. It’s tempting to load up your brush for a big impact, but this can often lead to a heavy, unnatural look that emphasizes skin texture. The key is to start with a small amount and build the intensity gradually. Gently tap your brush into the powder or use a single dot of liquid highlighter, then blend it out. You can always add another light layer if you want more drama, but it’s much harder to take it away once it’s on.
Choosing the Wrong Shade for Your Undertone
While golden highlighters are incredibly versatile, they still need to harmonize with the rest of your makeup. A beautiful warm gold highlighter can look out of place if you’ve paired it with a cool-toned pink blush. Think of your face makeup as a cohesive palette. Make sure the undertones of your highlighter, blush, and bronzer all complement each other. If you’re wearing a warm, golden shimmer on your cheekbones, stick with peachy, warm, or neutral tones for your cheeks and contour to create a seamless, sun-kissed effect.
Skipping Skin Prep and Blending
Highlighter is designed to catch the light, which means it will also catch on any dry patches or uneven texture. A smooth canvas is essential. If your foundation isn't well-blended or your skin is dehydrated, your highlighter can appear patchy or clumpy. Always start with moisturized, prepped skin. After applying your foundation and concealer, make sure your base is blended seamlessly before you add your glow. This simple step ensures your highlighter melts into your skin for that coveted lit-from-within look rather than just sitting on top of your makeup.
Using the Wrong Tools
The tools you use can completely change how your highlighter applies. A dense, stiff brush will deposit a lot of product in one concentrated area, which can look harsh. For powder formulas, a soft, fluffy fan brush or a small tapered brush offers a much more diffused and delicate application. When you’re working with a cream or liquid highlighter, your fingertips are often your best tool for warming up the product and melting it into the skin. You can also use a damp makeup sponge to gently tap and blend the product for a truly seamless, airbrushed finish.
Create Your Signature Golden Look
A golden highlighter is one of the most versatile products in your makeup bag. It’s not just for one type of look; it’s a tool you can use to create a range of beautiful effects, from a subtle hint of light to a show-stopping glow. The secret isn't about having dozens of different products, but about mastering your application and knowing how to pair your highlighter with other makeup.
Think of your golden highlighter as a finishing touch that can be dialed up or down depending on your mood and the occasion. For a day at the office, a soft sheen can make you look refreshed and awake. For a night out, a more concentrated application can define your features and create a stunning, luminous effect. Below, we’ll walk through how to adapt your technique to create three distinct looks, ensuring your golden glow is perfect for any setting.
The Subtle Daytime Glow
For a natural, everyday look, the goal is a soft radiance that looks like it’s coming from within. This is that "lit-from-within" glow that makes your skin look healthy and fresh. The key here is a light-handed application. Using a soft, fluffy brush, sweep a small amount of highlighter onto the very tops of your cheekbones, the bridge of your nose, and just above your cupid's bow. This placement catches the light in a subtle way without looking like obvious makeup. A sheer, finely-milled powder or a cream highlighter works beautifully for this. Pair it with a soft, neutral blush to complete the fresh-faced effect.
The Dramatic Evening Look
When you’re heading out for the evening, you can build on that daytime glow to create something more defined and impactful. This is where layering comes into play. To really make your features stand out, you’ll want to pair your highlighter with a coordinating blush and bronzer. After applying your bronzer to sculpt and your blush for a pop of color, apply your golden highlighter more intentionally. You can even dampen your brush slightly for a more metallic finish. Focus the product on your cheekbones, brow bones, and the inner corners of your eyes to create a striking, multi-dimensional look that catches the light beautifully in the evening.
The Special Occasion Glam
For weddings, parties, and other big events, you want a glamorous look that feels polished and lasts all day. This is your moment to truly shine. The key to a flawless special occasion look is choosing the perfect shade to complement your skin tone. Fair skin tones look stunning in champagne or light gold, while medium skin tones are warmed by a true, rich gold. Olive and dark skin tones are beautifully enhanced by warm, bronzed golds. For a truly personalized touch, you can build your own collection of complementary shades to ensure your entire look is cohesive and perfectly suited to you.
Complete Your Look: What to Pair With Golden Highlighter
A beautiful golden highlighter is a standout product, but it truly shines when it’s part of a cohesive makeup look. The key is to choose complementary colors for your eyes, lips, and cheeks that harmonize with that warm glow. Think of your highlighter as the finishing touch that ties everything together. When your blush, bronzer, and eyeshadow work in concert with your highlighter, you create a balanced, radiant look that appears effortless and natural. It’s less about matching colors exactly and more about creating a seamless flow of warmth and light across your face. Pairing your golden highlighter with the right shades will ensure your features are beautifully defined, giving you that coveted lit-from-within effect.
The Best Lip and Eye Colors
When you’re wearing a golden highlighter, you have a few great options for your lips and eyes. For a truly luminous, monochromatic look, you can lean into the theme with shimmering gold eyeshadows or a swipe of gloss with golden flecks. If you prefer a more balanced feel, stick to warm, earthy tones. A soft brown or bronze eyeshadow creates a beautiful, subtle definition that lets your glowing skin be the main event. For your lips, a warm nude or peachy lipstick is a perfect match. You could also opt for a clear or nude lip gloss to add shine without competing with your highlighter.
How to Choose a Coordinating Blush and Bronzer
To really make your cheekbones stand out, pairing your highlighter with the right blush and bronzer is essential. The goal is to create a smooth gradient of color on your cheeks. A warm-toned bronzer applied just below the cheekbones will add dimension, while a coordinating blush on the apples of your cheeks will bring a healthy, natural flush. For fair skin, a light pink or peach blush works beautifully. If you have a medium skin tone, try a warm peach or bronze blush. For deeper skin tones, rich shades like berry or deep red will add a stunning warmth that complements a golden highlight perfectly.
Related Articles
- Flawless Glow: 9 Powder Highlighters for Fair Skin | Nude Envie
- Get a Dewy Glow: 6 Best Highlighters for Dry Skin | Nude Envie
- Mastering the Art of Highlighter Application: Tips from a Makeup Artist | Nude Envie
Frequently Asked Questions
I have cool undertones. Can I still wear a golden highlighter? Absolutely. While gold naturally harmonizes with warm undertones, the key is to choose the right shade of gold. If you have cool-toned skin, look for a champagne or pearly gold with a more neutral or beige base rather than a deep yellow-gold. These softer shades will give you a beautiful, luminous glow without clashing with your skin’s natural coolness.
What's the difference between a golden highlighter and a bronzer? Think of it this way: a highlighter’s job is to attract light, while a bronzer’s job is to add warmth and dimension. You apply highlighter to the high points of your face to create a radiant glow. Bronzer, on the other hand, is typically matte or has a subtle satin finish and is applied where the sun would naturally tan your skin, like your forehead, nose, and the hollows of your cheeks, to create a sun-kissed effect.
My highlighter seems to make my skin texture more noticeable. What am I doing wrong? This is a common issue, and it usually comes down to formula and application. Highlighters with large, chunky glitter particles can emphasize pores and fine lines. Instead, look for a product with a finely milled shimmer that melts into the skin. Also, be sure your skin is well-moisturized before applying makeup. Applying a small amount with a soft brush and blending the edges well will give you a seamless glow that appears to come from your skin itself.
Can I wear highlighter on its own without foundation? Yes, and it’s a beautiful way to get a fresh, natural look. On bare, moisturized skin, simply tap a cream or liquid highlighter onto the high points of your face—cheekbones, brow bones, and the bridge of your nose. This technique gives you a subtle, dewy radiance that looks incredibly healthy and is perfect for days when you want a more minimal makeup look.
How can I make my highlighter last all day? To improve the staying power of your glow, it helps to layer your products. After applying a cream or liquid highlighter, you can set it with a light dusting of a similar powder highlighter on top. This locks it in place for hours. Finishing your entire makeup look with a setting spray will also help meld all the layers together and extend the wear of your highlighter for a flawless finish that lasts.