How to Blend Bronzer: A Complete Step-by-Step Guide
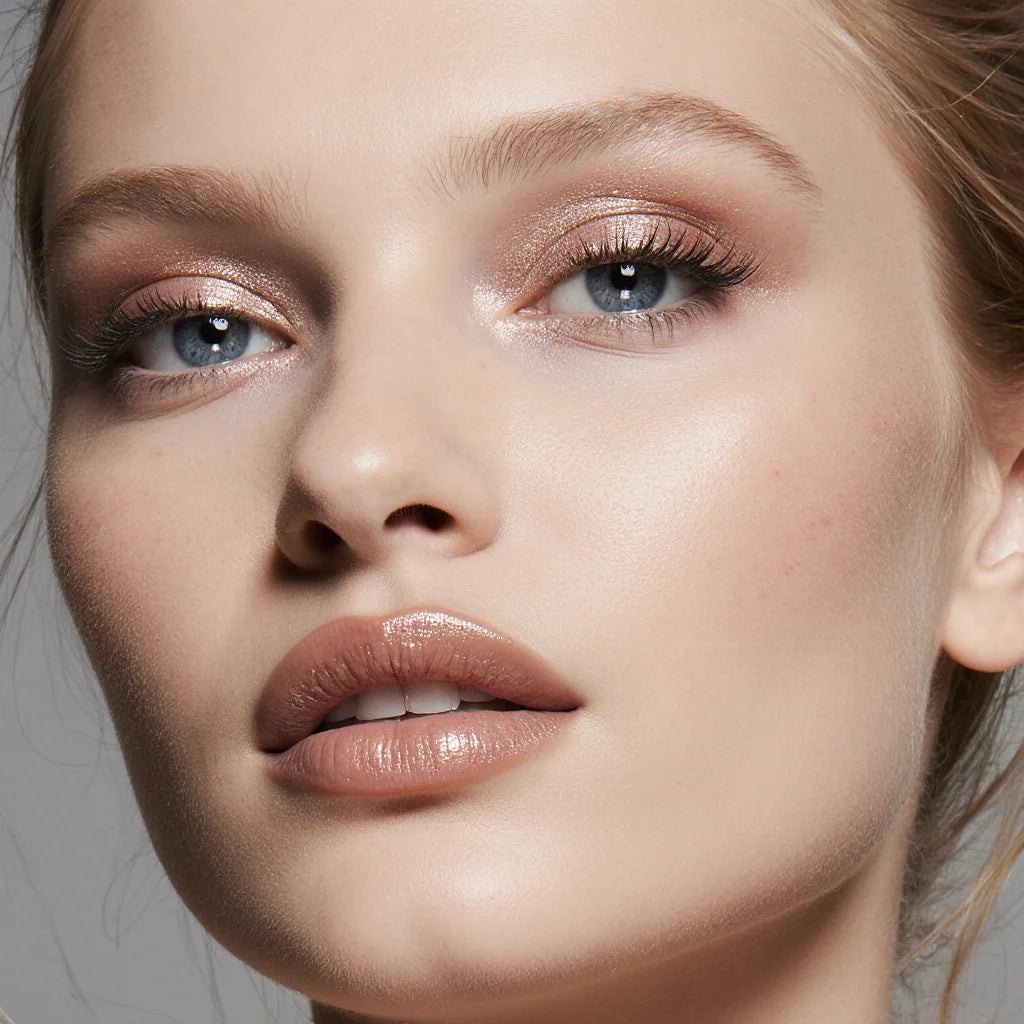
That perfect, sun-kissed glow should look like it comes from a week at the beach, not a makeup compact. Yet, we’ve all had those moments of frustration: the muddy patches, the harsh stripes, the color that just looks… off. The truth is, even the most luxurious, beautifully pigmented bronzer needs the right technique to shine. It’s not just about the product; it’s about the application. Learning how to blend bronzer is the single most important skill for achieving a seamless, natural warmth that enhances your features instead of just sitting on top of your skin. This guide will walk you through the essential steps, from prep to finish, ensuring your glow looks believable every single time.
Key Takeaways
- Choose the Right Formula and Tools: Powder bronzers are great for oily skin, while cream formulas give dry skin a dewy glow. Use a fluffy brush for powders and your fingers or a dense brush for creams to get a seamless blend.
- Perfect Your Placement: For a natural look, apply bronzer using the "3" technique, sweeping it along your hairline, under your cheekbones, and across your jawline. This adds warmth exactly where the sun would tan your skin.
- Build Color Slowly and Blend Well: Always start with a light hand and build your bronzer in sheer layers. This prevents patchiness and makes blending easier, but if you do apply too much, a clean brush can quickly soften any harsh lines.
Powder vs. Cream: Which Bronzer Is for You?
Walking down the makeup aisle can feel a little overwhelming with all the bronzer options out there. The biggest decision you’ll make is choosing between a powder and a cream formula. Each one gives a different effect and works best with certain skin types and application styles. Powder bronzers are classics for a reason, offering a buildable, matte, or shimmery finish. Cream bronzers, on the other hand, are amazing for creating that dewy, skin-like glow. Don’t worry, the choice is simpler than it seems. It all comes down to your skin, the look you’re going for, and a little bit of personal preference.
Choose the right formula for your skin type
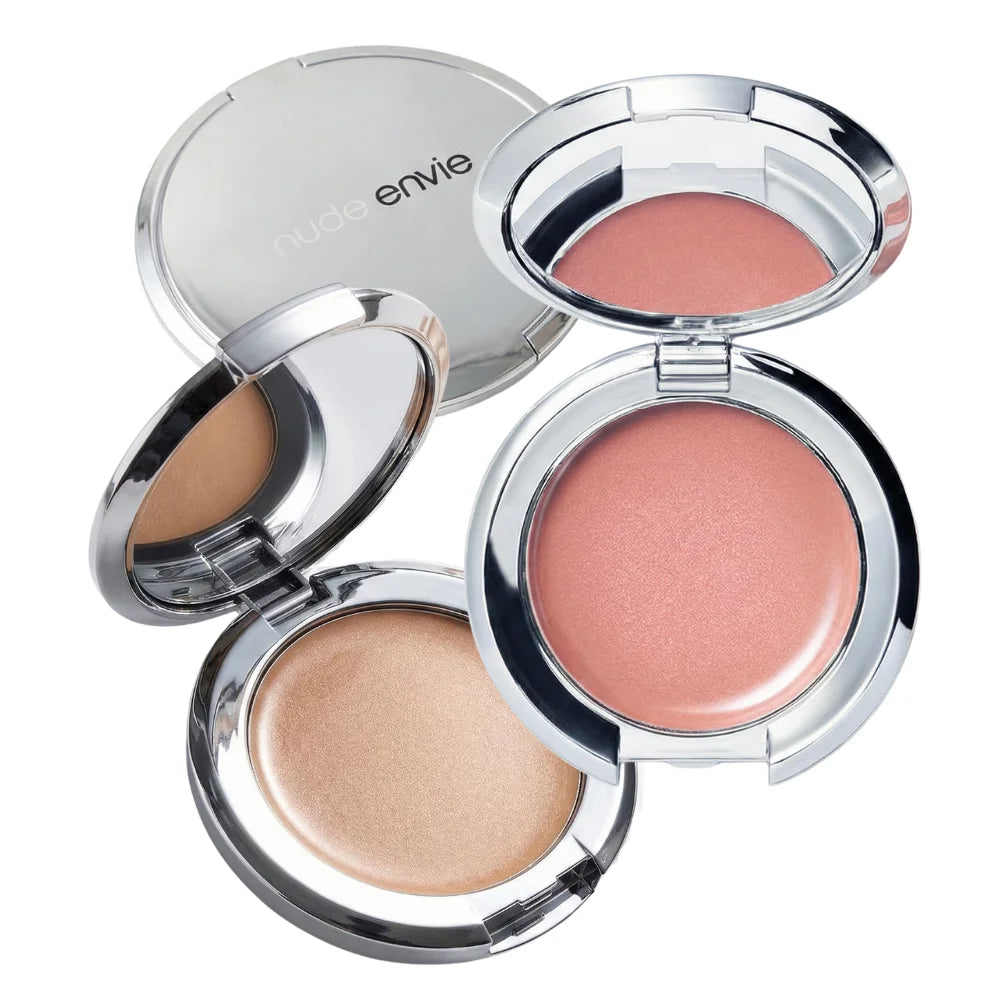
The secret to a flawless bronze is picking a formula that complements your skin. If your skin tends to be oily, a matte powder bronzer is your best friend. It helps absorb excess oil and provides a smooth, velvety finish that won’t slide around during the day. For those with dry skin, a cream formula like our Cream Cheek + Lip is a game-changer. It melts into the skin, adding a dose of hydration and a natural, dewy radiance that won’t settle into fine lines or look cakey. If your skin is somewhere in the middle, you have the freedom to play with both, choosing based on the finish you want that day.
Find the perfect shade for your skin tone
Choosing a bronzer that matches your skin's natural undertone (warm, cool, or neutral) is the key to avoiding a finish that looks unnatural or muddy. A good rule of thumb is to select a color that is one to two shades deeper than your skin tone. For fair skin, think about soft, peachy nudes. For medium skin, true golden tones look beautiful. And for deeper skin tones, rich, warm terracotta or chocolate shades add incredible warmth. If you’re feeling unsure, getting a second opinion can make all the difference. A virtual beauty consultation can help you find your perfect match with confidence.
When to layer powder and cream
For a sun-kissed glow that truly lasts from morning to night, layering is your best technique. This is a go-to trick for makeup artists, especially for special events or long days. Start by applying your cream bronzer to create a dewy, pigmented base. Then, lightly dust a powder bronzer, like our Golden Bronzer, over it. The powder sets the cream, locking in the color and preventing it from fading or smudging. This method not only gives your bronzer serious staying power but also adds beautiful dimension to your look. You can even build your own collection with the perfect cream and powder duo for a customized, long-wearing look.
What Tools Do You Need to Blend Bronzer?
Having the right bronzer is only half the battle; the tools you use to apply it are just as crucial for achieving that flawless, sun-kissed glow. The perfect application comes down to pairing your bronzer formula with the right tool. Whether you prefer a soft powder or a dewy cream, the brush, sponge, or even your fingers can dramatically change the final look. Let’s get into which tools work best for each type of bronzer and how your technique can make all the difference.
The best brushes for powder bronzer
When you’re working with a powder bronzer, your goal is a soft, diffused warmth, not harsh, obvious lines. The key is to use a large, fluffy brush with long, loose bristles. Avoid brushes with short, dense bristles, as they tend to pick up too much product and place it too precisely, making blending a challenge. A fluffier brush distributes the powder more evenly for a seamless, natural finish. Think of it as gently dusting color onto the skin rather than painting it on. This simple switch is one of the easiest ways to get a professional-looking application every time.
The best tools for cream bronzer
Cream bronzers are incredibly versatile, and so are the tools you can use to apply them. For a sheer, natural look that truly melts into your skin, the warmth of your fingertips is your best friend. Gently tap and press the product into your skin. If you want to build more color or coverage, a damp makeup sponge or a dense, stiff brush will work beautifully. A sponge can give you an airbrushed effect, while a brush offers more control for sculpting. Experiment with different tools to see which finish you love most with your favorite cream blush and bronzer.
How your tools change the final look
The way you handle your tools is just as important as the tools themselves. As soon as your brush or sponge touches your face, keep it moving. Use light, circular motions or gentle sweeping motions to blend the bronzer smoothly and prevent any harsh edges from forming. Using a big, fluffy brush helps spread the product softly for that believable, just-back-from-vacation look. If you’re ever unsure about your technique or want personalized tips, a virtual beauty consultation can help you master the perfect application for your face shape and favorite products.
Where Do You Apply Bronzer?
Knowing where to apply bronzer is just as important as knowing how to blend it. The goal is to add warmth where the sun would naturally hit your face, creating a believable, healthy glow. Placing it correctly enhances your features and gives you that effortless, sun-kissed look without any harsh lines. Think of it as adding dimension and life back into your skin after applying foundation. By focusing on specific areas, you can define your bone structure and create a soft, radiant finish that looks completely natural.
Master the "3" technique for a natural look
If you’re new to bronzer, the "3" technique is your best friend. It’s a foolproof way to apply bronzer for a seamless, natural finish. Using a fluffy brush, lightly sweep your Golden Bronzer onto your skin in the shape of the number three. Start at the top of your forehead along your hairline, curve down and under your cheekbone, and then sweep back out and along your jawline. Repeat on the other side of your face. This simple motion hits all the high points where the sun would naturally tan your skin, creating a cohesive and beautifully blended warmth.
Adjust placement for your face shape
While the "3" technique is a fantastic starting point, you can tailor your bronzer application to flatter your unique face shape. The idea is to use warmth and shadow to create balance. For example, if your face is more round, applying bronzer along your temples and hairline can add length. For a heart-shaped face, a touch of bronzer on the forehead and cheeks helps soften your features. If you're unsure about your face shape or want specific guidance, you can always get personalized advice from a beauty expert to find the perfect placement for you.
Where not to apply bronzer
Just as important as where to apply bronzer is where not to. A common mistake is applying it all over your face, which can look muddy instead of sun-kissed. Avoid sweeping bronzer down the center of your nose or in the middle of your forehead, especially if it has shimmer. These areas tend to get oily, and adding shimmer can make you look overly shiny. Instead, let a beautiful cream blush bring color to the apples of your cheeks. Remember, bronzer is for warmth, not for a deep contour, so keep the application light and focused on the perimeter of your face.
How to Blend Bronzer: A Step-by-Step Guide
Once you have your products and tools ready, it’s time for the fun part: application. Getting a smooth, believable glow is all about technique. Whether you prefer powder, cream, or a combination of both, these steps will help you achieve a beautifully blended, sun-kissed finish every time.
Apply and blend powder bronzer
To get that natural, just-back-from-vacation look with a powder bronzer, start by dipping a fluffy brush into the product and tapping off any excess. Begin your application near the top of your ear, then gently sweep the brush along the hollows of your cheeks using soft, circular motions. This technique diffuses the powder beautifully, preventing harsh lines. For added definition, lightly blend the bronzer along your jawline and across your temples. Pairing your bronzer with the right blush on the apples of your cheeks will complete the warm, radiant effect.
Apply and blend cream bronzer
Cream bronzer gives your skin a dewy, seamless finish that looks incredibly natural. You can apply it directly with your fingers or use a dense brush for more control. Warm a small amount of product on the back of your hand, then gently tap it onto the high points of your face where the sun would naturally hit: your temples, the top of your forehead, your cheekbones, and a touch on your chin. The key to a flawless cream application is to blend, blend, blend. Use gentle patting or circular motions to melt the product into your skin until there are no visible edges.
Layer cream and powder for longer wear
For a look that truly lasts from morning to night, layering is your best friend. This makeup artist trick adds dimension and serious staying power. Start by applying your cream bronzer as a base, blending it thoroughly into the skin. Then, take a powder bronzer and lightly dust it over the same areas. The powder sets the cream, preventing it from fading or moving, while also intensifying the color for a more defined look. You can build your own collection with complementary cream and powder shades to master this technique.
Set cream bronzer for all-day perfection
If you’re using a cream bronzer, setting it properly ensures it stays put, especially if you have oily skin or are heading out on a warm day. After blending your bronzer, take a translucent setting powder on a fluffy brush and lightly press it over the areas you applied the cream. Focus on your T-zone (forehead, nose, and chin) to control any excess shine throughout the day. For extra insurance, a light mist of a makeup setting spray will lock everything in place. If you’re unsure which products are right for you, a virtual beauty consultation can provide personalized recommendations.
Common Bronzer Blending Mistakes to Avoid
Even with the best products, a few common slip-ups can stand between you and that perfect sun-kissed glow. The good news is that these mistakes are incredibly common and simple to correct. Let's walk through the main culprits so you can get a flawless, natural-looking warmth every single time. Knowing what to watch for makes all the difference in creating a seamless, radiant finish that looks like it came from a week at the beach, not a makeup bag.
Applying too much product
It’s so easy to go a little overboard, especially with a beautifully pigmented bronzer. The key is to build color gradually rather than applying a lot at once. Before the brush even touches your face, always tap off any excess powder. This simple step is your best defense against patchiness and helps you achieve a soft, even application. Remember, you can always add more, but it’s much harder to take away. Starting with a light hand ensures your Nude Envie bronzer looks like a natural tan, not a streak of color.
Using the wrong brush
The tool you use is just as important as the bronzer itself. Using a brush with short, dense bristles is a common misstep that often leads to harsh, difficult-to-blend lines. Instead, opt for a large, fluffy brush with long, loose bristles. This type of brush picks up less product and diffuses the color softly across your skin for that coveted airbrushed effect. Think of it as gently dusting your skin with warmth rather than painting on color. A quality brush will do most of the blending work for you, making your routine quicker and the results more professional.
Placing bronzer in the wrong spots
Bronzer is meant to mimic where the sun would naturally hit your face, giving you a warm, healthy glow. A frequent mistake is applying it in the hollows of the cheeks like a contour, which can make your face look muddy instead of sun-kissed. Focus your application on the high points of your face: the top of your forehead near the hairline, the tops of your cheekbones, and a light dusting across the bridge of your nose. This placement adds dimension and warmth exactly where you need it, creating a believable, radiant finish that pairs beautifully with a pop of blush.
Forgetting to blend at the hairline and jawline
One of the biggest giveaways of a bronzer mishap is seeing obvious start and stop points. To avoid this, make sure your application is seamless, especially around the edges of your face. Always begin applying bronzer at your hairline and along your jawline, blending inward toward the center of your face. This technique ensures the color fades naturally into your skin and hairline, preventing any harsh lines. A well-blended jawline also helps create a cohesive look that connects your face to your neck, ensuring everything looks uniform and naturally sun-kissed.
How to Fix Bronzer Mistakes
We’ve all had that moment: you take a step back from the mirror and realize the sun-kissed glow you were going for looks more like a muddy streak. Don’t worry, it happens to the best of us. The great news is that you don’t need to wash your face and start your makeup all over again. Most bronzer mistakes are incredibly simple to fix with the right technique and the tools you already have. Whether you’re dealing with harsh lines or a color that’s a little too intense, these quick adjustments will get your look back on track.
Soften harsh lines with a clean brush
If your bronzer is creating a distinct stripe instead of a soft, diffused shadow, the solution is all about blending. Find a clean, fluffy brush or use the sponge or brush you applied your foundation with, just make sure there’s no extra product on it. Gently stipple and buff along the edges of the bronzer where the color looks too strong. This simple motion helps diffuse the pigment and soften the lines, creating a seamless gradient between the bronzer and your skin. The idea is to blur the borders so the color looks like a natural part of your complexion.
Tone down too much color
It’s easy to be a bit heavy-handed, especially with a rich, pigmented bronzer. A great preventative habit is to always tap the excess powder off your brush before it touches your face. If you’re past that point, you can still tone it down. Take a large, clean powder brush and lightly sweep it over the over-bronzed areas to lift and diffuse some of the extra product. For a more powerful fix, you can dip that brush into a small amount of translucent setting powder and gently buff it over the area to sheer out the color and perfect your eye makeup look.
Check your application in natural light
Your bathroom lighting can be deceiving, often casting shadows that hide unblended edges or make colors appear different. Before you decide your makeup is finished, always try to check your work in natural daylight. Step in front of a window to get the most honest assessment of your application; it will instantly reveal any harsh lines or patchy spots that need a little more attention. It also helps to let your makeup sit for about five minutes to settle into your skin. Once you’re happy with the blend, you can pair it with your favorite lipstick to complete the look.
Pro Tips for a Flawless, Sun-Kissed Finish
Once you have the basic techniques down, a few extra steps can make all the difference. These are the little secrets makeup artists use to achieve that truly seamless, lit-from-within glow. Think of them as the finishing touches that ensure your bronzer looks like a natural tan, not just makeup sitting on your skin. By incorporating these simple habits into your routine, you’ll get a professional-looking result every single time.
Warm up cream bronzer before applying
If you’re using a cream bronzer, this tip is a game-changer. Instead of applying it directly from the stick or pot to your face, warm it up first. I like to swirl my finger or a brush in the product and then dab it onto the back of my hand. This uses your body heat to gently melt the formula, making it creamier and much easier to blend. It also gives you more control over how much product you apply, so you can avoid placing a heavy, hard-to-blend patch directly on your cheek.
Build color gradually
Whether you’re using a powder or a cream, the golden rule of bronzer is that it’s always easier to add more than it is to take it away. Start with a very light application, using just a whisper of product. After you’ve blended out that first sheer layer, step back and assess. If you want more depth, you can go in with another light layer. This gradual approach ensures you never accidentally overdo it and helps you achieve the most natural-looking warmth. It’s the key to looking sun-kissed, not streaky.
Pair with the right blush and highlighter
Bronzer, blush, and highlighter are the ultimate power trio for a radiant complexion. Bronzer adds warmth and definition, but pairing it with a complementary blush is what brings your face to life. Apply your blush to the apples of your cheeks to create a healthy, youthful flush. Then, a touch of highlighter on the high points of your face will catch the light beautifully. When all three work together, you get a dimensional, glowing finish that looks completely natural. You can even build your own collection to find the perfect shades that harmonize with your skin tone.
Related Articles
- How to Apply Powder Bronzer Naturally: A 5-Step Guide | Nude Envie
- Where to Apply Bronzer for Your Face Shape – Nude Envie
- 5 Best Bronzers for Fair Skin for a Natural Glow – Nude Envie
- How to Buy the Perfect Natural Finish Bronzing Powder – Nude Envie
Frequently Asked Questions
What's the difference between bronzing and contouring? This is such a great question because they are often confused. Think of it this way: bronzer adds warmth, while contour adds shadow. You should apply bronzer to the high points of your face where the sun would naturally give you a tan, like your forehead and cheekbones. Contour, which is typically a cooler-toned product, goes in the hollows of your face to create definition and sculpt your features.
How can I keep my bronzer from looking orange or muddy? The key to avoiding an unnatural finish is choosing the right shade. Look for a color that is only one or two shades deeper than your natural skin tone. It’s also important to consider your skin's undertone; if your bronzer looks orange, you might need a more neutral or rosy-toned shade. Applying the product with a light hand and building the color slowly also prevents it from looking too heavy or muddy.
Is cream or powder bronzer better for mature or textured skin? For mature or textured skin, I almost always recommend a cream bronzer. Cream formulas are more hydrating and tend to melt into the skin, creating a seamless, dewy finish. They are less likely to settle into fine lines or cling to dry patches, which can sometimes happen with powders. A cream bronzer gives a youthful radiance that looks very natural.
My bronzer always looks patchy or streaky. What can I do? Patchiness usually comes down to two things: your tools and your technique. Make sure you are using a large, fluffy brush, as a dense brush can deposit too much color in one spot. Also, always tap the excess powder off your brush before applying it. Start with a very light layer and build the color up gradually. This gives you more control and helps the product diffuse evenly across your skin.
Do I still need blush if I'm wearing bronzer? Yes, I recommend it. Bronzer and blush serve two different, but equally important, purposes. Bronzer adds warmth and dimension, giving you that sun-kissed look. Blush adds a pop of color to the apples of your cheeks, which brings life and a healthy flush to your complexion. Using both together creates a balanced and radiant look that appears more natural and complete.