5 Essential Eyeshadow Tips for Hooded Mature Eyes

For years, most makeup tutorials have catered to one specific eye shape, leaving those of us with hooded eyes feeling a bit lost. If you’ve ever felt like your eyeshadow looks muddy or makes your eyes seem smaller, it’s likely because you’ve been following rules that weren’t made for you. The secret isn’t to fight your natural eye shape, but to understand it. Once you learn how to place color and create dimension in a way that complements your features, everything changes. We’re breaking down the essential eyeshadow tips for hooded mature eyes to give you the confidence to create a gorgeous, open-eyed look every single time.
Key Takeaways
- Create a New Crease with Your Eyes Open: Look straight into a mirror to apply your defining shadow slightly above your natural crease. This ensures the color remains visible when your eyes are open, creating depth and making your eyes appear larger.
- Make Matte Your Go-To for Contouring: Use matte eyeshadows to sculpt the area above your crease, as they absorb light and help the hooded part of your lid recede. Reserve shimmery shades for the center of your lid or inner corner to add a strategic pop of brightness.
- Blend Up and Out for a Natural Lift: When applying shadow to the outer corner, always blend the color in an upward direction toward the tail of your eyebrow. This simple technique visually lifts the entire eye area for a more awake and refreshed look.
What Are Hooded Eyes and Why Do They Need a Different Technique?
Ever feel like you’ve spent time creating a beautiful eyeshadow look, only for it to disappear the moment you open your eyes? If that sounds familiar, you likely have hooded eyes. This common and beautiful eye shape just requires a slightly different approach to makeup application. It’s not about fighting your features; it’s about learning to work with them. Once you understand the unique canvas of a hooded eye, you can use specific techniques to create definition, brightness, and the illusion of a larger, more lifted eye area. The key is to place and blend your products strategically so your hard work stays visible and flattering.
Defining hooded eyes
So, what exactly are hooded eyes? Simply put, it’s an eye shape where a fold of skin from the brow bone hangs over the mobile eyelid, making the lid look smaller. This can be a genetic trait you’ve had your whole life, or it can develop as you get older. Many iconic beauties have hooded eyes, so you’re in great company! The main challenge is that the "hood" can hide your eyeshadow, eyeliner, and even your lash line. But with the right eye makeup and application, you can make your eyes the star of the show.
How aging can affect the eye area
Our features naturally evolve over time, and the delicate skin around our eyes is often one of the first places we notice changes. As we mature, skin can lose some of its elasticity, which can cause the skin below the brow bone to become heavier and more pronounced. This means that even if you didn't have hooded eyes in your 20s or 30s, you might find that your eye shape has changed. The makeup techniques that worked for you a decade ago might not deliver the same results now. This is a perfect opportunity to adapt your routine and discover new ways to enhance your eyes.
Why your usual eyeshadow methods might not work
If you’ve been following standard eyeshadow tutorials, you’ve probably felt a little frustrated. Most guides tell you to apply a darker shade directly into your natural crease to create depth. For hooded eyes, this is where the problem starts. When your eye is open, that carefully applied color gets hidden by the fold of skin. The secret is to create a new crease slightly above your natural one. It’s also essential to apply your shadow and liner while your eyes are open and looking straight ahead. This allows you to see exactly where the color will land, ensuring your beautiful eyeshadow look remains visible.
Why Eyeshadow Can Be Tricky for Hooded Eyes
If you’ve ever spent time carefully applying eyeshadow only to have it disappear the moment you open your eyes, you know the unique challenges of hooded lids. It’s not about a lack of skill; it’s about working with a specific eye shape that requires a different approach. With hooded eyes, a bit of skin folds down from the brow bone over the eyelid, which can hide your hard work and even make your eyes appear smaller if you use standard application techniques.
This becomes even more apparent as we get older and the skin around our eyes changes. The texture might become less smooth, and the hood can become more prominent. The good news is that a few simple adjustments can make all the difference. Understanding why your usual methods aren't working is the first step toward creating a beautiful, lifted look that lasts. It’s all about strategic placement and choosing the right products to enhance your natural eye shape, not fight against it.
Dealing with limited visible lid space
The main characteristic of hooded eyes is that extra fold of skin that covers most of the mobile lid—the part that moves when you blink. This means any eyeshadow you place on that lid space can get lost when your eyes are open. This can be frustrating, as it often makes the eyes look smaller or more closed off. The key is to shift your focus. Instead of concentrating color on the hidden mobile lid, you’ll learn to create definition above your natural crease, on the skin that remains visible. This technique creates the illusion of more lid space and a more open, awake appearance.
Working with changes in skin texture
As skin matures, it naturally loses some of its elasticity, and the delicate skin on our eyelids is no exception. You might notice more fine lines or a slightly crepey texture, which can affect how eyeshadow applies and wears. Shimmery or glittery formulas can sometimes settle into these lines and unintentionally highlight texture. This is why a powder eyeshadow often flatters mature eyes best, as it’s less likely to migrate across the skin. Our finely milled eye makeup is designed to glide on smoothly, giving you rich color without emphasizing texture, for a soft, seamless finish every time.
How to prevent transfer and creasing
One of the most common complaints with hooded eyes is eyeshadow transfer—when the color on your lid smudges onto the brow bone because the skin touches. Oily lids can also cause shadow to crease and slide off throughout the day. The solution is an essential first step: an eye primer. A good primer creates a smooth, clean base for your eyeshadow to cling to. It helps control oil, prevents creasing, and ensures your look stays vibrant and in place all day. Think of it as the foundation for a flawless, long-lasting eye look that won’t budge. For personalized product recommendations, you can always book a virtual beauty consultation with one of our experts.
Choose the Right Eyeshadow for Hooded Eyes
Choosing the right eyeshadow is just as important as how you apply it, especially when working with hooded or mature eyes. The wrong formula or finish can accidentally draw attention to skin texture or settle into fine lines, undoing all your hard work. The goal is to select products that create a smooth, long-lasting look that opens up the eye area. Think of your eyeshadows as your core tools—the better they are, the easier it is to build a beautiful result.
Before you even pick up a brush, consider the texture, formula, and color of your products. A few thoughtful choices here can make a world of difference in preventing creasing, fading, and transfer throughout the day. We’ll walk through the best finishes for creating dimension, which formulas offer the most staying power, and why prepping your lids is a non-negotiable step for a flawless look that lasts.
Matte vs. shimmer: What works best?
When it comes to hooded eyes, matte eyeshadow is your best friend. Matte finishes absorb light, which helps create the illusion of depth and makes areas appear to recede. This is exactly what you want for the hooded part of your eye. Using a soft, matte shadow to define the area above your natural crease helps to visually push back the hood, making your eyes look more open and defined.
Shimmer, on the other hand, reflects light and brings areas forward. Placing a shimmery shadow all over the hood can emphasize it. That doesn’t mean you have to give up shimmer entirely! Just use it strategically. A pop of a soft, satin, or shimmery shadow on the center of your mobile lid (the part that moves when you blink) or at the inner corner can add a beautiful touch of light without highlighting the hood itself.
Cream vs. powder: When to use each
While cream eyeshadows can offer beautiful color payoff, they often pose a challenge for hooded eyes. Because the skin on the lid folds over, cream formulas are more likely to crease and transfer, especially on mature skin. Powder eyeshadows are generally a more reliable choice. A high-quality, finely milled powder shadow is less likely to migrate across the skin and settle into fine lines, giving you a smoother, more airbrushed finish.
If you love the ease of a cream shadow, look for long-wearing formulas that set completely dry. You can also use a cream shadow as a base color on the mobile lid, then set it with a similar powder shadow to lock it in place. For creating definition above the crease, however, a blendable powder eye makeup is almost always the superior option.
The importance of a good eyeshadow primer
If there’s one step you absolutely shouldn’t skip, it’s applying an eyeshadow primer. For hooded eyes, primer is essential. It creates a smooth, slightly tacky base that grips onto your eyeshadow, preventing it from creasing, fading, or transferring onto the brow bone area throughout the day. It also helps even out any discoloration or redness on the lids, ensuring your eyeshadow color looks true to how it appears in the pan.
Think of it as double-sided tape for your eyeshadow. It locks everything in place, which is critical when there’s extra skin folding over your lid. A good primer ensures your carefully blended look stays exactly where you put it from morning to night.
How neutral shades can brighten your eyes
Color choice is key to creating a lifted, wide-awake look. For hooded and mature eyes, warm, neutral matte eyeshadows are incredibly flattering. Shades like soft taupe, warm bronze, muted peach, and rosy browns add warmth to your skin and brightness to your eyes without being harsh. Dark, cool-toned colors can sometimes make the eyes appear smaller or more deep-set.
Neutral shades are perfect for sculpting the eye and creating a new, higher crease. You can build soft, natural-looking dimension that enhances your eye shape beautifully. These versatile colors are the foundation of a timeless look and are featured in many of our best-selling palettes because they work for everyone, every day.
How to Apply Eyeshadow to Lift and Define Hooded Eyes
Applying eyeshadow to hooded eyes isn't about hiding your natural shape—it's about using strategic placement to create the illusion of more space and lift. The key is to work with your eyes open and create new dimensions where the hooded skin covers your mobile lid. Instead of following the standard rules you might have learned years ago, this technique involves creating a new, higher crease and carefully placing color to draw the eye upward. It’s a simple shift in approach that makes a world of difference.
With the right products and a few key adjustments, you can define your eyes beautifully. The goal is to place shadows where they will remain visible, adding depth and structure that enhances your features. Think of it as creating a custom contour specifically for your eye shape. Using a collection of buildable, blendable shadows, like our versatile eye makeup palettes, gives you the control to build intensity exactly where you need it. Forget about complicated, multi-step routines; these techniques are straightforward and designed to give you a brighter, more lifted look every time.
Place color above your natural crease
One of the most common mistakes people with hooded eyes make is applying a darker eyeshadow directly into their natural crease. The problem? As soon as you open your eyes, that color completely disappears behind the fold of skin. The solution is to create a new, visible crease. Instead of placing the shadow in your natural socket, apply it slightly above the crease, onto the lower part of the brow bone. This technique ensures the contouring shade is visible when your eyes are open, which immediately makes them appear larger and more defined. Use a soft, matte neutral to gently sculpt this new dimension.
Map your eye shape while your eyes are open
To know exactly where to place that new crease color, you have to work with your eyes open. Look straight ahead into a mirror with your facial muscles relaxed. This allows you to see precisely where the skin folds and where your shadow needs to go to make an impact. With your eyes open, take a small brush and gently mark where you want the shadow to sit—just above your natural crease where the hood begins. By mapping out the shape first, you create a guide for your application, ensuring the color won't get lost when you blink or look around. This simple step is the foundation for a lifted, open-eyed look.
Use a press-and-blend motion for the outer corner
When applying a deeper shade to the outer corner, a swirling or windshield-wiper motion can move the delicate skin around and lead to a muddy application. Instead, try a press-and-blend technique. Take a small, dense brush and dip it into your darker eyeshadow, tapping off any excess. Gently press the color onto the outer corner of your eye, making sure to get the pigment underneath any folds. Continue to press or pat the color into place to build intensity exactly where you want it. This method gives you more control and deposits a clean, concentrated layer of pigment that defines the eye without looking heavy.
Create depth with darker shades
To add dimension and further enhance the lifted effect, use a darker shade to create a new "socket" for your eye. With your eye relaxed and open, you can see where the skin hangs. Using a small, precise brush, map out where you want a darker color, like a deep matte brown or soft charcoal, to go. Apply it just above your natural crease, focusing on the area where the hood is most prominent. This technique creates a shadow that recedes that area, giving the illusion of depth and making your lid space appear more prominent. Our Eyeshadow in Muse is perfect for creating this kind of soft, believable depth.
Use Color Placement to Create a Lifted Look
When you have hooded eyes, where you place your eyeshadow is just as important as the colors you choose. The goal is to create an illusion of depth and lift right where you need it most. Instead of following the natural contours of your eye, which can get lost under the hooded skin, you’re essentially creating new ones. This isn't about heavy contouring; it's about using light and shadow to your advantage to make your eyes appear more open, awake, and defined.
Think of it as architectural makeup. By strategically placing darker shades higher than your natural crease and adding light to specific areas, you can visually reshape the eye area. This section will walk you through four simple placement techniques that make a world of difference. From creating a vertical gradient to adding a pop of inner-corner highlight, these steps will help you master a lifted look that feels both natural and beautiful. It’s all about working with your unique eye shape to enhance what you have.
Try a vertical gradient for dimension
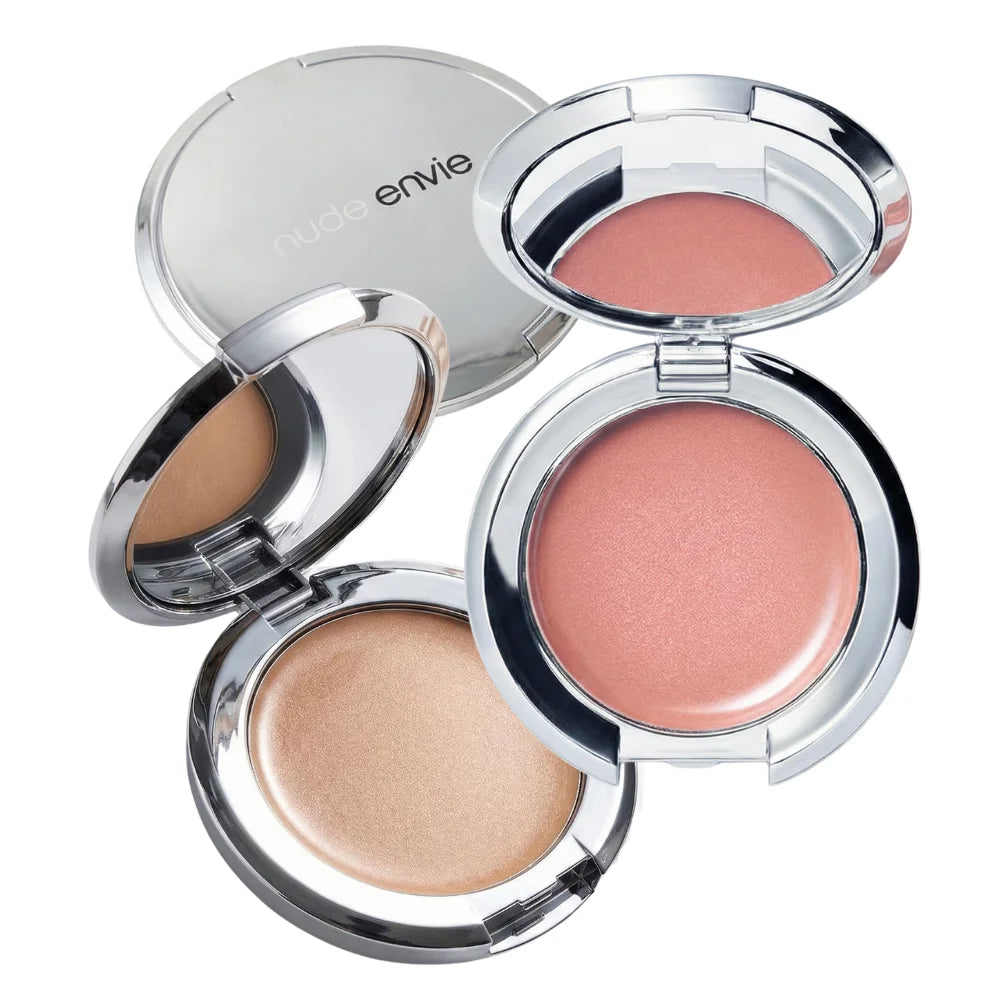
A vertical gradient is a game-changer for hooded eyes. Instead of placing color horizontally along your crease, you’ll work upward to create depth that remains visible when your eyes are open. Start by grabbing a smaller, precise brush. With your eyes open and looking straight ahead, map out where you want a darker matte color to go. Place it slightly above your natural crease, right on the area of the hood you want to recede. Our Nude Envie eye palettes have gorgeous, blendable matte shades perfect for this. This technique pushes back the hooded part of the lid, creating the illusion of a deeper socket and a more defined eye.
Brighten with an inner corner highlight
A little bit of light in the right place can make your eyes look instantly brighter and more awake. This is where an inner corner highlight comes in. After you’ve applied your other shadows, take a shimmery, light-reflecting shade on a small pencil brush or even just your pinky finger. Gently dab a tiny bit of shimmer right in the inner corner of your eye, near the tear duct. This simple touch catches the light and draws attention to your eyes, making them appear larger and more vibrant. It’s a small detail that delivers a big impact, adding a youthful glow to your entire look.
Extend the outer corner upward for a lift
To create a subtle, lifted effect, focus on the direction of your eyeshadow at the outer corner. Whether you’re using a dark shadow as a liner or blending out your crease color, always guide the shape upward toward the tail of your eyebrow. Imagine a clean line extending from your lower lash line and angle it upwards towards your temple. This draws the eye up, counteracting any natural downturn and giving you a visible lift. It’s a classic makeup artist trick that helps define the eye shape while contributing to a more refreshed and youthful appearance.
Apply light matte shades to the mobile lid
Starting your eyeshadow application with a light, natural matte shade is a crucial first step. Sweep a wash of a neutral color, like a soft cream or beige, all over your mobile lid, extending it up toward your brow bone. This does two important things: it creates a smooth, even canvas for the rest of your shadows to blend on, and it helps your visible lid space appear more prominent and bright. Using a matte finish here is key, as shimmer can sometimes emphasize texture. This simple base layer ensures your final look is polished and helps your eye makeup last longer without creasing.
Common Eyeshadow Mistakes to Avoid with Hooded Eyes
Mastering eyeshadow for hooded eyes is often more about what you don't do than what you do. Certain techniques that look amazing in tutorials can fall flat or even make your eyes look smaller if you have a hooded shape. The good news is that once you identify these common missteps, they are incredibly easy to correct. A few simple adjustments to your routine can completely change your makeup game, helping you achieve that bright, lifted look you’re going for. Let's walk through some of the most frequent mistakes and how to fix them for a flawless finish every time.
Placing dark colors in the natural crease
It feels like the most intuitive place to add definition, but for hooded eyes, placing a dark shadow directly in your natural crease can backfire. When your eyes are open, the hooded skin folds over, completely hiding that carefully applied color. As makeup artist Paige Sevier notes, "The problem is, when they open their eyes, the color disappears." To fix this, apply your contour shade slightly above your natural crease, onto the lower part of the brow bone. This creates a new, visible crease that adds depth and dimension, making your eyes appear more open and defined even when you're looking straight ahead.
Applying shadow with your eyes closed
Applying eyeshadow with your eyes closed is a habit many of us have, but it’s a major roadblock for hooded eyes. You can’t see where the skin will fold, so you’re essentially guessing where the color will land when your eyes are open. Instead, do most of your application while looking directly into a mirror with your eyes relaxed and open. This allows you to map out exactly where your shadow needs to go to remain visible. You can place dots of shadow to mark the shape you want to create above your natural crease, then close your eyes to blend it all together.
Using too much shimmer on the hood
Shimmer is beautiful, but it reflects light, which can highlight texture and bring an area forward. When you apply a shimmery shadow all over the hooded part of your lid, it can emphasize the puffiness and make your eyes look smaller. Matte eye makeup is your best friend for contouring the hood, as it absorbs light and creates the illusion of depth. Save your shimmers for specific areas where you want to draw attention, like the center of your mobile lid or the inner corner. A touch of light-catching shimmer there will make your eyes pop without accentuating the hood.
Choosing brushes that are too large
When you have limited visible lid space, precision is everything. Using large, fluffy brushes can deposit color over too wide an area, leading to a muddy, undefined look. Instead, opt for smaller, denser brushes that give you more control over where you place your product. A small, tapered blending brush is perfect for applying color just above your crease, while a flat, dense brush is great for packing color onto the mobile lid. Keep those big, fluffy brushes for an all-over base application or for the final, gentle blending of all your edges.
The Best Brushes and Tools for a Flawless Application
Having the right tools can completely transform your makeup routine, especially when you're working with hooded eyes. If you’ve ever felt frustrated that your eyeshadow disappears the moment you open your eyes, or that your colors look muddy no matter how much you blend, your brushes might be the culprit. Using brushes that are too large or fluffy for your eye shape can deposit color in the wrong places, making your eyes look smaller and undoing all your hard work. This isn’t about needing a huge, expensive collection; it’s about having a few key shapes that give you control and precision.
Think of your brushes as your magic wands—they do most of the heavy lifting for you. A curated set of smaller, more precise brushes will allow you to place color exactly where you want it, creating that beautiful, lifted effect we’re all after. Once you understand which makeup brush shapes work best for hooded eyes, you’ll find the entire process becomes easier, faster, and far more effective. Investing in the right tools will not only improve your application but also give you the confidence to experiment with different looks.
Small, dense brushes for control
When you have limited visible lid space, precision is everything. A small, dense shader brush is your non-negotiable tool for this job. Its compact bristles are designed to pick up the perfect amount of eyeshadow and pack it directly onto your mobile lid with minimal fallout. This gives you complete control over where the color goes, ensuring it stays exactly where you place it and doesn't get lost in the hooded area. Use a gentle patting or pressing motion to build up the intensity. This technique is much more effective than sweeping, which can sheer out the color and cause it to migrate.
Tapered brushes for blending above the crease
To create that lifted illusion, you need to blend your crease color higher than your natural crease, essentially faking a new one. This is where a tapered blending brush becomes your secret weapon. It’s typically fluffy but has a slightly pointed tip, which allows you to diffuse color softly while still maintaining control. This brush shape is perfect for applying a transition shade in the area just above your natural crease. Use light windshield-wiper and small circular motions to create a soft, seamless gradient of color that draws the eye upward, making your eyes appear more open and defined.
How to blend for a seamless finish
The secret to a professional-looking eye is a flawless blend where you can’t tell where one color ends and another begins. Start by applying your lid color with your small, dense brush. Then, take your tapered blending brush and a mid-tone matte shade from your favorite eyeshadow palette to soften the edges. Gently blend where the lid color meets your transition shade, working upward and outward with very light pressure. For a truly seamless finish, keep a separate, clean blending brush on hand. Go over all the edges with this clean brush to diffuse any harsh lines without adding more product. This final step melts the colors together beautifully.
Tips for cleaning up the brow bone area
Defining your brow bone adds the perfect finishing touch to a lifted eye look. This simple step creates contrast and makes your brows pop, which helps frame your eyes. Use a small, precise brush to apply a light matte or satin eyeshadow directly under the arch of your brow. If you prefer a bit of glow, a touch of a subtle cream highlighter can also work beautifully here, but avoid anything with large glitter particles. The most important part is to blend the edge downward into your transition color with a clean brush. This ensures there’s no obvious line, just a bright, clean space that enhances your eye shape.
A Step-by-Step Tutorial for Hooded Eyes
Ready to put these tips into practice? This simple, four-step tutorial will help you create a lifted, defined eye look that beautifully complements your features. The key is strategic placement and blending to create the illusion of more space and depth. Grab your favorite neutral eyeshadow palette, and let’s get started. Remember to work with your eyes open, looking straight into a mirror, for the most important steps. This allows you to see exactly where the color will be visible when your eyes are relaxed.
Step 1: Prep and prime the lids
A smooth canvas is the secret to flawless, long-lasting eyeshadow. Before you apply any color, make sure your eyelids are clean and free of any excess oil. A quick swipe of micellar water on a cotton pad works perfectly. Next, apply a dedicated eyeshadow primer from your lash line all the way up to your brow bone. While it’s tempting to use concealer, a proper primer is formulated to control oil, prevent creasing, and make your eye makeup colors appear more vibrant and true to pan. This step is non-negotiable for mature skin, as it creates a grip for the shadow to adhere to all day.
Step 2: Apply your base color strategically
With your lids prepped and primed, it’s time for your base. Choose a light, matte eyeshadow that’s close to your skin tone. Using a fluffy brush, sweep this color all over your entire eye area—from the lash line right up to your brow bone. This simple action does a few important things: it sets your primer, evens out any discoloration on your lid, and creates a silky-smooth surface that will make blending your other shadows much easier. Think of it as creating the perfect blank canvas for your masterpiece.
Step 3: Build dimension without adding weight
This is where the magic happens for hooded eyes. With your eyes open and looking straight ahead, take a soft, matte eyeshadow that’s a few shades deeper than your base color. Using a smaller, tapered blending brush, apply this shade just above your natural crease, following the curve of your eye socket. Focus the color on the outer portion of your eye, blending it gently inward and slightly upward toward the tail of your brow. This technique creates a new, visible crease that lifts the eye instead of closing it off.
Step 4: Add the final brightening touches
To bring light and focus back to your eyes, add a touch of brightness. Select a light, shimmery eyeshadow or a soft matte cream shade. Using your fingertip for the best color payoff, press this shade onto the center of your mobile lid—the part that’s visible just above your lash line when you look down. Then, take a small pencil brush and pop a tiny bit of that same light shade into the inner corner of your eye. This final step makes your eyes look bigger, brighter, and more awake, completing your beautifully lifted look.
Related Articles
- Simple Makeup for Older Hooded Eyes: 5-Step Guide | Nude Envie
- Simple Eye Makeup for Wrinkled Hooded Eyes: A Guide | Nude Envie
- The Best Eyeshadow for Mature Hooded Eyes Over 60 | Nude Envie
Frequently Asked Questions
Can I still wear eyeliner with hooded eyes? Absolutely! You just need to adjust your technique. Instead of a thick line across your entire lid, try tightlining, which is applying liner to your upper waterline to define your lashes without taking up precious lid space. For a winged look, keep the line very thin along your lash line and create the wing with your eye open, drawing it upward from the outer corner to create a lifting effect.
Are these techniques only for dramatic looks, or can I use them for everyday makeup? These techniques are perfect for everyday makeup. The core principle is about creating a lifted shape, which you can do with very soft, neutral colors. By using a matte shade just a bit deeper than your skin tone to create that higher crease, you add subtle definition that looks completely natural. The goal isn't to look heavily made up, but to make your eyes appear more open and awake.
Is shimmer completely off-limits if I have mature or hooded eyes? Not at all! The key is strategic placement. While it's best to avoid placing a lot of shimmer on the hooded part of your eye, as it can highlight texture, a touch of it can be beautiful. Try dabbing a soft, satin, or shimmery shadow right on the center of your mobile lid or at the inner corner of your eye. This catches the light and adds a brightening effect without emphasizing the hood.
How do I stop my mascara from transferring onto my brow bone? This is a classic hooded eye challenge. The best solution is to switch to a waterproof or a tubing mascara. Tubing formulas wrap around each lash and don't smudge or flake, even when your lashes touch your skin. When you apply your mascara, try tilting your head back and looking down into a mirror. Hold that position for a few seconds to give the mascara a chance to dry before you blink normally.
My eyes are slightly different—one is more hooded than the other. How should I adapt my makeup? This is incredibly common, so don't worry. The best approach is to treat each eye as its own canvas and aim for symmetry. Look straight into the mirror and notice where the hood is heavier on one eye. On that eye, you may need to bring your "new crease" color slightly higher than you do on the other eye to create a more balanced and even appearance. It might take a little practice, but adjusting the placement for each eye will make a huge difference.