How to Prevent Nail Polish Chipping for Flawless Nails

A perfect, chip-free manicure often feels like an exclusive secret held by salon professionals. You leave the nail salon with a seemingly indestructible coat of polish, yet when you try to replicate it at home, the results barely last through the weekend. The good news is that this knowledge isn't out of reach. The key to how to prevent nail polish chipping lies in a methodical process that anyone can master. It’s about creating the perfect canvas and applying each layer with purpose. This guide will walk you through that exact process, breaking down the essential prep work, application tricks, and maintenance habits that give your manicure its strength and staying power, ensuring your at-home results look and feel professionally done.
Key Takeaways
- Prep is Everything: The most critical step for a lasting manicure happens before you apply polish. Always wipe your nails with rubbing alcohol to remove oils and gently buff the surface, creating the perfect canvas for your base coat to grip.
- Think in Thin Layers: Avoid thick, goopy coats that peel easily. The secret to a durable, salon-quality finish is a methodical application: a base coat, two thin coats of color, and a protective top coat, making sure to cap the free edge with each layer.
- Maintenance Makes the Difference: Your work isn't over when the polish dries. Protect your manicure by wearing gloves for household chores and reapply your top coat every two to three days to restore shine and add a fresh shield against chips.
What Causes Nail Polish to Chip?
It’s one of life’s small but mighty frustrations: you spend time giving yourself a perfect manicure, only to see it chip the very next day. What gives? A long-lasting manicure isn’t just about the quality of your polish; it’s also about understanding the common culprits that cause it to lift, peel, and chip away.
The good news is that most of these issues are completely preventable. From the natural state of your nails to your application technique and daily habits, a few small adjustments can make a world of difference. Let’s get into the three main reasons your polish isn’t lasting and what you can do about it.
Your Nail's Natural Oils
Just like your skin and scalp, your nail beds produce natural oils. While these oils are great for keeping your nails hydrated and healthy, they are the number one enemy of a fresh manicure. Oil creates a slick barrier on the nail plate, preventing the base coat and polish from properly adhering. If the polish can’t get a good grip, it’s going to lift and peel off much sooner than you’d like. Before you even think about opening your polish bottle, it’s crucial to remove this oily residue. A quick wipe-down with rubbing alcohol or an acetone-based nail polish remover on a cotton pad is all it takes. This simple step creates a clean, dry canvas, ensuring your polish can bond directly to the nail for maximum staying power.
How You Apply Your Polish
Your application technique plays a huge role in the longevity of your manicure. Rushing the process or applying coats that are too thick is a recipe for chipping. A thick, gloopy coat of polish takes much longer to dry and cure. Even when it feels dry to the touch, the layers underneath can remain soft, making the polish vulnerable to smudges and dents. These thick layers also tend to peel off in larger, more noticeable pieces. For a durable, salon-quality finish, always apply your nail lacquer in multiple thin coats. The magic formula is a quality base coat, followed by two thin coats of color, and sealed with a protective top coat. Allowing each layer to dry for a few minutes in between is key. It might take a little more patience, but this method creates a stronger, more flexible finish that moves with your nail instead of cracking under pressure.
Everyday Wear and Tear
Your hands do a lot for you all day, and everyday activities are a major cause of wear and tear on your manicure. Simple things like typing, opening cans, or searching for keys in your bag can cause tiny impacts that lead to chips. Water is another significant factor. When you soak your hands in warm water while washing dishes or taking a long bath, your nail plates absorb the water and expand. As they dry, they contract back to their original size. This constant expanding and contracting can cause the polish to crack and lift away from the nail. To protect your polish, always wear gloves when doing household chores like washing dishes or cleaning. It’s a simple habit that can easily add days to the life of your manicure, keeping your nails looking flawless for longer.
Prep Your Nails for a Lasting Manicure
A perfect, chip-free manicure has less to do with the application and more to do with the prep work you do beforehand. Think of it like painting a wall; you wouldn't just put paint on without cleaning and priming the surface first. The same principle applies to your nails. Taking a few extra minutes to properly prepare your nails creates the ideal foundation for your polish, ensuring it goes on smoothly and stays put for days. These simple steps are the secret to making your at-home manicure look professionally done and last so much longer.
Clean and Dehydrate the Nail Plate
This is your first and most critical step. Our nails naturally produce oils that, while great for nail health, can prevent polish from properly bonding to the nail surface. Any leftover lotion or cuticle oil will do the same. To create a clean slate, simply take a cotton pad soaked in rubbing alcohol or a good quality nail polish remover and wipe down each nail thoroughly. This quick swipe removes any residue and temporarily dehydrates the nail plate, allowing your base coat and nail lacquer to grip on tightly. Don't skip this; it’s a total game-changer for preventing those annoying chips and peels that happen just a day or two after painting.
Shape, Buff, and Manage Cuticles
With your nails clean, it's time to refine their shape and surface. Start by filing your nails into your desired shape, always filing in one direction to prevent splitting. Next, gently buff the surface of your nails. You aren't trying to thin the nail, just lightly roughing up the surface to remove any shine and smooth out ridges. This gives the polish a better texture to adhere to. Finally, address your cuticles. Instead of cutting them, which can lead to irritation, apply a cuticle remover and gently push them back with a wooden orange stick. This creates a clean, even edge for your polish and prevents it from lifting at the base of your nail.
Why a Clean Canvas Is Essential
Let’s put it all together. Every step in your prep routine is designed to create the perfect clean canvas. Think of any oil, dust, or lingering hand cream as a barrier standing between your nail and your polish. When that barrier exists, your polish isn't truly sticking to your nail; it's just sitting on top of the residue. This is why manicures sometimes peel off in a single sheet. Taking the time to clean, shape, and buff ensures that your base coat can form a strong bond directly with the nail plate. This foundation is what gives your entire manicure its strength and staying power, making your beautiful color collection last.
The Best Products for a Chip-Free Manicure
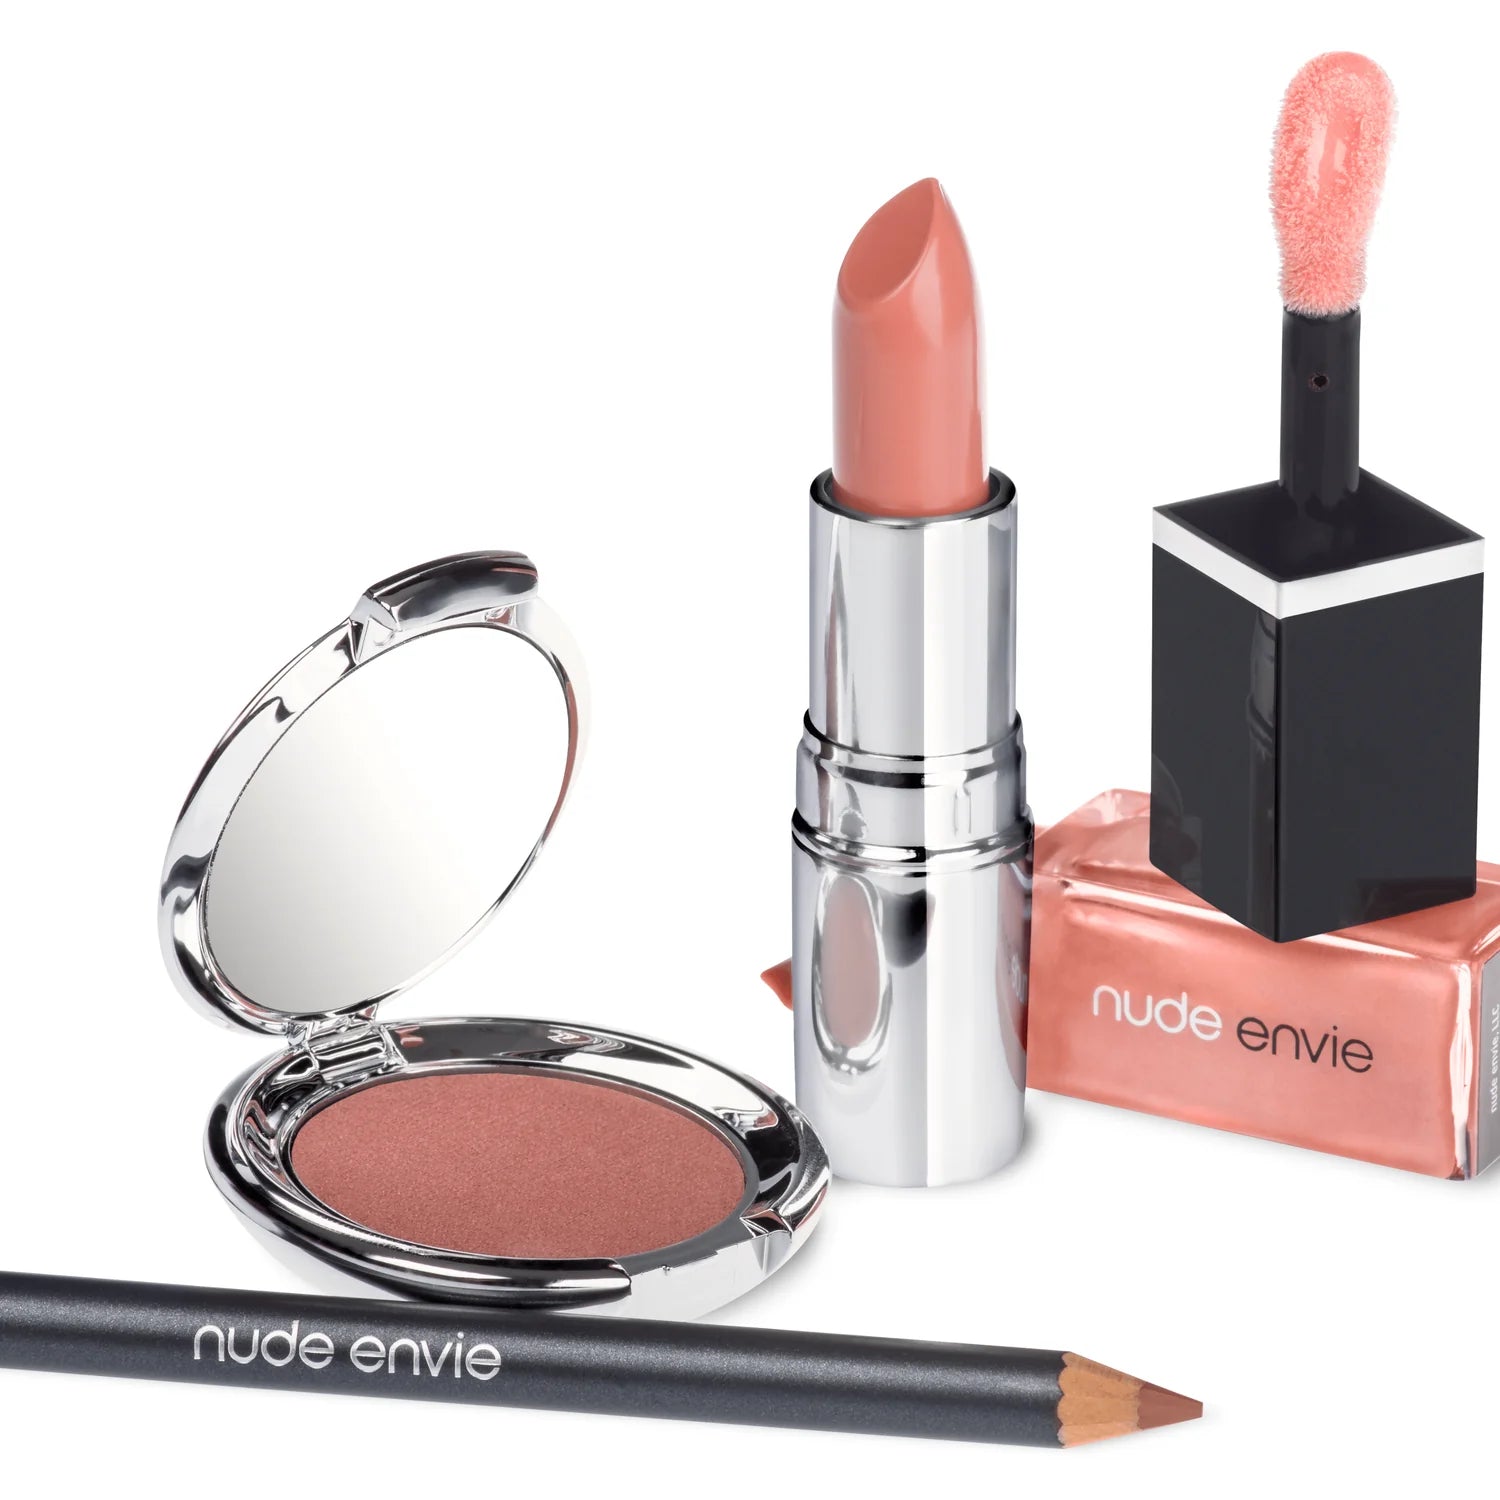
Having the right technique is only half the battle for a lasting manicure; the products you use are your secret weapons. Investing in a few key items will completely change your at-home nail game, turning a manicure that chips in two days into one that looks flawless for a week or more. Think of these products as the foundation of a great manicure. They create the perfect canvas and provide the protection needed to keep your favorite Nude Envie nail lacquer looking freshly applied. With the right support system, you can make any polish color last longer and look more professional.
The Power of a Good Base Coat
If you’re skipping a base coat, you’re setting your manicure up for failure before you even open your color. A good base coat is the single most important product for preventing chips. It works like double-sided tape, creating a sticky surface that grips both your natural nail and the polish you apply on top. This creates a strong bond that is much more resistant to chipping. Beyond making your manicure last, a base coat also acts as a barrier, protecting your natural nails from getting stained by pigmented polishes. It’s a non-negotiable step that takes just a minute but adds days of life to your color.
Why You Need a Protective Top Coat
Think of a top coat as the armor for your manicure. This final layer is crucial for sealing in your nail color, protecting it from scratches, and giving it that enviable, high-gloss shine. Without it, your polish is left exposed to all the bumps and scrapes of daily life. For an extra layer of defense, always remember to “cap the free edge.” This just means swiping a little top coat along the very tip of your nail. This simple trick provides extra protection right where chipping usually starts, effectively sealing the entire nail from top to bottom and locking in your beautiful work.
Nail Strengtheners and Hardeners
If your nails are naturally prone to bending or breaking, a nail strengthener or hardener can be a game-changer. While not a mandatory step for everyone, these treatments are fantastic for building up the resilience of weak nails. Stronger nails provide a more stable base for your polish, meaning they are less likely to flex and cause your manicure to crack and chip. You can often use a strengthener as your base coat or apply it as a treatment between manicures to improve your nail health over time. Many nail enthusiasts find that investing in a quality base and top coat system makes a huge difference, even when using less expensive polishes.
Cuticle Oil and Nail Buffers
Great manicures begin before you even touch the polish. Proper nail prep is essential, and a nail buffer and cuticle oil are your best friends here. Gently buffing the surface of your nails removes any natural oils and shine, creating a slightly textured canvas that helps the polish adhere much better. After buffing, use a good cuticle oil to hydrate the skin around your nails. Healthy, moisturized cuticles not only look better but are also less likely to cause hangnails that can ruin the look of your manicure. This step makes your nails look professionally done and feels like a little moment of self-care.
How to Apply Polish for a Chip-Free Finish
Now that your nails are prepped and ready, it’s time for the main event. The way you apply your polish is just as important as the prep work you put in. A careful, methodical application is your best defense against chips, smudges, and peeling. Getting this part right ensures your manicure not only looks professional but also has the staying power to last through your busy week. Let's walk through the four key steps to achieve a flawless, salon-quality finish right at home.
Step 1: Start With a Base Coat
Think of a base coat as the essential primer for your manicure. It’s a step you absolutely shouldn't skip. A good base coat does two critical jobs: it protects your natural nail from getting stained by the pigments in your polish, and it creates a slightly tacky surface for the color to grip onto. This simple layer helps your manicure adhere better and last significantly longer. It creates the perfect foundation for the beautiful color you’re about to apply, ensuring a smoother, more even result from the very start.
Step 2: Apply Two Thin Coats of Color
When it comes to applying your polish, patience is key. The secret to a durable, even finish is applying two thin coats rather than one thick one. A thick, goopy layer takes much longer to dry and is far more likely to smudge or peel off in a single sheet. Instead, apply a thin, even layer of your favorite nail lacquer, let it dry for at least two minutes, and then follow with a second thin coat. This method ensures the polish cures completely, giving you rich, vibrant color and a much stronger, chip-resistant finish.
Step 3: Cap the Free Edge
This is the professional trick that makes all the difference in your manicure's longevity. Capping the free edge simply means you swipe your polish brush horizontally across the very tip of your nail. You should do this with your base coat, each color coat, and your top coat. This technique seals the most vulnerable part of your nail, which is where chipping often begins. It creates a protective bumper that helps your manicure withstand daily typing and other activities. It might feel a little awkward at first, but it’s a game-changer for preventing premature tip wear.
Step 4: Seal With a Top Coat
Finally, never finish a manicure without sealing it with a top coat. This is your manicure’s armor. A quality top coat locks in your color, protects it from nicks and scratches, and adds a gorgeous, high-gloss shine that makes your nails look professionally done. Just like with your other layers, remember to cap the free edge with your top coat for that extra seal of protection. This final step locks everything in place and provides a durable shield against everyday wear and tear, keeping your nails looking flawless for days to come.
Common Mistakes That Cause Chipping
You’ve prepped your nails and have the perfect polish, but your manicure still chips within a day or two. What gives? Often, the culprit isn’t the polish itself, but a few common application mistakes. It’s easy to get impatient during a manicure, but taking the time to avoid these simple errors will make a world of difference in how long your color lasts. By correcting these small habits, you can ensure your beautiful manicure stays flawless for days, not hours. Let’s walk through the most frequent missteps and how to fix them for a truly chip-free finish.
Skipping Your Base or Top Coat
If you’re doing only one thing to extend your manicure, make it this: never skip your base and top coats. A base coat acts like double-sided tape, creating a surface that grips both your nail and the polish. It also protects your natural nails from staining, which is especially important with darker shades. A top coat is your manicure’s protective shield. It seals in the color, adds a beautiful shine, and provides a durable barrier against the bumps and scrapes of daily life. Using both is essential for a professional-looking, long-lasting result with any nail lacquer.
Applying Thick, Gloopy Coats
We’ve all been tempted to lay on a thick coat of polish to get opaque color in one go, but this is a fast track to chipping. Thick, heavy layers take much longer to dry and cure properly. As they slowly shrink, they become weak and prone to peeling off in sheets. The secret to a strong, durable finish is to apply two to three thin, even coats of color. This method allows each layer to bond to the one beneath it, creating a more flexible and resilient manicure that can withstand daily wear and tear without chipping.
Not Letting Each Layer Fully Dry
Patience is a virtue, especially when it comes to painting your nails. Applying a new layer of polish before the previous one is dry traps solvents and creates a gummy mess that will never fully harden. This leads to smudges, dents, and, you guessed it, chips. Give each coat at least two to three minutes to set before applying the next one. You’ll know a layer is ready when it’s no longer tacky to the touch. If you're struggling to get your timing right, a virtual beauty consultation can offer personalized tips to perfect your at-home manicure technique.
Forgetting to Seal the Free Edge
Sealing the free edge of your nail is a non-negotiable step that professional manicurists swear by. This technique, also known as "capping the tip," involves running your polish brush horizontally across the very tip of your nail. This simple motion creates a seal that wraps the polish from the front of your nail over the edge, preventing water from seeping underneath and causing the polish to lift. You should do this with every single layer, including your base coat, color coats, and top coat, to lock in your manicure and prevent frustrating tip wear.
Does the Nail Polish Formula Really Matter?
The short answer is yes, the formula of your nail polish absolutely matters. While your application technique is a huge piece of the puzzle, the product you choose lays the foundation for your entire manicure. Different formulas are created with different goals in mind, whether it's drying in a flash or lasting through a busy week. A high-quality polish not only provides better color and shine but also has ingredients that help it adhere to the nail and resist chipping.
Think of it like painting a wall in your house. You can have the best technique in the world, but if you start with a low-quality, watery paint, you’re going to have a frustrating time getting a smooth, durable finish. The same principle applies to your nails. Choosing the right type of polish for your needs and lifestyle is the first step toward a flawless, long-lasting manicure. Let’s break down the most common types of formulas and what they mean for your nails.
The Pros and Cons of Quick-Dry Polish
We’ve all been there: you need a perfect manicure but only have a few minutes to spare. Quick-dry polish seems like the perfect solution, and its main advantage is obvious, it saves you precious time. However, this speed can come with a downside. These formulas often contain ingredients that cause them to evaporate rapidly, which can sometimes make the polish more brittle and prone to shrinkage as it dries. To get the most out of a quick-dry polish, application is everything. Always apply two to three thin, even coats. A thick layer will struggle to dry properly and becomes much more likely to peel away.
Understanding Long-Wear Lacquers
Long-wear lacquers are designed for durability. These polishes are formulated to be more flexible and resilient, creating a stronger bond with the nail to withstand daily wear and tear. The real secret to their success, however, often lies in the system. A true long-wear manicure depends on a quality base coat and a protective top coat working in harmony with the color. Many people find that investing in a good base and top coat makes a significant difference in longevity, even with different color polishes. When you use products designed to work together, you create a powerful trio that seals in color and protects against chips for days.
The Benefit of Clean, Quality Formulations
Choosing a clean, high-quality nail lacquer is an investment in both the beauty of your manicure and the health of your nails. Clean formulas skip harsh chemicals that can leave your nails feeling dry and brittle over time. Healthier nails provide a smoother, stronger canvas for polish to adhere to, which naturally helps prevent chipping. It all starts with a properly prepped nail, using a good remover to create a clean slate for your base coat. From there, a quality polish formula provides richer pigment and a more durable finish that lasts. It’s a simple choice that makes a world of difference.
How to Extend the Life of Your Manicure
You’ve spent time creating a flawless, beautiful manicure, and the last thing you want is to see it chip the next day. The good news is that a little maintenance can make a world of difference. Extending the life of your manicure is less about avoiding life and more about incorporating a few simple habits into your routine. These small adjustments protect your polish from the daily wear and tear that leads to chips, cracks, and dullness. By giving your nails a bit of extra care, you can keep your color looking vibrant and freshly applied for much longer, ensuring your hands always look polished and put-together. Think of it as the final, crucial step to a perfect manicure that lasts.
Reapply Your Top Coat Every Few Days
One of the easiest ways to preserve your manicure is to add a fresh layer of top coat every two to three days. This simple step acts as a protective shield, reinforcing your polish against bumps and scratches from daily activities. It also helps restore that glossy, just-painted shine that can fade over time. A quick-dry formula makes this a fast and effortless part of your routine. By reapplying a top coat, you’re essentially giving your nail lacquer a refresh, sealing the color and preventing minor wear from turning into a major chip. It’s a small investment of time that offers a huge return in longevity.
Wear Gloves for Household Chores
Your manicure’s biggest enemies are often hot water and harsh cleaning chemicals. When you’re washing dishes, scrubbing countertops, or doing any household chore that involves getting your hands wet or using cleaners, always wear rubber gloves. Water causes the nail bed to expand and contract, which can make your polish lift and peel away. Similarly, the chemicals in cleaning products can break down the polish, leading to dullness and chipping. Protecting your hands with gloves is a non-negotiable step if you want your manicure to last. This simple habit can be the difference between a manicure that lasts two days and one that stays flawless for over a week.
Avoid Soaking Your Nails After Polishing
While a long, hot bath can be relaxing, it’s not the best friend to a fresh manicure. Prolonged soaking in hot water can cause your nail plate to absorb water and expand. As your nail dries and shrinks back to its normal size, the polish on top can crack and chip because it doesn't have the same flexibility. This doesn't mean you have to avoid washing your hands, but be mindful of activities like swimming or spending extended time in a hot tub right after painting your nails. Keeping your nails relatively dry, especially in the first 24 hours, gives the polish time to fully cure and adhere properly.
Keep Your Nails and Cuticles Hydrated
Healthy, hydrated nails are more flexible and less likely to break or chip. Once your polish is completely dry, make it a daily habit to apply cuticle oil. Massaging oil into your cuticles and the surrounding skin keeps them soft and moisturized, which prevents hangnails and promotes healthy nail growth. Hydrated nails are less brittle, meaning they can bend slightly upon impact instead of having the polish flake off. If you’re unsure which products are best for your nail health, a virtual beauty consultation can provide personalized advice to keep your nails looking their best. This finishing touch not only extends your manicure but also frames it with healthy, beautiful skin.
Find Your Signature Nude Lacquer
A perfect nude manicure is the ultimate accessory. It’s timeless, sophisticated, and goes with absolutely everything. But finding your signature shade is more than just grabbing the first beige bottle you see. The right nude polish can make your fingers appear longer and more graceful, creating a truly polished look that feels like an extension of you. The key is to find a color that complements your unique skin tone, whether it has warm, cool, or neutral undertones. Think of it as finding your perfect foundation, but for your nails.
Once you’ve found your shade, the quality of the formula itself plays a huge role in how long your manicure will last. A high-quality nail lacquer is formulated for a smoother application and a more durable finish, which is exactly what you need to keep chips at bay. Investing in a good polish means you’re not just paying for a color; you’re paying for performance. Cheaper formulas can be thicker and more prone to peeling, undermining all the careful prep work you put in. For a flawless look, especially with lighter shades where imperfections can be more obvious, a long-lasting nail polish is a must.
While the formula is foundational, your application technique seals the deal. Even the best polish needs a little help to perform its best. Always start with a base coat to create a smooth, even canvas for your color to adhere to. This is especially important for nude shades. After applying two thin coats of your chosen lacquer, finish with a protective top coat. For extra credit and to keep that just-manicured shine, reapply your top coat every two to three days. This simple step adds an extra layer of defense against daily wear and tear, keeping your signature nude looking flawless for longer.
Related Articles
Frequently Asked Questions
My polish always seems to peel off in one big sheet. What am I doing wrong? This is a classic sign that your polish never properly bonded with your nail. The two most common reasons are leftover oil on your nail plate or applying your polish too thickly. Before you start, always wipe each nail with rubbing alcohol to remove any natural oils or lotion residue. Then, be sure to apply your color in two thin, even coats instead of one thick one. This allows the polish to cure properly and create a much stronger, more durable finish.
Is it really necessary to use both a base coat and a top coat? Yes, absolutely. They perform two completely different, yet equally important, jobs. A base coat acts like a primer, creating a sticky surface that helps the polish adhere to your nail and prevents staining. A top coat is the armor; it seals in your color, protects it from scratches, and provides that glossy shine. Skipping either one is like building a house without a foundation or a roof, you're just not going to get a lasting result.
How long do I actually need to wait between applying each coat of polish? Patience is your best friend here. You should wait at least two to three minutes between each layer, from base coat to color to top coat. This gives the solvents in the polish enough time to evaporate, allowing each layer to set and form a solid foundation for the next. Rushing this step traps the solvents, resulting in a gummy manicure that will never fully harden and is much more likely to smudge or chip.
My nails are naturally weak and bendy. Is there any hope for a long-lasting manicure? There is definitely hope. When your nails are flexible, they can cause rigid polish to crack and chip more easily. The key is to give your nails some extra support. Using a nail strengthener or hardener as your base coat can make a huge difference. These products help fortify your natural nail, creating a more stable and less flexible surface for the polish to sit on, which significantly improves its staying power.
What's the one habit I can change that will make the biggest difference in how long my manicure lasts? If you change just one thing, start wearing gloves when you wash dishes or clean around the house. Soaking your hands in hot, soapy water is the fastest way to ruin a manicure. Water causes your nail plate to expand, and as it dries and shrinks back, it can cause the polish to crack and lift. Protecting your nails from water and cleaning chemicals is the single most effective thing you can do to keep your manicure looking flawless for a week or more.